
If you have been programming mobile apps for a while, you must have used a web based API - JSON based or otherwise - and you have had to deal with bugs related to your requests and responses to a web service. You have likely asked yourself why some parsing code is not working as expected, or why a request seems to have an invalid format. Intercepting your own network calls with a proxy can help you find the answer to these questions.
You have probably heard about Charles Proxy, a wonderful tool that lets you inspect the network calls of your app to other web services. It also lets you inspect the traffic of other apps. It’s an amazing and very easy to use tool that lets you intercept traffic and reverse engineer network calls, both to see how some app works, or to help you debug your own code.
But Charles is not the only solution to this problem. It’s the most popular one due to its ease of use, but you may not be interested in buying a license. So in this article, we will explore another tool that lets you intercept network calls. mitmproxy is a free and open source command line utility that lets you intercept network traffic that both leaves and enters your device. It has some advanced features like scripting, and in the long run, I find it is the more powerful tool.
Installation
If you use Homebrew, simply open a Terminal window and type:
brew install mitmproxy
Followed by the Enter key.
Quick Introduction
mitmproxy is a proxy tool. Its features are spread across three different command line utilities:
mitmproxy: Interactive man-in-the-middle proxy for HTTP and HTTPS with a console interface.mitmdump: Command line version ofmitmproxy. Think tcpdump for HTTP.mitmweb: Web-based interface formitmproxy.
This tool can do a lot. It can intercept network calls for traffic impression, it can replay previous requests, interception SSL certificates are generated on the fly, and more. There’s a page on all the features here.
A Quick Explanation of the Tools
Before we start using it, let’s talk a few minutes about the three command line tools that make up mitmproxy. This will help you understand when you can use which and the different features they have.
mitmproxy
This tool allows interactive examination and modification of HTTP(S) traffic. All the flows are kept in memory, so this tool was built for taking and manipulating small samples. If you need to do more intense work, use mitmdump instead.
mitmdump
This is a command-line compation to mitmproxy. It behaves very similar to tcpdump, and as such you can view, record, and programatically transform (scripting!) HTTP traffic.
mitmweb
If you don’t fancy a command line interface, you can use mitmweb, which provides a web-based interface to mitmproxy which allows you to examine and modify HTTP traffic. It has the same limitations as the mitmproxy tool, so use this if you want to work with small samples of requests as all the flows are stored in memory.
Setup for iOS Simulators and Physical Devices
If you only care about intercepting raw HTTP traffic (not HTTPS), you are set. However in this modern age, the vast, vast majority of APIs and websites are using HTTPS. In fact I have not found a single raw HTTP API in at least 5 years. So if you want to intercept traffic of SSL-apps, you need to do one more step.
We now need to install the Certificate in both the simulator and physical device. If we don’t, we won’t be able to see traffic to HTTPS websites.
mitmproxy cannot do anything for network calls that make use of SSL pinning. If you want to reverse engineer an app that is not yours and is using SSL pinning, mitmproxy will not help you. You will still need to jailbreak your phone to find ways to undo the pinning.
iOS Simulator
Dealing with the iOS Simulator is a little bit more complicated than preparing physical devices, because simulators have no way to configure their own proxy settings. They use the macOS native proxy settings instead. Essentially, we have to configure our entire computer to use the proxy. If you are scared and are a Charles user, this is exactly how Charles works by default. This implies that all the network traffic in our Mac will appear in mitmproxy. The good news is that we have ways to easily filter out what we don’t need.
On your Mac, open System Preferences, then go to Network > Advanced > Proxies.
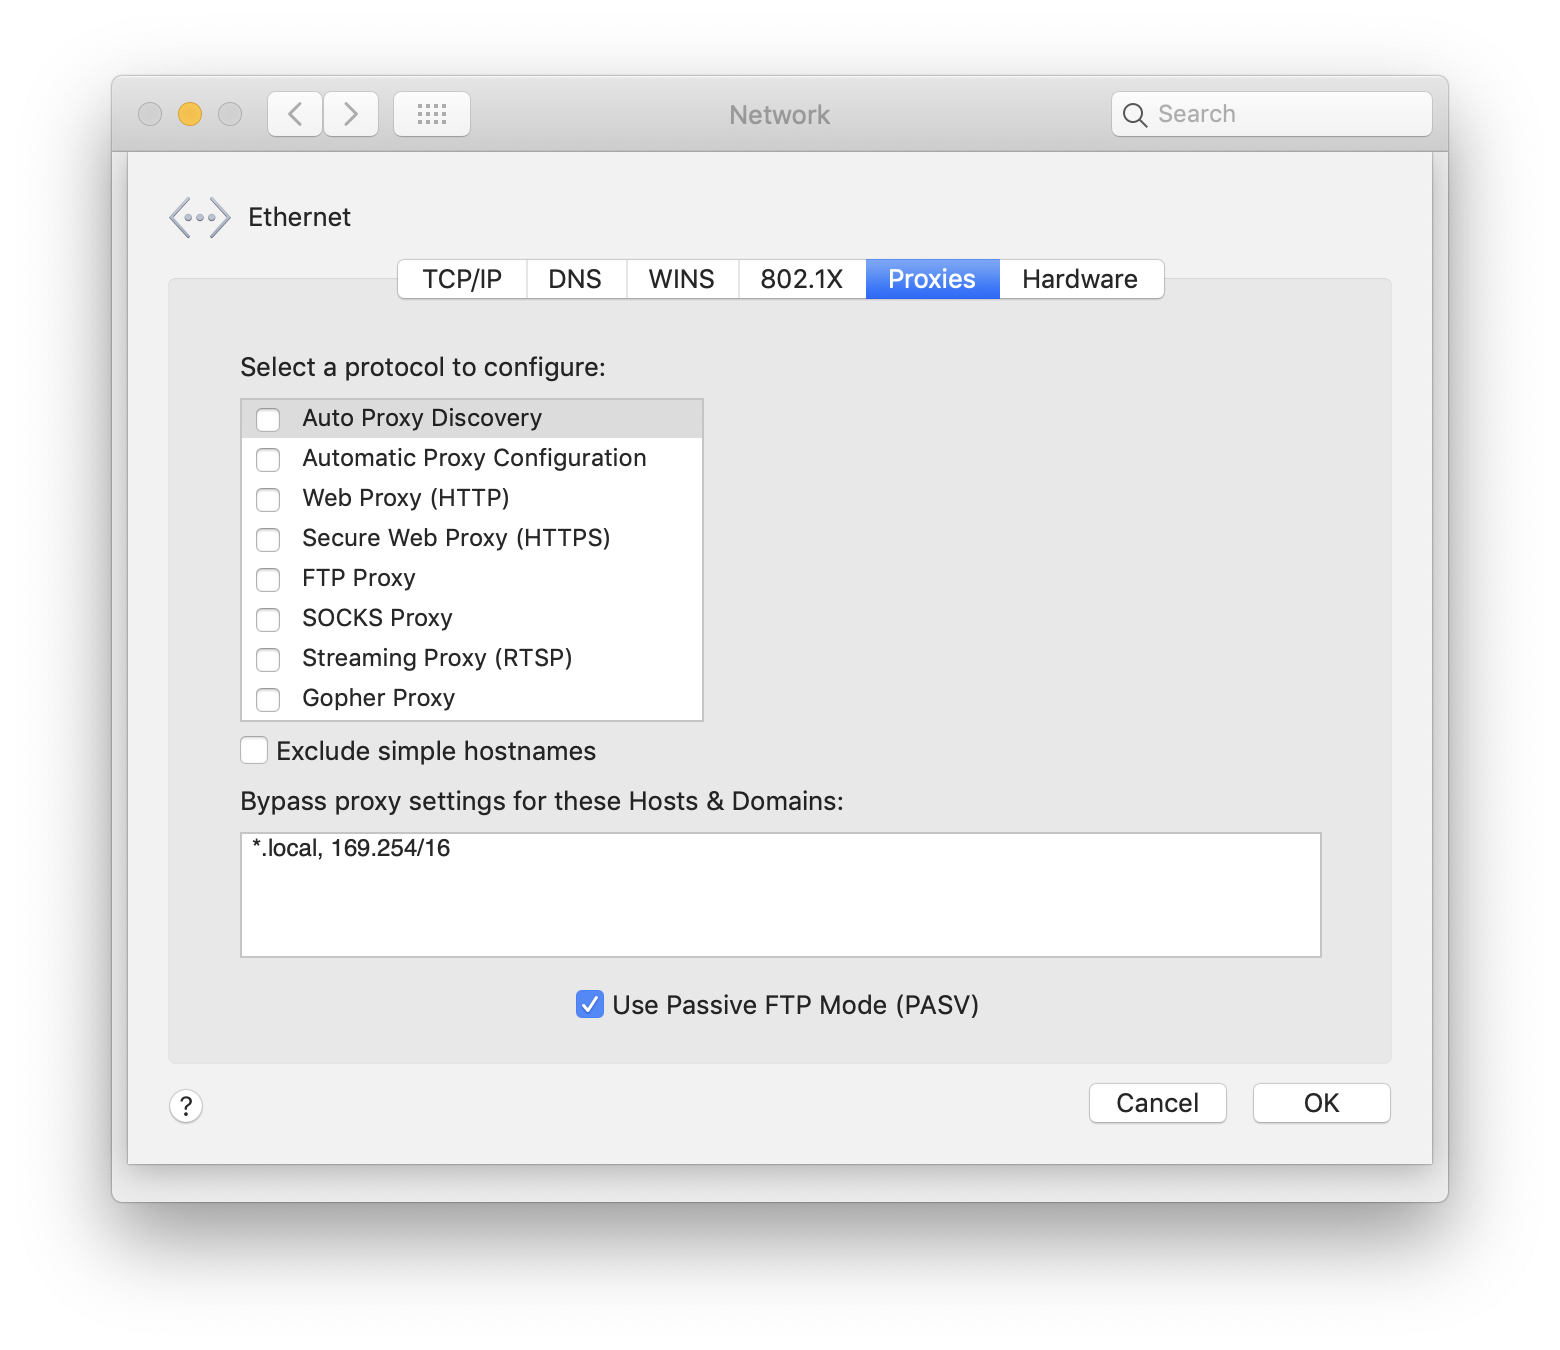
On this screen, enable both the Web Proxy (HTTP) and Secure Web Proxy (HTTPS) options. You will need to write mitmproxy’s IP address in both. By default, mitmproxy runs on address 0.0.0.0 and port 8080. Once you hit OK and then Apply to save the chances, all the traffic should start going through mitmproxy.
Now, visit mitm.it. This page allows you to download the certificates and it only works if you set the proxy properly. If you see anything other than the screenshot below, check the proxy settings. You may need to change the IP Address and/or port depending on your settings and other tools you have on your Mac:
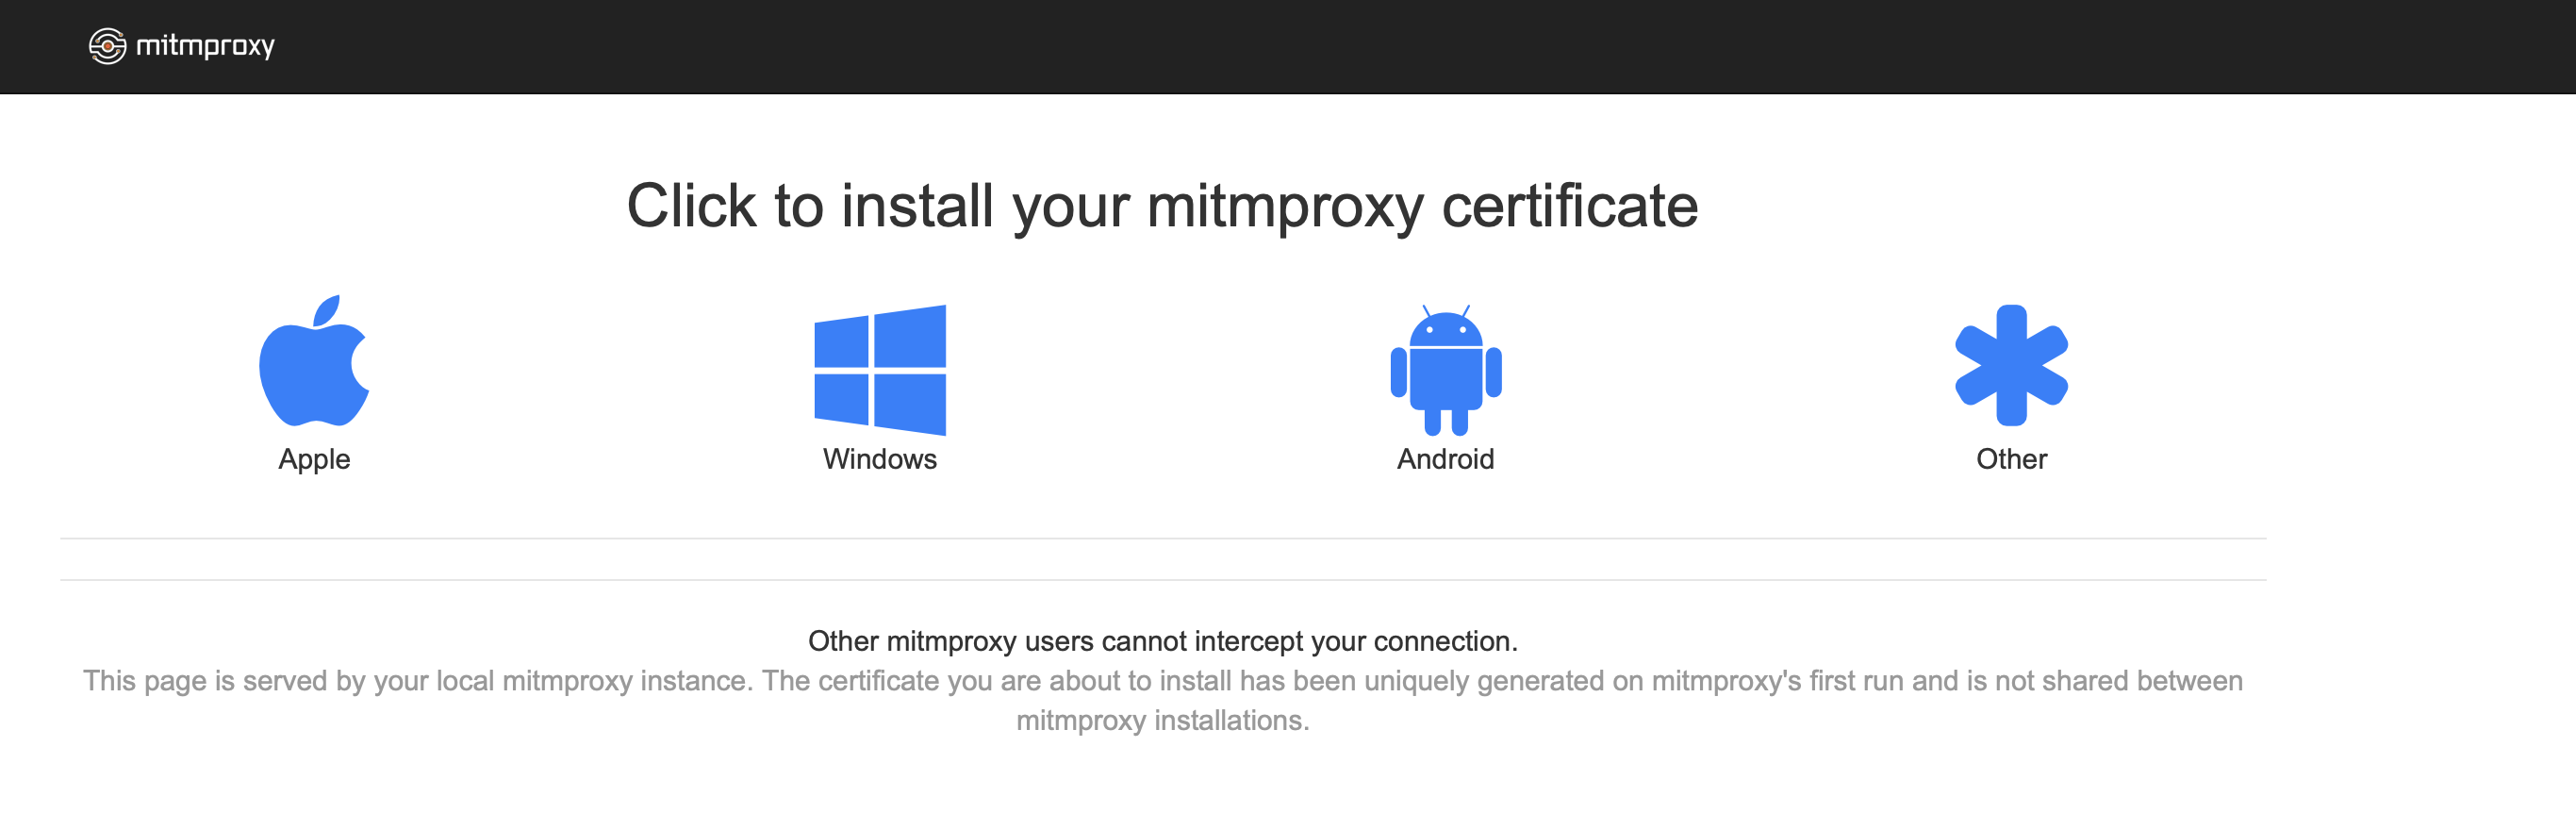
Click the Apple icon and it will download a *.pem file. The page has additional instructions you need to follow to finish the setup:
- Double-click the PEM file
- The “Keychain Access” applications opens
- Find the new certificate “mitmproxy” in the list
- Double-click the “mitmproxy” entry
- A dialog window openes up
- Change “Secure Socket Layer (SSL)” to “Always Trust”
- Close the dialog window (and enter your password if prompted)
- Done!
Now, the proxy is automatically receiving all the requests on your computer. You can view them with any of the tools mentioned above. To make things easier for now, we will use the web client. On a Terminal window, simply write mitmweb followed by Enter. After a few seconds, your default web browser will launch with the mitmweb page, and you will start seeing all the requests and responses from all the applications on your Mac. We will see how the web client works at the end of this article.
Physical iOS Devices
If you want to intercept calls in physical iOS devices, you need to configure the devices so they use mitmproxy as a proxy server. To do this, first you need to figure out the address of your Mac running mitmproxy on your network. An easy way to do this is to go back to the Network preferences on your Mac:

Now, follow these steps to finish the configuration of the proxy on your device:
- Open the
Settings.appon your device. - Tap
Wi-Fi. - Tap the “i” icon in the network name you want to modify.
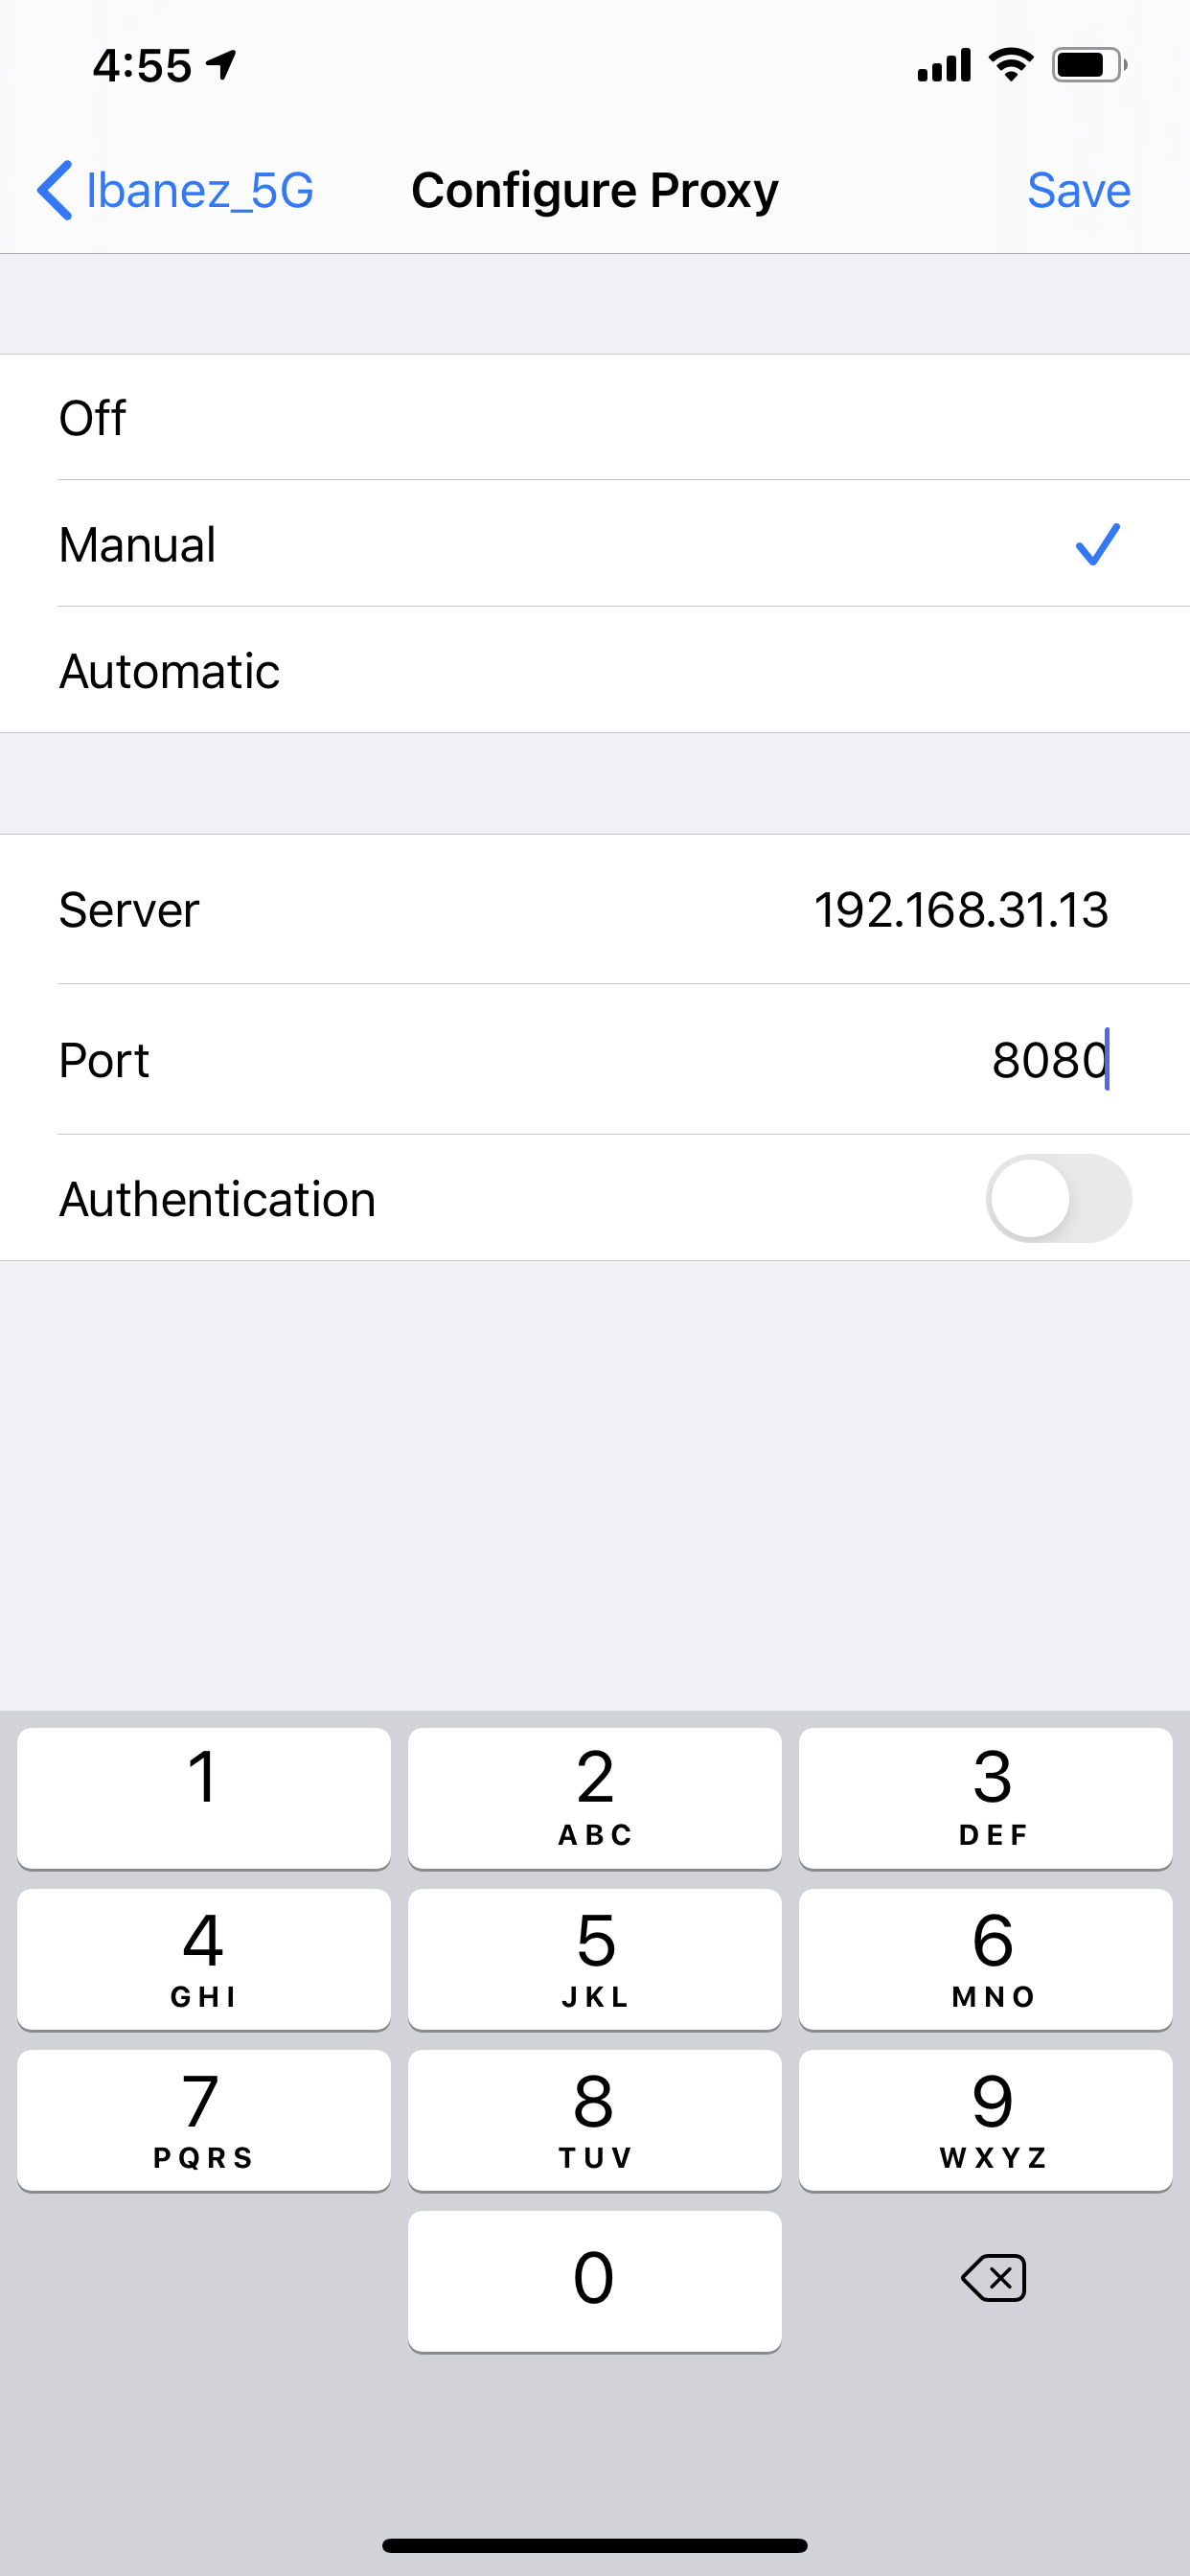
- Scroll to the bottom and tap the
Configure Proxycell. - Choose
Manual. - In IP address, write the address of your Mac on your network.
- On port, write
8080. - Leave the “Authentication” switch off.
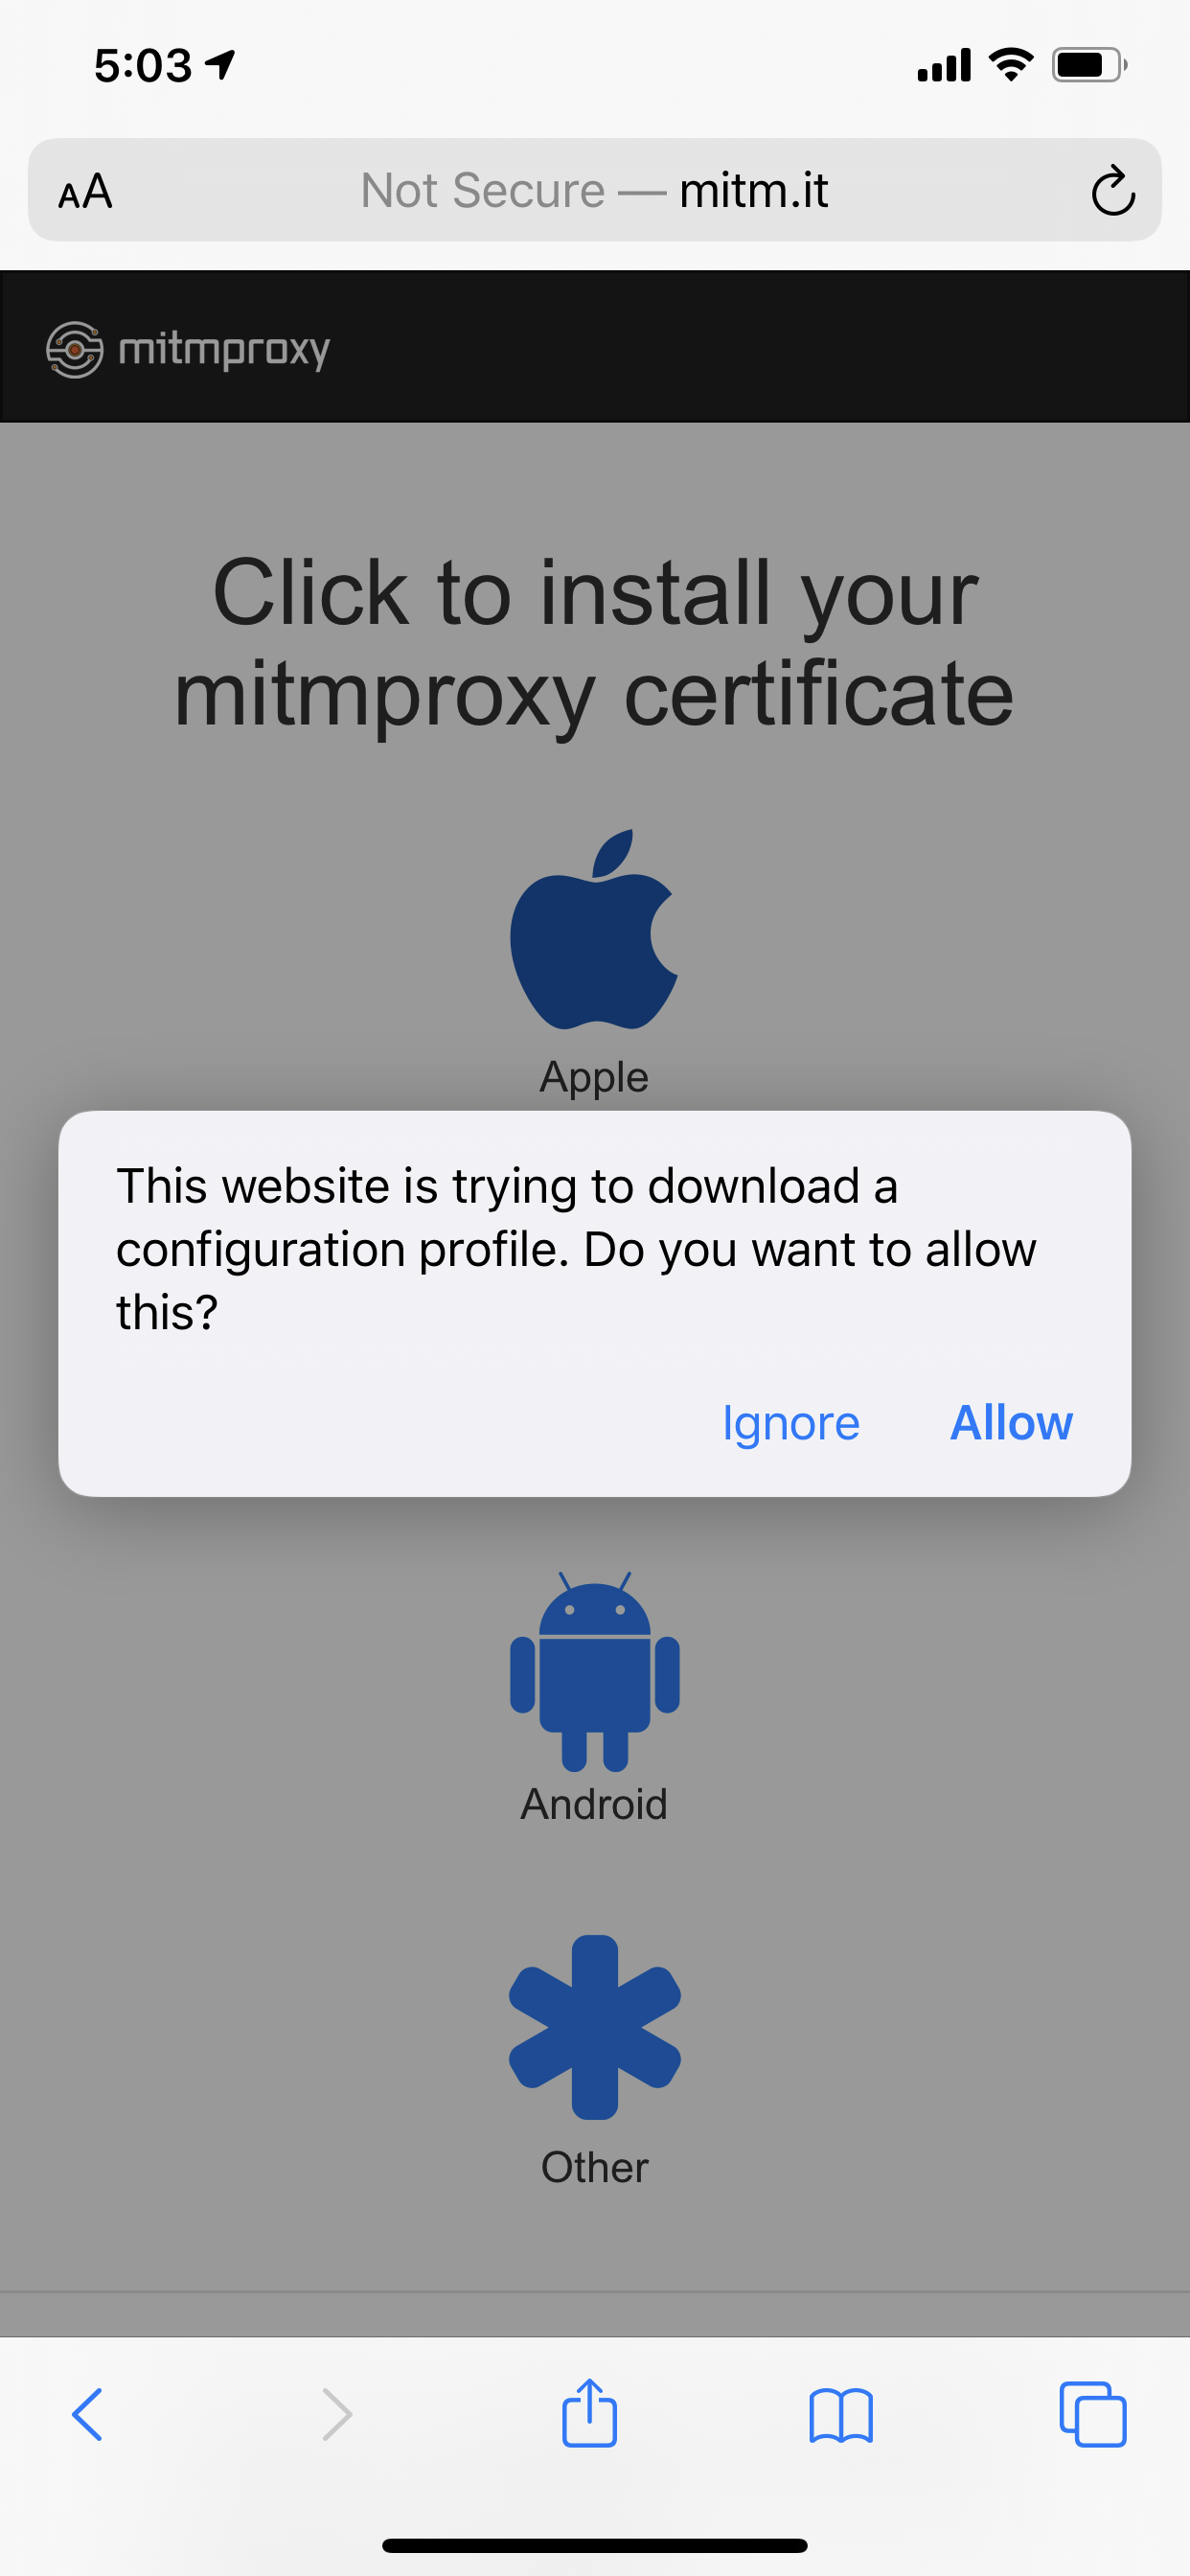
- Launch safari, and navigate to
mitm.it. - You will see the same page you saw when configuring the simulator. Click the Apple logo to download the certificate.
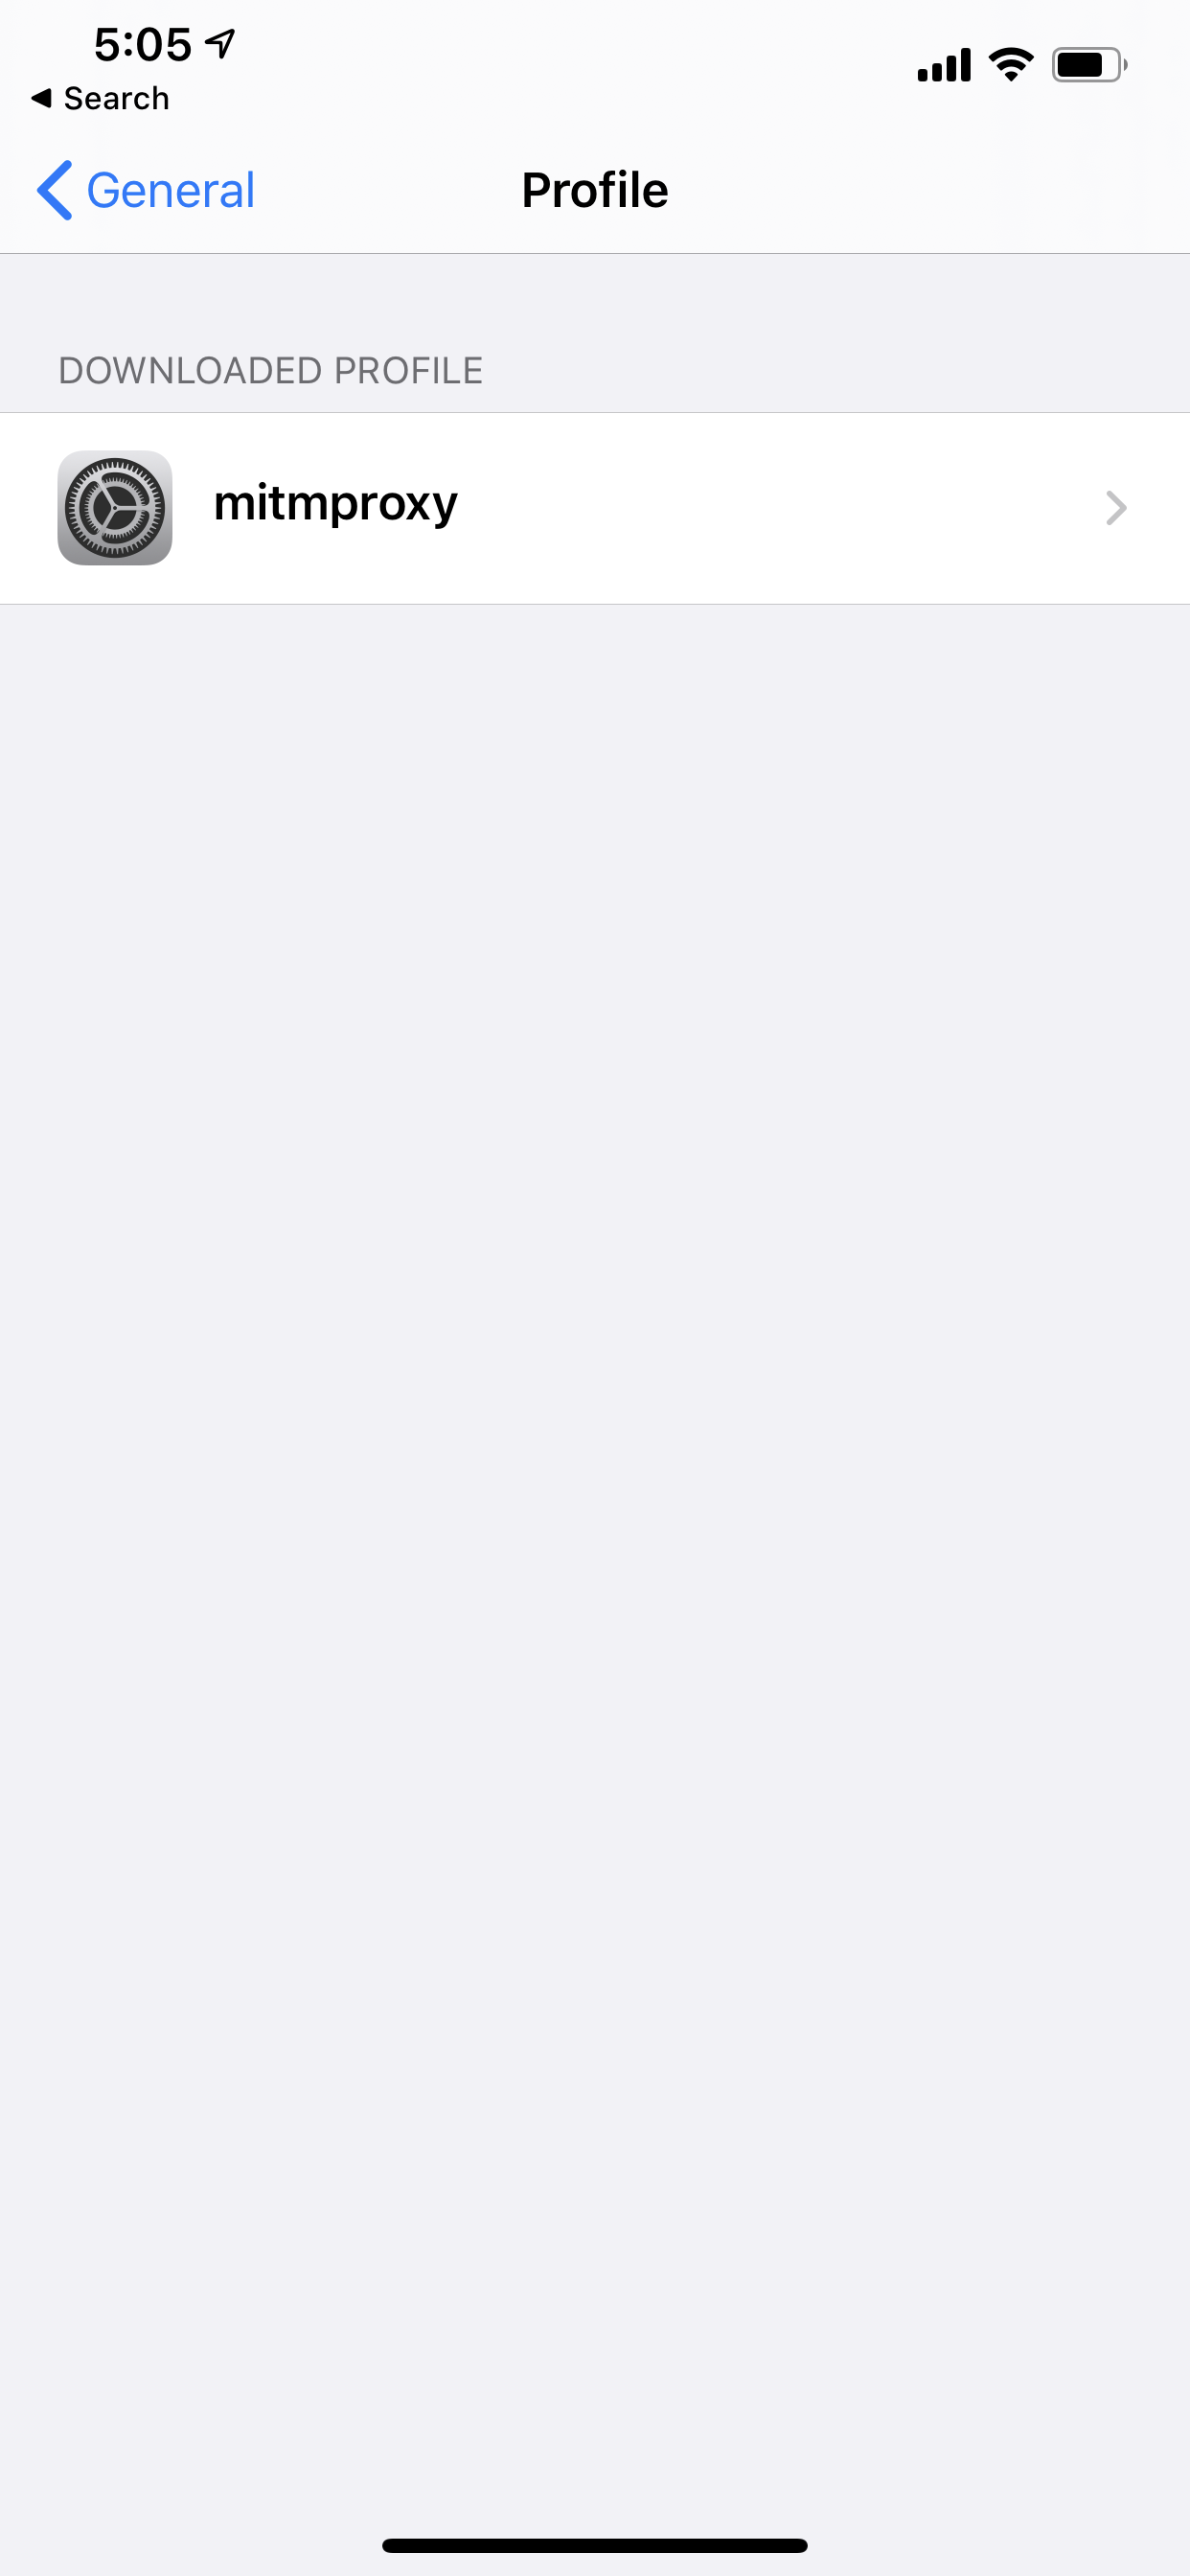
- Go back to Settings, and then
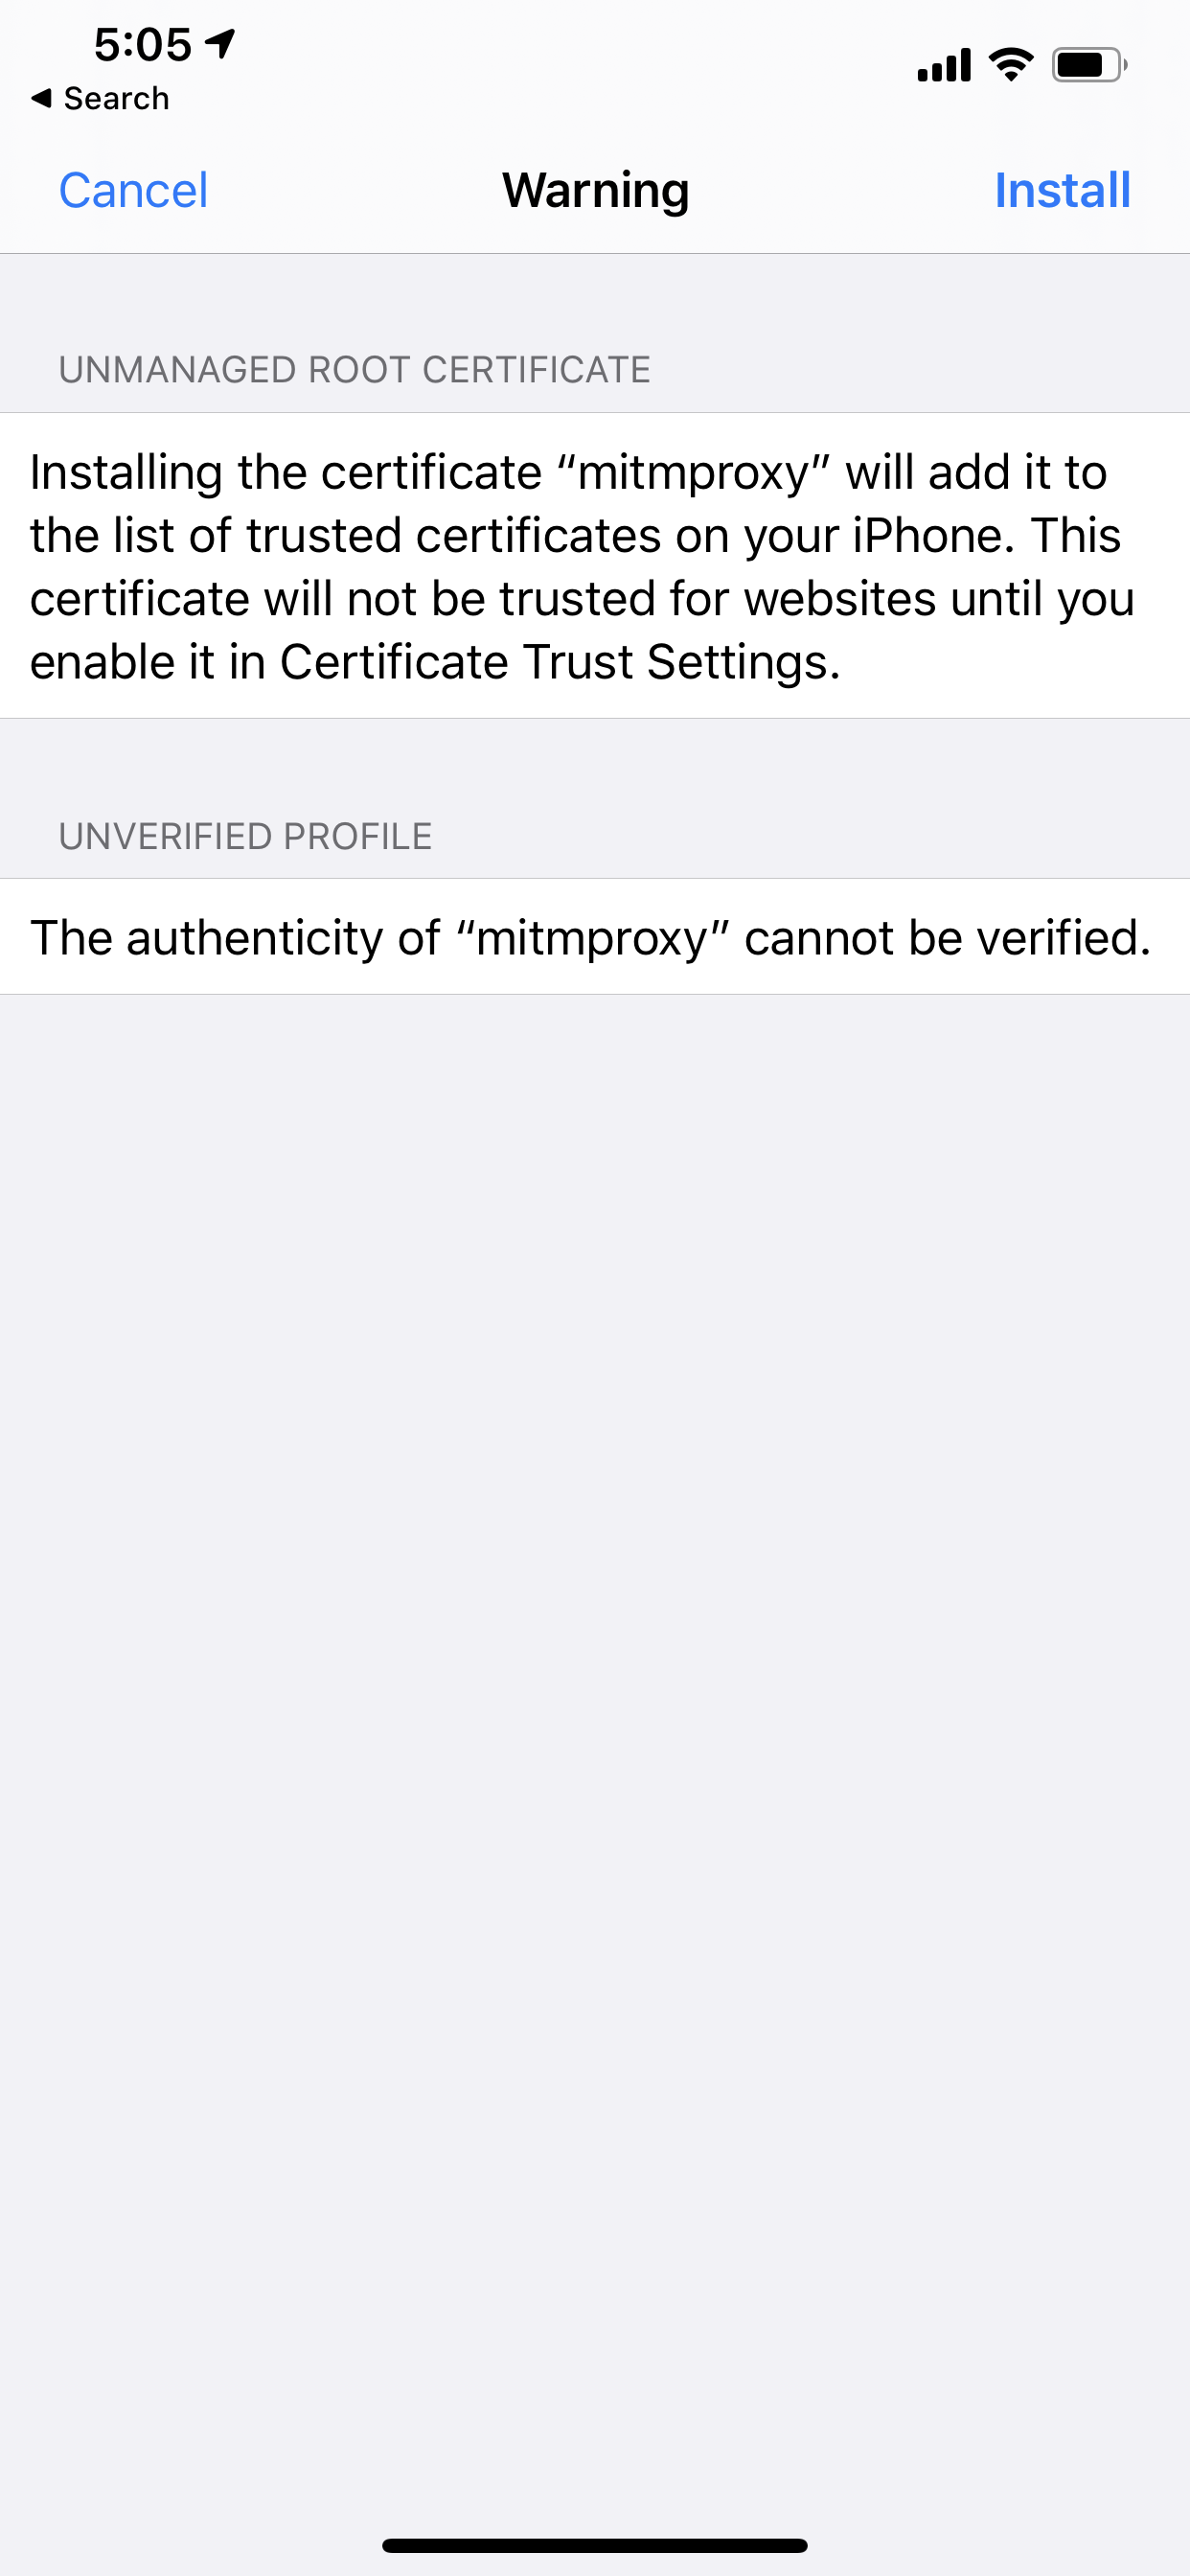
General>Profile. Image - Tap the “mitm proxy” profile, and tap
Install. The system will ask for your passcode. - Go back to
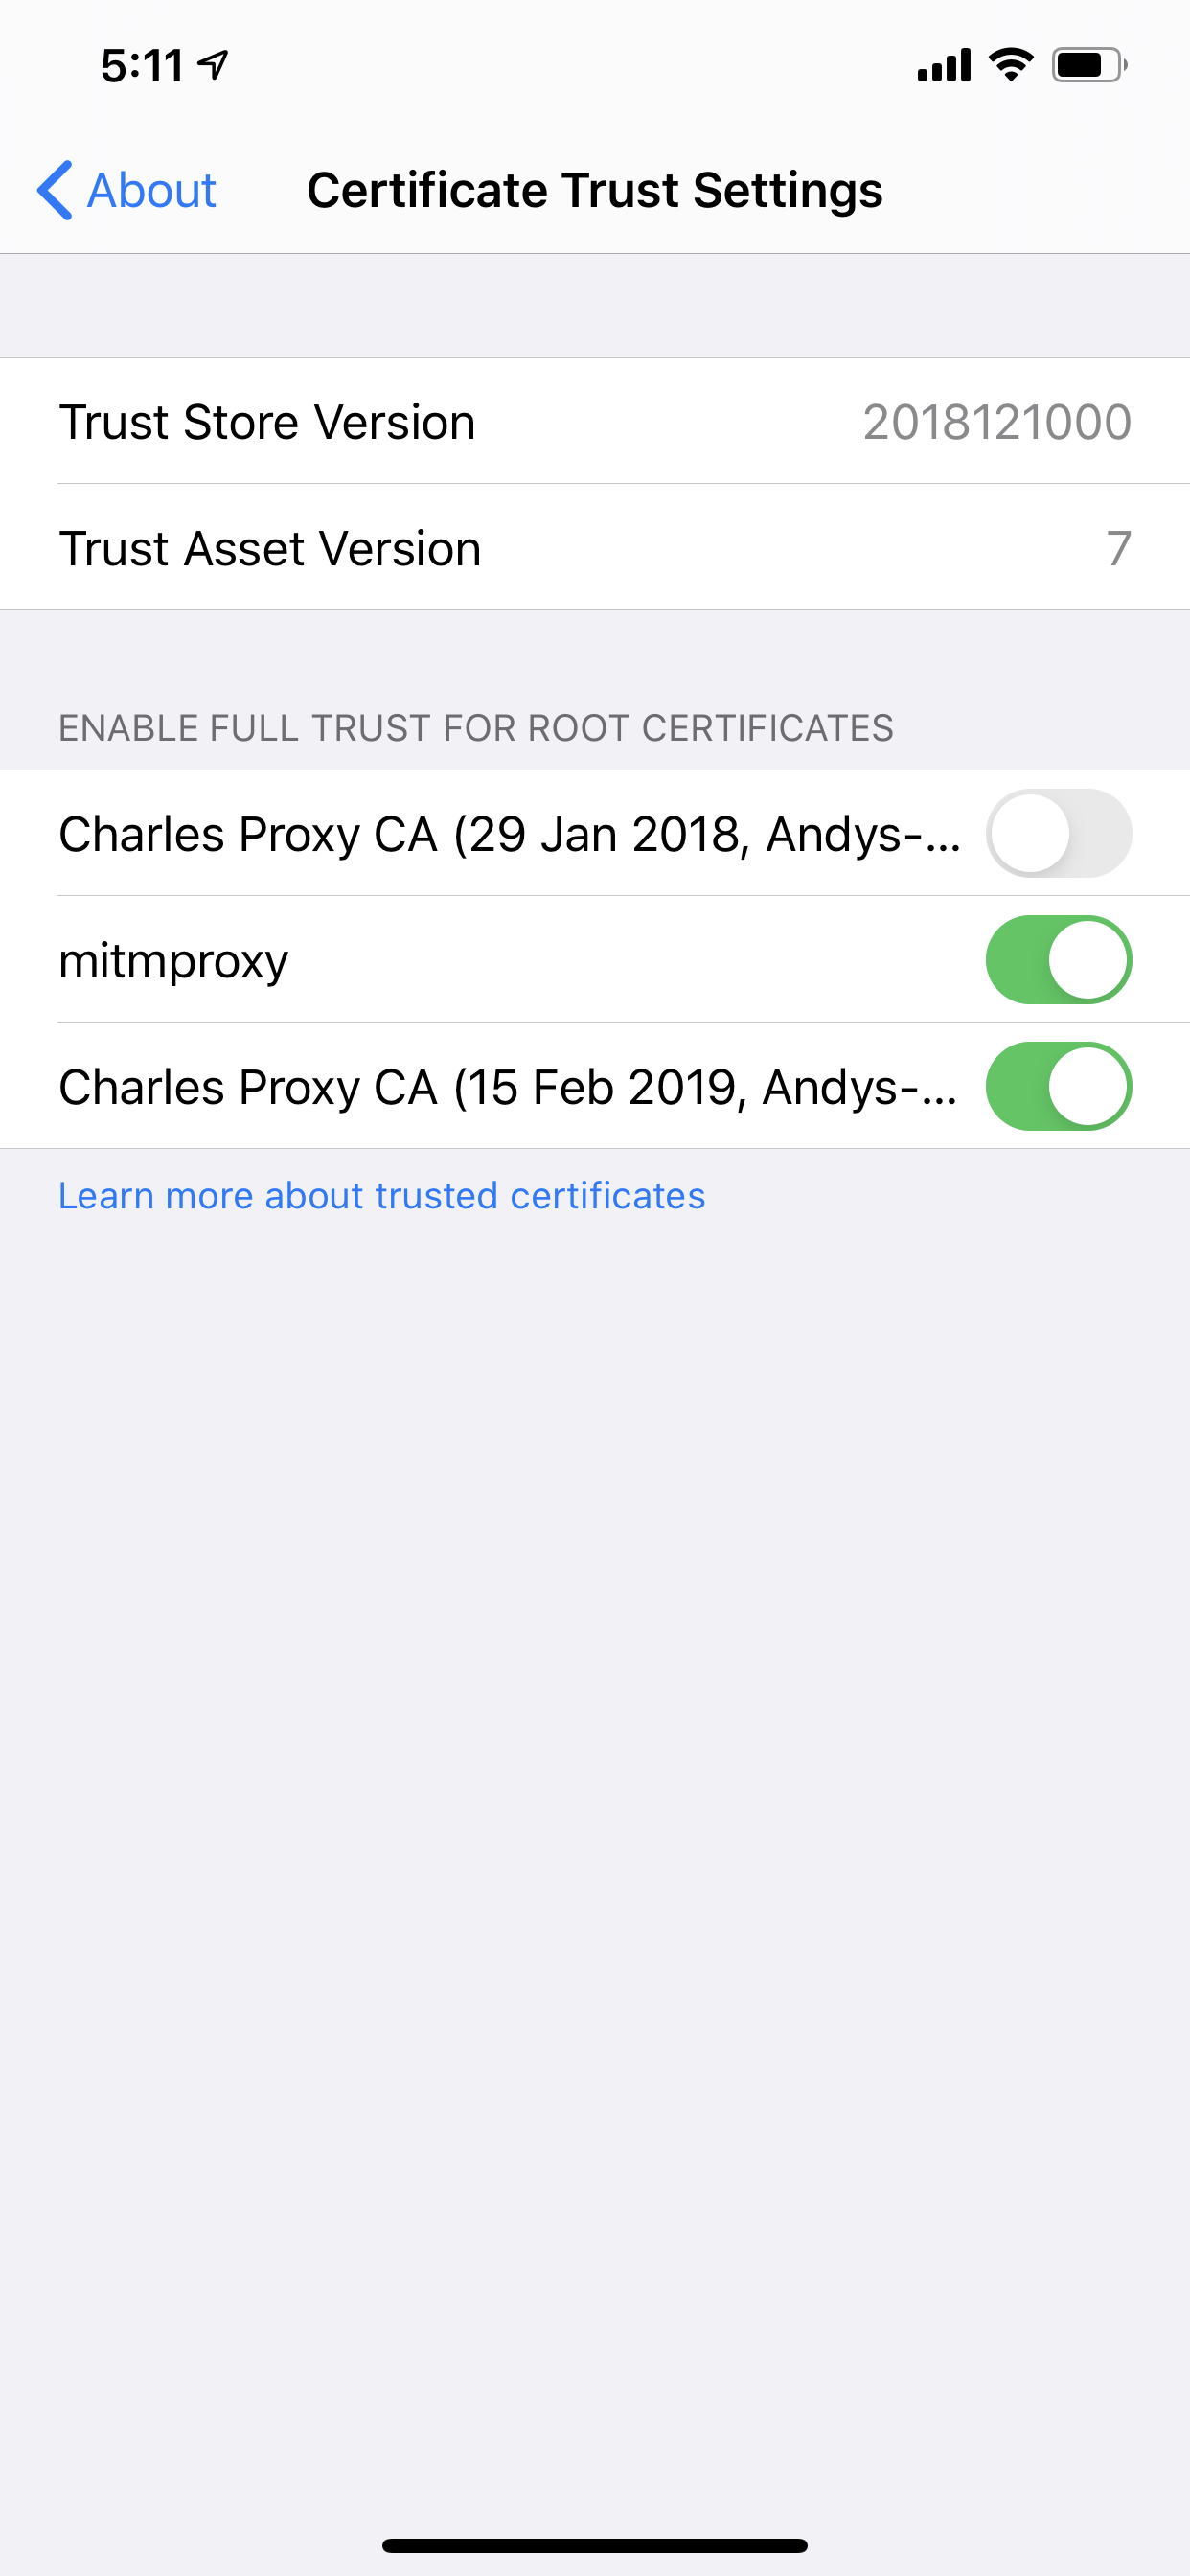
General, and this time tapAbout. - Scroll down to the
Certificate Trust Settingsoption, and tap it. - Enable the switch for
mitmproxy.
With that done, you can finally start intercepting calls from your actual device.
Setup Issues.
You may come across a few setup issues, depending on the software you have running on your Mac.
First, in my experience, if you have two active network connections on your Mac (I have both Wi-Fi and Ethernet enabled), you may have some problems. You only need to configure mitmproxy in one of them to start intercepting HTTP requests and responses on your local Mac. Ensure you write the right IP address and Port when configuring the proxy, and if that doesn’t solve it, try to configure a different IP address and port for mitmproxy (check the docs). If you are running other proxy software or have other software that may be bind to the same address and port as MITM Proxy, you will have issues.
For my phone, I was having problems accessing mitm.it. I was connecting to the Mac network that didn’t have the proxy configured, so ensure that whatever network you are connecting to has the proxy enabled for mitmproxy. I spent longer fighting this than I care to admit.
Exploring the Requests
With all that setup done, you can finally start using mitmproxy to intercept some requests. As I said earlier, I will be using the web client, because it covers the vast majority of my needs.
Open a Terminal window and type mitmweb.
Now you need an app to (maybe your own!) to start seeing the requests of. For this article, I will be intercepting my own Next Anime Episode app.
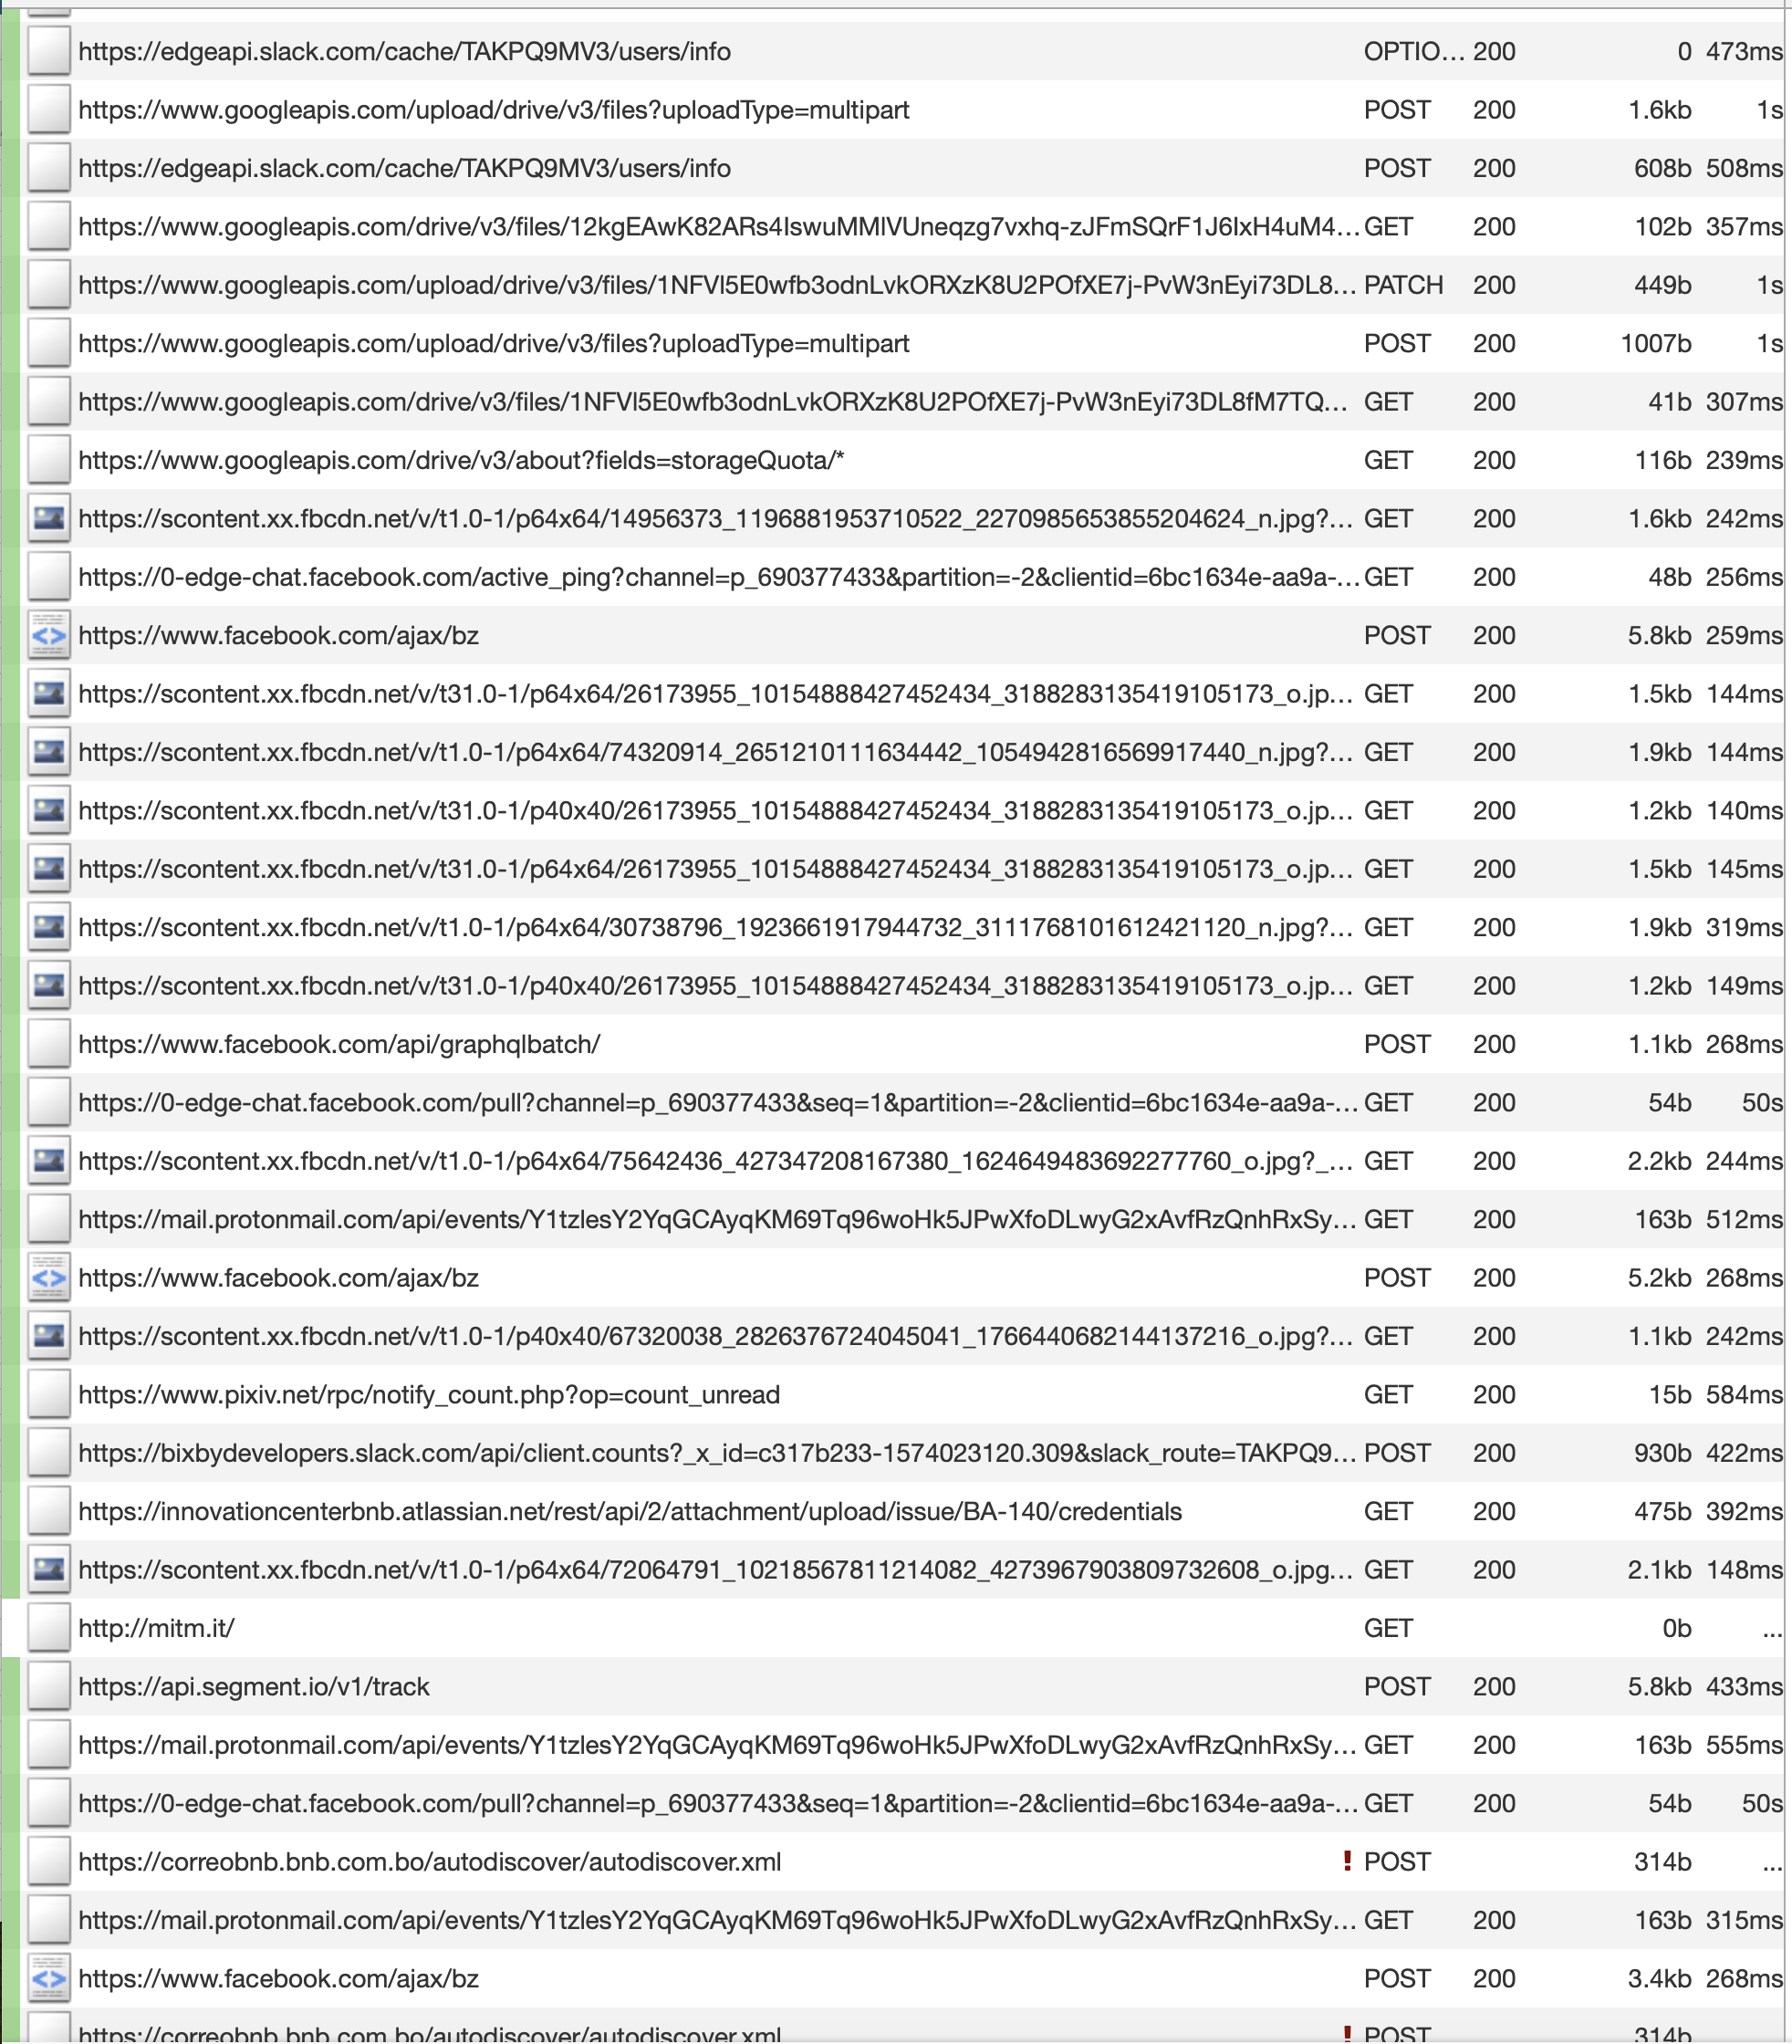
When you open the web client, you will see the flood of requests for all your computer. Luckily you can use the search filter to filter it down and find what you need. There’s many options here, and when you click on the textfield, it will give you a list of options you can use to search. You can write more advanced search queries if you know regex. For now, I know my app just queries graphql.anilist.co, so by writing ~u anilist, I will filter by all the URLs that just have this URL.
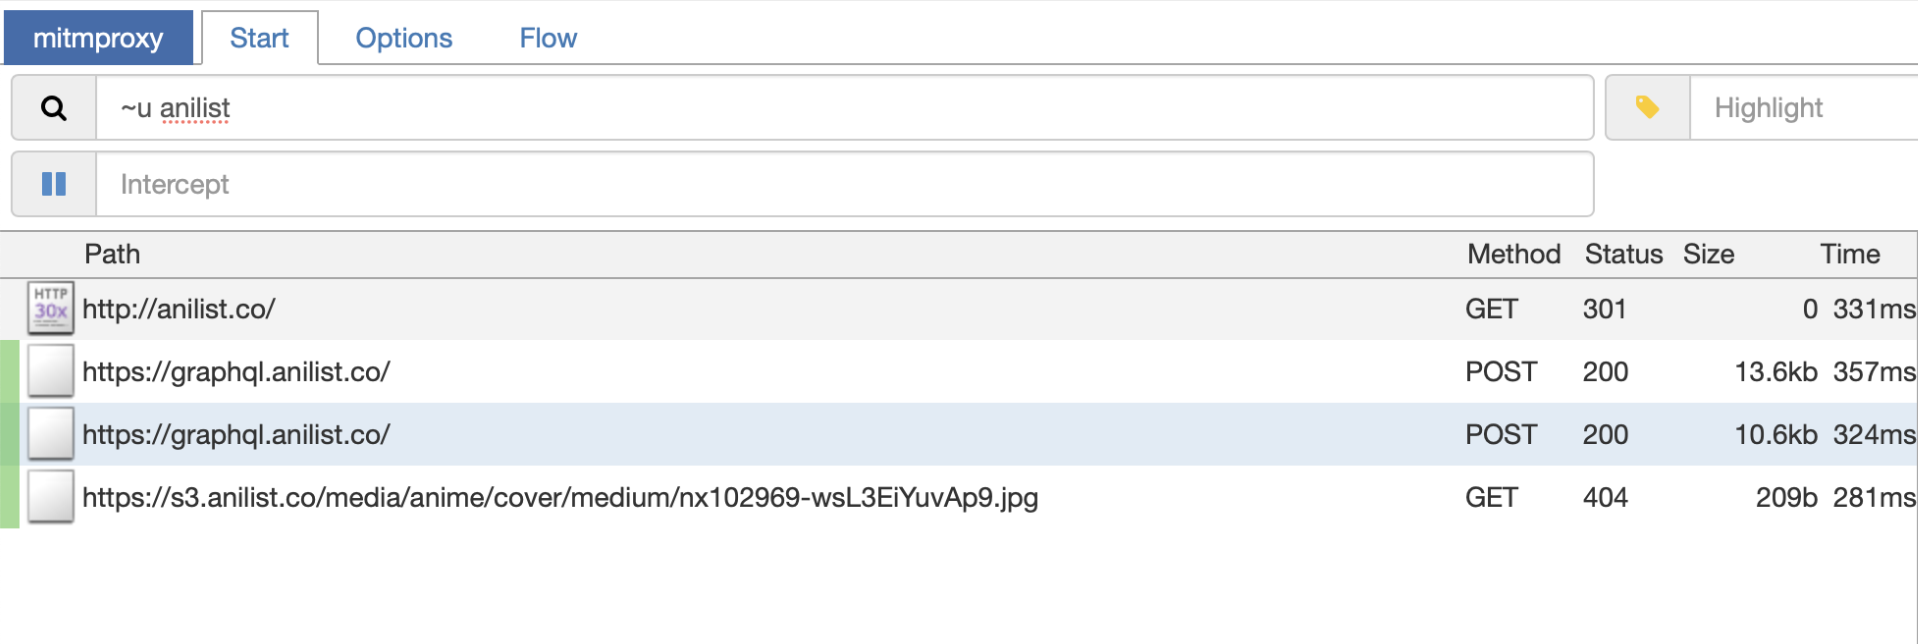
In this screenshot you can see that now I’m only seeing the requests that have anilist as part of the URL.
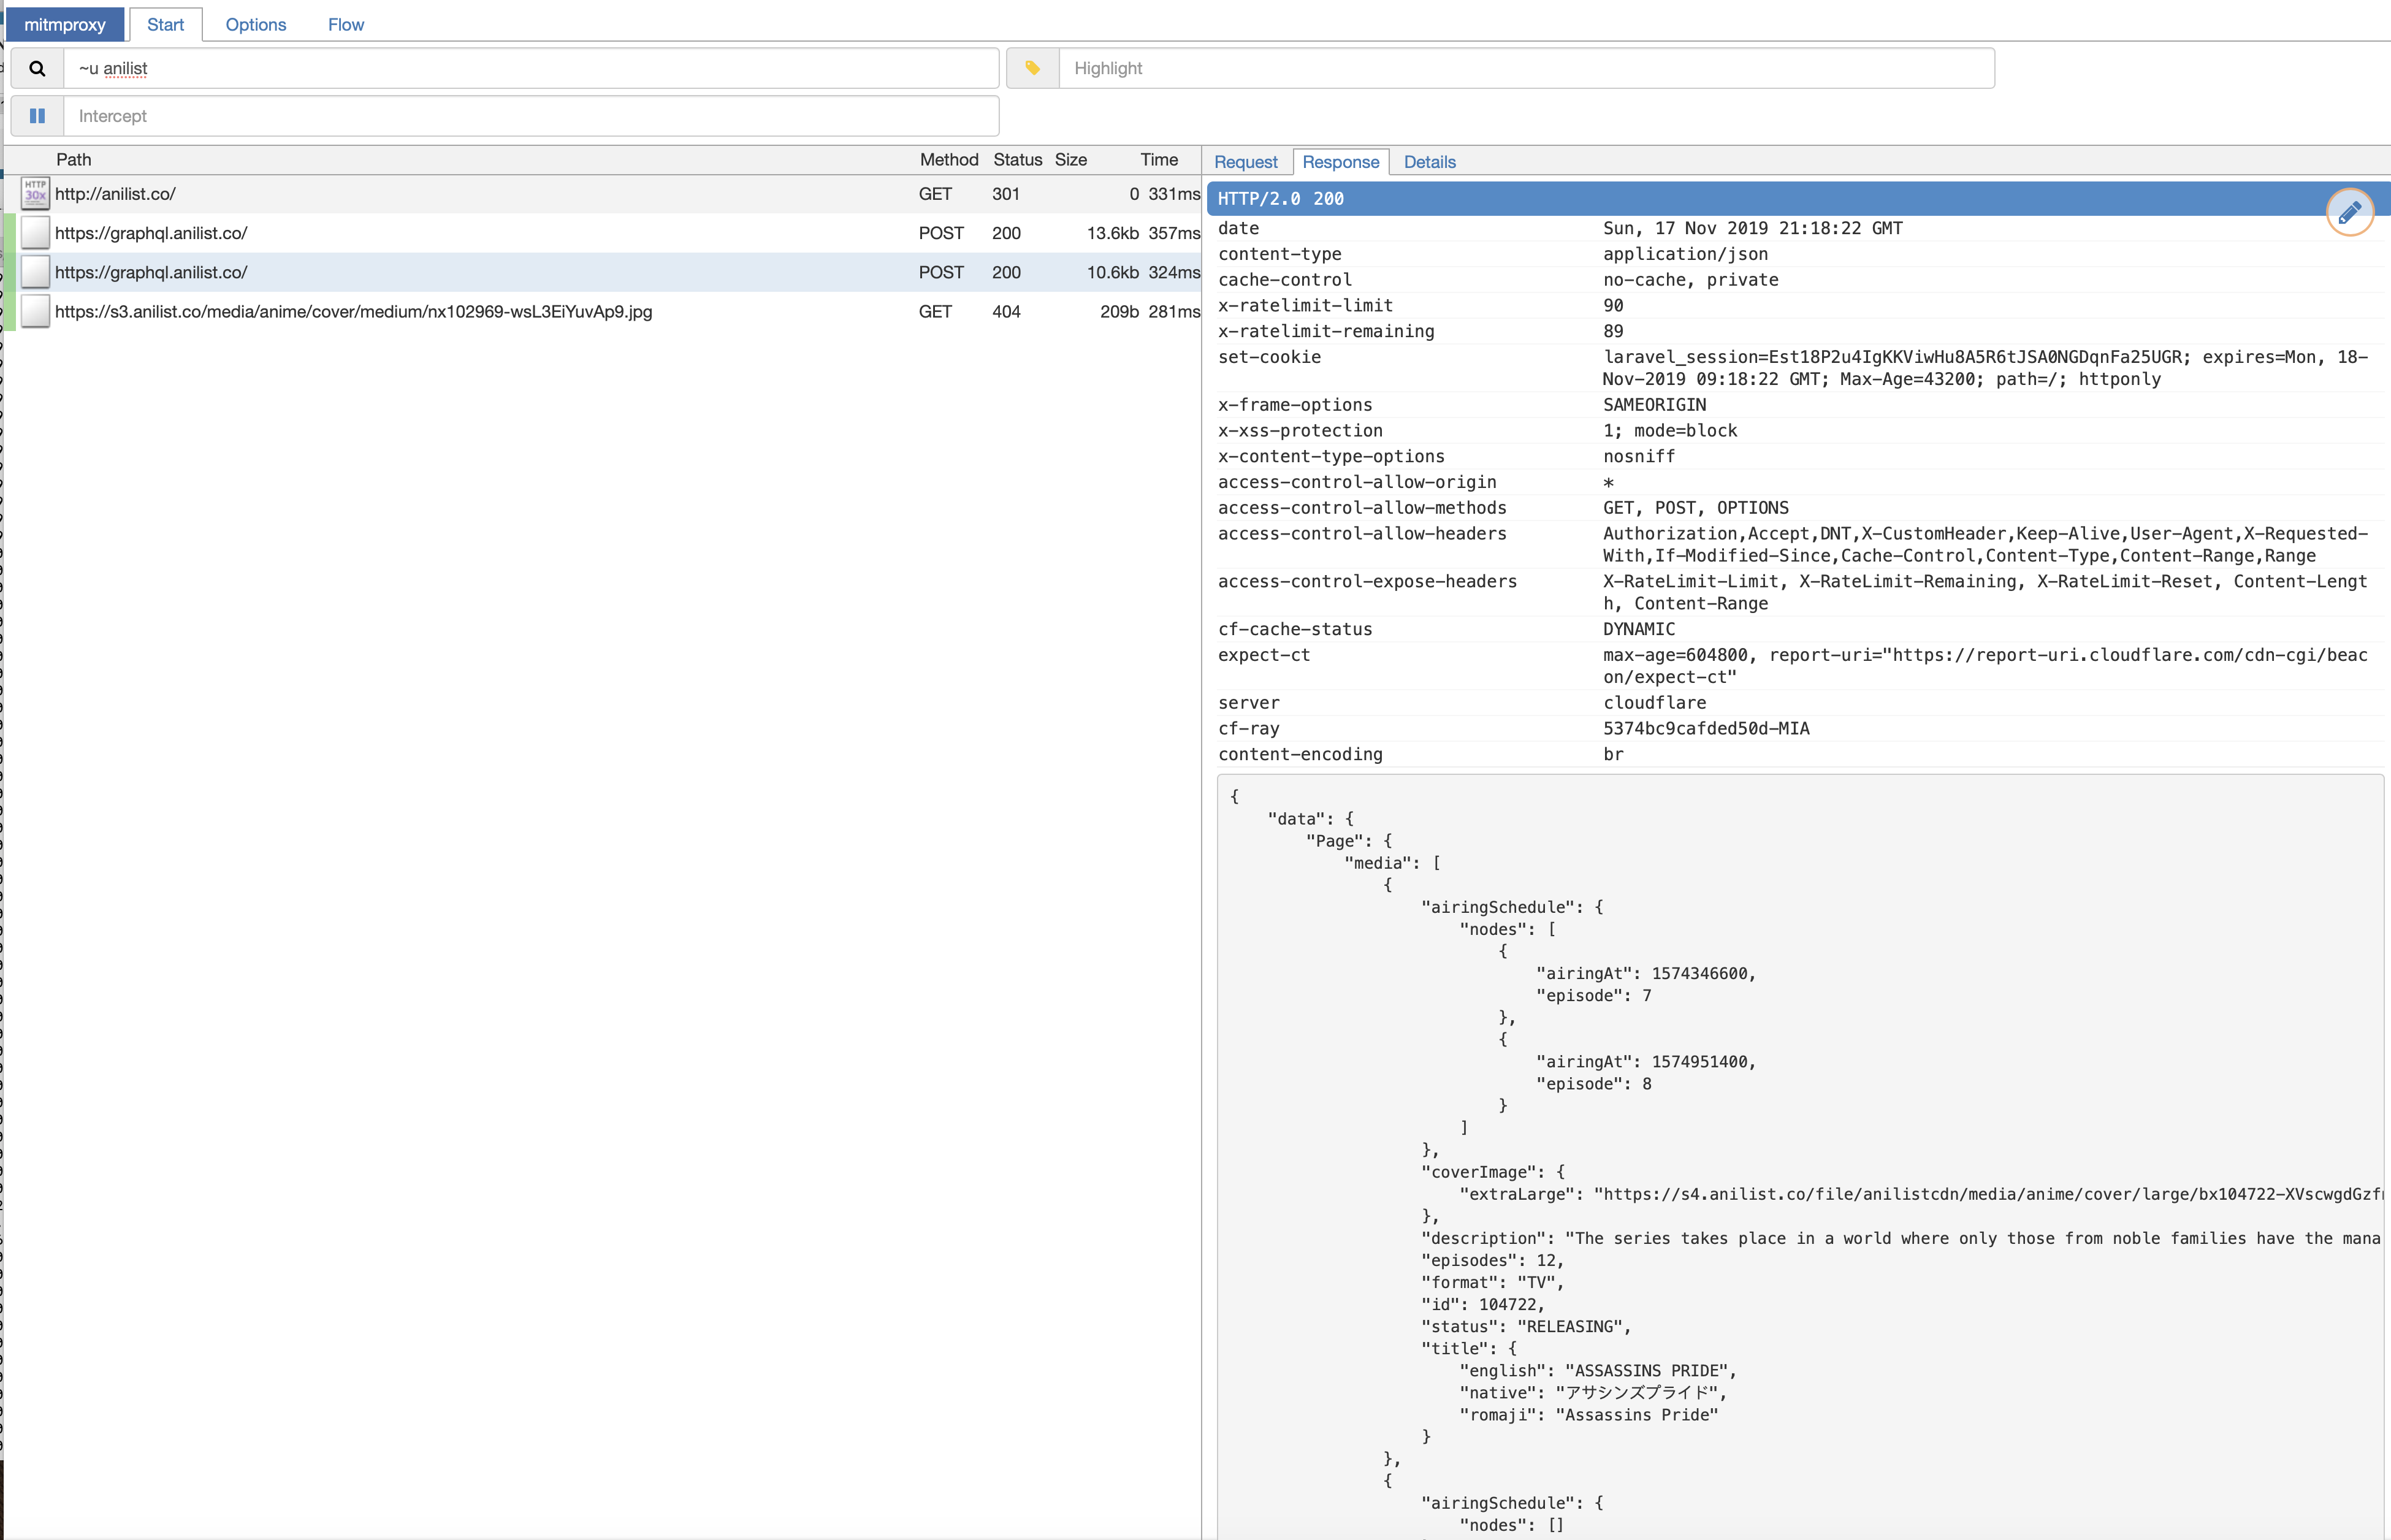
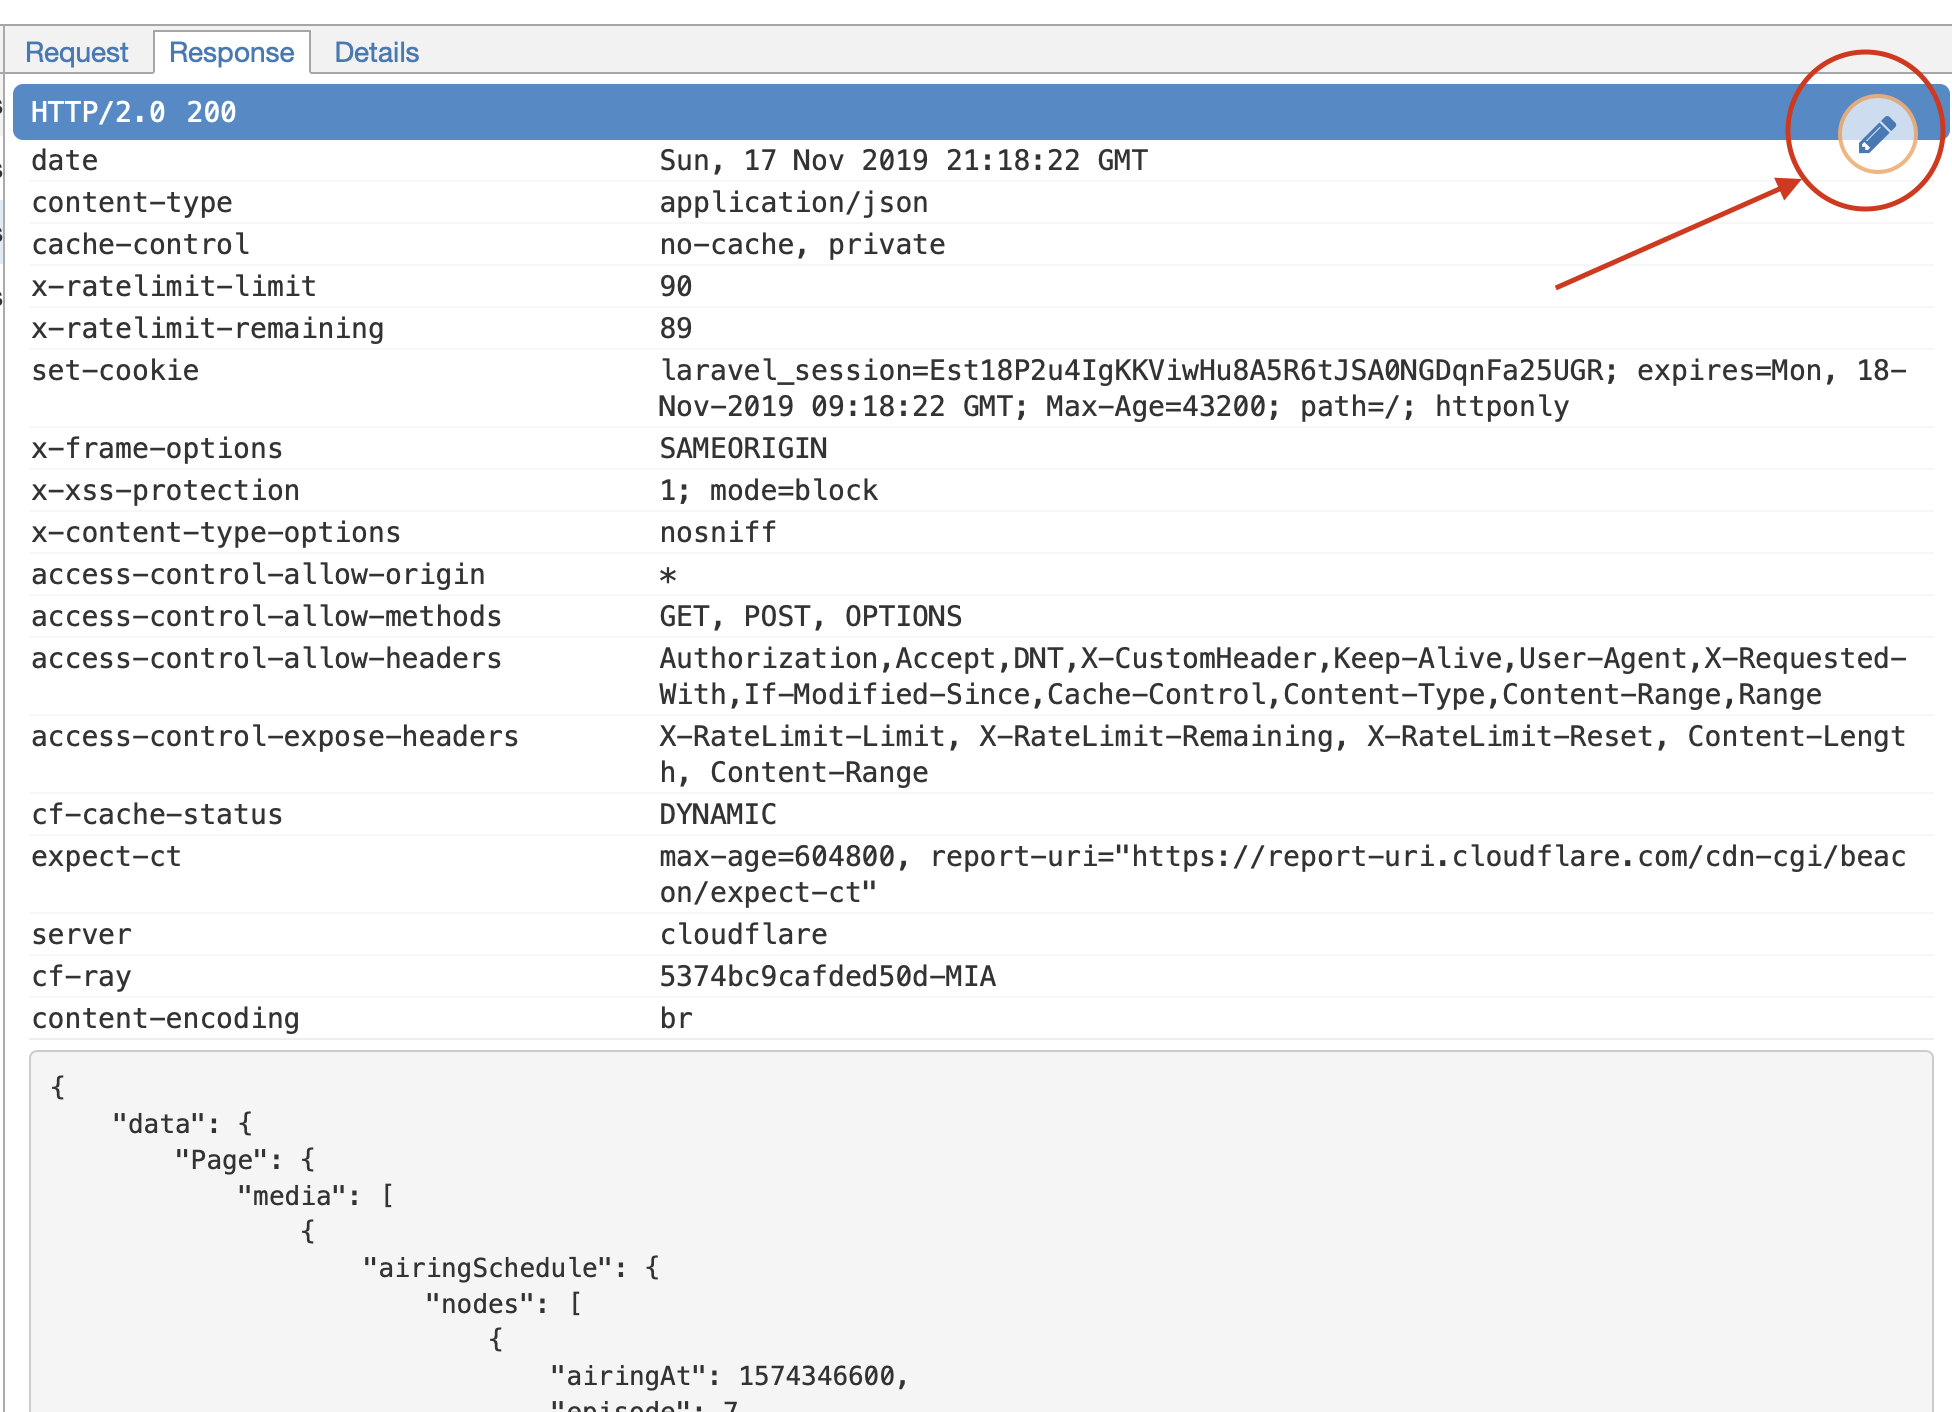
You can check both the Request and Response tabs to view how a request was done and what returned to your device. Also, if you click the little pencil icon, you can modify both the request the device sent and the response it is expeting to suspect. With this feature you can modify calls on the fly to reverse-engineer APIs or to see how APIs you use would expect if you modified certain parameters.
Other Tips
Charles took care of the configuration for you. When you launched it, it automatically setup the System Preferences to use the proxy. mitmproxy cannot currently do that, but in your Mac, if you want to avoid setting up the proxy everytime you need to, I recommend you create two Locations: One called “Proxy”, and the other called “No Proxy”. In the Proxy location you can set up the proxy, and you can simply change locations when you need to use it.
Unfortunately you cannot do this on iOS, but there was no workaround for Charles, either.
Conclusion
We didn’t explore the full power of mitmproxy in this article, but what you learned should help you add a new tool to your arsenal to debug networking in your apps. mitmproxy is a very powerful tool, and if you are interested in learning all its features, I encourage you to read the docs. That said what you learned in this article is more than enough for most scenarios, and the power to do more is out there.