
The original version of this article was titled “rclone and Encryption Tutorial” and was posted in the old version of my website. The original article was written in February 2017 for a much older version of rclone. This revised article covers rclone 1.48, and it has been rewritten from scratch to improve its quality. The examples used in the original article have been kept.
rclone is a command line tool, similar to rsync, with the difference that it can sync, move, copy, and in general do other file operations on cloud storage services, such as Dropbox and Google Drive. You can use rclone to create backups of your servers or personal computers or to simply store your files in the cloud, optionally adding encryption.
rclone supports many different services, from customer services like Dropbox, Google Drive, and One Drive, to bucket-based storage services such as Wasabi and Backblaze 2, and even more traditional protocols such as FTP and Webdav. It even supports the local filesystem, so you can use rclone fully locally as well. For a list of all supported services and protocols, see this page.
Getting Started
Installation
The installation process for rclone is straightforward. There’s little point in me explaining how to install it, because the installation instructions page has instructions for all major OSes.
If you are on a Mac, I suggest you install it with Homebrew. If you have Homebrew installed, just type this command in your terminal followed by the Enter key:
brew install rclone
If you are on Windows instead, you can install it with Chocolatey. Simply open a Console window and type the following, followed by the Enter key:
choco install rclone
Once you have it installed, we’ll explore some basic terminology to get you started with rclone.
Basic Terminology
The most important concept of rclone is the remote. A remote is simply a cloud service you have configured in the tool. For example, if you configure your Dropbox account, it becomes a remote. You can have more than one remote for each cloud service type, so if you have two Dropbox accounts, you can configure a remote for each. You can then interact with your remotes with the command line. If you added your Dropbox and Google Accounts, you can share files between them (note that in that case the files will be downloaded to your computer before being sent to the destination remote), and you can also send files from your local filesystem to a remote, and vice-versa.
With rclone, you execute commands. Things like copy, move, sync are all rclone commands. There’s many more, and this article will not even cover half of them. It’s good to know which ones exist though, so you can start adapting rclone to your use cases. Run the following command:
rclone
And the output will give you a list of commands rclone can do. It looks like this (this list has been truncated):
  copy            Copy files from source to dest, skipping already copied
  copyto          Copy files from source to dest, skipping already copied
  copyurl         Copy url content to dest.
  cryptcheck      Cryptcheck checks the integrity of a crypted remote.
  cryptdecode     Cryptdecode returns unencrypted file names.
  dbhashsum       Produces a Dropbox hash file for all the objects in the path.
  dedupe          Interactively find duplicate files and delete/rename them.
  delete          Remove the contents of path.
rclone commands typically have at least two parameters: a source and a destination, where each is a remote. For commands that take two remote parameters, the source goes before the destination.
Make sure you understand the four concepts above before moving.
rclone Basics
Rclone Configuration
You are about to configure your first remote. Open a command line window (or a Console window) and type the following:
rclone config
The config command allows you to add, delete, and modify existing remotes. All your remotes are stored in a config file. If you run the rclone config file command, you will see where your config file is stored. In my system, it prints /Users/andyibanez/.config/rclone/rclone.conf. Generally, you can recreate the contents of this file in another system or in a clean setup, but once we start dealing with encryption things can be a little bit messy in terms of management of your config file, so I recommend you keep a backup of it at all times.
One additional thing you can with rclone config is to encrypt your config file itself (not to be confused with encrypted remotes, which we will explore later). Encrypting your config file is useful if you are you going to be using rclone in a computer you don’t control, unless you trust the host enough that they aren’t going to be looking at your rclone data.
When running rclone, you can also pass it an alternative config file with the --config file. When this flag is missing, it will use the config stored in the path of rclone config file. We won’t explore this idea further, but if you want to organize your remotes into different files or have any other use for separate config files, know that the option to have them is there.
Your first remote
Once you run rclone config, you will see an output similar to this:
Name                 Type
====                 ====
GoogleDrive		  google drive

e) Edit existing remote
n) New remote
d) Delete remote
s) Set configuration password
q) Quit config
e/n/d/s/q>
Since you do not have any remotes yet, you will not see the first four lines of the output. The first four lines show you your existing remotes and what service they are configured with. In the example above, you can see I have a remote of type google drive. In this example, we will configure a Google Drive remote, but feel free to use other types to experiment.
Press n followed by the Enter key to create a new remote. The first prompt will be a name. This is just a name you assign to your remote so you can identify it later when doing a command such as rclone listremotes to view a list of all remotes in your config file. The name can be anything, just make sure it doesn’t have any spaces. For example, if you want to add two Dropbox accounts, one for personal use and another one for business, you could create two remotes called DropboxPersonal or DropboxBusiness. I’ll name mine aibanezDrive.
The next prompt will ask you for the Storage type.
 1 / A stackable unification remote, which can appear to merge the contents of several remotes
   \ "union"
 2 / Alias for an existing remote
   \ "alias"
 3 / Amazon Drive
   \ "amazon cloud drive"
 4 / Amazon S3 Compliant Storage Provider (AWS, Alibaba, Ceph, Digital Ocean, Dreamhost, IBM COS, Minio, etc)
   \ "s3"
 5 / Backblaze B2
   \ "b2"
 6 / Box
   \ "box"
 7 / Cache a remote
   \ "cache"
 8 / Dropbox
   \ "dropbox"
 9 / Encrypt/Decrypt a remote
   \ "crypt"
10 / FTP Connection
   \ "ftp"
11 / Google Cloud Storage (this is not Google Drive)
   \ "google cloud storage"
12 / Google Drive
   \ "drive"
13 / Hubic
   \ "hubic"
14 / JottaCloud
   \ "jottacloud"
15 / Koofr
   \ "koofr"
16 / Local Disk
   \ "local"
17 / Mega
   \ "mega"
18 / Microsoft Azure Blob Storage
   \ "azureblob"
19 / Microsoft OneDrive
   \ "onedrive"
20 / OpenDrive
   \ "opendrive"
21 / Openstack Swift (Rackspace Cloud Files, Memset Memstore, OVH)
   \ "swift"
22 / Pcloud
   \ "pcloud"
23 / QingCloud Object Storage
   \ "qingstor"
24 / SSH/SFTP Connection
   \ "sftp"
25 / Webdav
   \ "webdav"
26 / Yandex Disk
   \ "yandex"
27 / http Connection
   \ "http"
Since we are configuring Google Drive, write in 12 and press Enter.
Important Note!
At the time this article was written, the current rclone version was 1.48. You can check your rclone version by running:
rclone version
Andys-iMac-2:andyibanez andyibanez$ rclone version
rclone v1.48.0
- os/arch: darwin/amd64
- go version: go1.12.6
There’s generally no changes with how rclone commands work in each release, but it’s very common for each update to add new cloud storage providers. In this current version, Google Drive is option 12, but if you follow this article in a newer version, it’s possible that the number assigned to Google Drive has changed. In fact, the initial version of this article which I wrote two years ago back in 2017, had Google Drive on number 7! So be wary of that if you are reading this article and following it step by step.
Many providers will prompt you for a client_id and a client_secret. You don’t need these most of the time. In general, if you are having any problems with rclone using specific remotes, the community will recommend you to use these parameters and how they should be used. If you are familiar with how web APIs work for services like Google Drive, then you know how to use these parameters and in that case I recommend you set them - but in case you don’t the defaults should work fine, at least for the purposes of this article.
For now, press Enter when it prompts you for each to leave them blank. But if you are inclined to fill these values (which is recommended for long term usage anyway), you can go here to find instructions on how to get your client ID and client secret.
The output will look like this:
Google Application Client Id
Setting your own is recommended.
See https://rclone.org/drive/#making-your-own-client-id for how to create your own.
If you leave this blank, it will use an internal key which is low performance.
Enter a string value. Press Enter for the default ("").
client_id>
Google Application Client Secret
Setting your own is recommended.
Enter a string value. Press Enter for the default ("").
client_secret>
You will then be asked for the scope. This configuration is specific to Google Drive. This setting allows you choose what “space” it will have in your Google Drive folder. The first option will grant rclone access to every single folder and file in your drive, with the exception of App Data. App Data is a special folder. Generally mobile applications that interact with Google Drive can store their data here and have it inaccessible to anyone outside. Think of WhatsApp for Google Drive - it’s backups are stored in the App Data folder and it’s not visible even to you. You can choose this folder to give rclone a special container to store files in. This will prevent your main Google Drive view from being polluted with encrypted files that you can’t view without rclone itself, which is handy if you use the web client. I personally use this option for my backups, but know that if you use this option, it’s really recommended you backup your config file.
All other scopes but the first one are outside the scope of this article, so write 1 followed by the Enter key. This will grant rclone standard access to the root of your Google Drive account and it will be able to see all your files and folders.
Scope that rclone should use when requesting access from drive.
Enter a string value. Press Enter for the default ("").
Choose a number from below, or type in your own value
 1 / Full access all files, excluding Application Data Folder.
   \ "drive"
 2 / Read-only access to file metadata and file contents.
   \ "drive.readonly"
   / Access to files created by rclone only.
 3 | These are visible in the drive website.
   | File authorization is revoked when the user deauthorizes the app.
   \ "drive.file"
   / Allows read and write access to the Application Data folder.
 4 | This is not visible in the drive website.
   \ "drive.appfolder"
   / Allows read-only access to file metadata but
 5 | does not allow any access to read or download file content.
   \ "drive.metadata.readonly"
scope> 1
Next you will be asked to put in a root_folder_id. This is an interesting option, but not one we will be using in this article. It allows you restrict rclone to certain folders, even the Computers folders the Backup and Sync program uses to store files in. For now leave it blank and press Enter.
ID of the root folder
Leave blank normally.
Fill in to access "Computers" folders. (see docs).
Enter a string value. Press Enter for the default ("").
root_folder_id>
You will now be asked for the path to a JSON file (service_account_file). This allows you to change the authentication method with Google Drive. We definitely don’t want this now, so leave it blank and press Enter.
Service Account Credentials JSON file path
Leave blank normally.
Needed only if you want use SA instead of interactive login.
Enter a string value. Press Enter for the default ("").
service_account_file>
After that you will be asked if you want to use advanced configurations. We aren’t, so press n followed by Enter.
Edit advanced config? (y/n)
y) Yes
n) No
y/n> n
Finally, you will be asked if you want to use auto config. If you configure rclone in your Mac, or Windows, or in another system with a GUI, you can say “yes” to this. If you were configuring rclone in a headless system (like SSHing into a Linux system with no GUI), you need to say “no” to this.
Since you are working on a Mac, Windows, or Linux with a GUI, press y followed by Enter.
Remote config
Use auto config?
 * Say Y if not sure
 * Say N if you are working on a remote or headless machine
y) Yes
n) No
This will launch your default browser with a Google Drive authorization page.

Once you are done authorizing your account, you will see another page with this in it:
If you are asked if you want to configure it as a team drive, press n followed by Enter:
Configure this as a team drive?
y) Yes
n) No
y/n> n
rclone will print something like this in the console at the end, showing you information about your newly created remote. It may look differently depending on how and what parameters you have configured.
[aibanezDrive]
client_id =
client_secret =
token = {...}
Press y followed by Enter. Your new remote has been created, and you are finally read to use it.
Interacting With Your First Remote
Before we do anything, run:
rclone listremotes
To view a list of all your remotes. Your newly created remote should look like this:
aibanezDrive:
As you configure more remotes, they will show up in that list.
We will create a list of files and directories and upload them to our Google Drive account using rclone. I need to remind you that we are currently playing with a non encrypted remote, so don’t choose any files you wouldn’t store unencrypted in the cloud. We will create the encrypted remote later.
Go to your desktop and create a few files there. I created a directory called ~/Desktop/Cards and I created this directory structure with files:
Cards
 - Sakura
   - The Mirror
   - The Fly
   - The Sword
   - The Arrow
 - Shaoran
   - The Time
   - The Storm
   - The Return
   - The Freeze
 - None.txt
Where Sakura and Shaoran are directories, and everything starting with The is a file. If you want to use this same directory structure, you can run this small bash script to create the files in the same location as mine:
mkdir ~/Desktop/Cards && cd ~/Desktop/Cards
mkdir Sakura Shaoran
touch Sakura/The\ Mirror
touch Sakura/The\ Fly
touch Sakura/The\ Sword
touch Sakura/The\ Return
touch Shaoran/The\ Time
touch Shaoran/The\ Storm
touch Shaoran/The\ Return
touch Shaoran/The\ Freeze
touch None.txt
Copying the Local Directory to Your Newly Created Google Drive Remote
The command to copy files and directories is very straight forward.
rclone copy LOCAL_DIRECTORY_OR_FILE REMOTE_DIRECTORY
This will copy LOCAL_DIRECTORY_OR_FILE to REMOTE_DIRECTORY. Fun little feature here is that rclone will skip everything that already exists in REMOTE_DIRECTORY by default, so you can use this command to do a very primitive version of incremental backups. For backups, I recommend you use the sync command instead, as it will mirror the LOCAL_DIRECTORY_OR_FILE exactly as it is on REMOTE_DIRECTORY. When you add files they will be added to the destination; when you change files they will be changed in the destination as well; when you delete files, they will also be deleted from the destination. Covering sync is outside the scope of this article, but keep in mind if you are interested in doing backups.
You can copy entire directories or single files only. rclone is very flexible in that aspect.
When you want to copy something to a remote, you write your remote name, followed by a :, and finally the path where you want to copy to.
Going back to the example we are building, rewrite the last command like this:
rclone copy ~/Desktop/Cards aibanezDrive:/Cards
Depending on your internet connection, it could take a while, but they are all small files so hopefully that’s not the case.
After running the command, rclone will give you a nice little report of how everything went.
Transferred:      0 Bytes (0 Bytes/s)
Errors:                 0
Checks:                 0
Transferred:            9
Elapsed time:       28.9s
Always check these stats after running rclone to ensure your destination is not missing any data. When rclone detects the same files on the destination as in the origin already, it will run a Check instead of uploading it directly. This will ensure that, if the files are the same, they are skipped. If the files are different, they will be overridden in the destination.
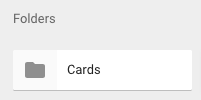
Login to your Google Drive account using your web browser. You will see the Cards directory at the root of your account.
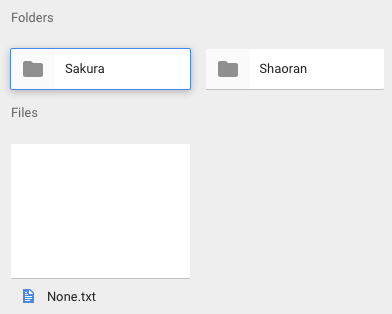
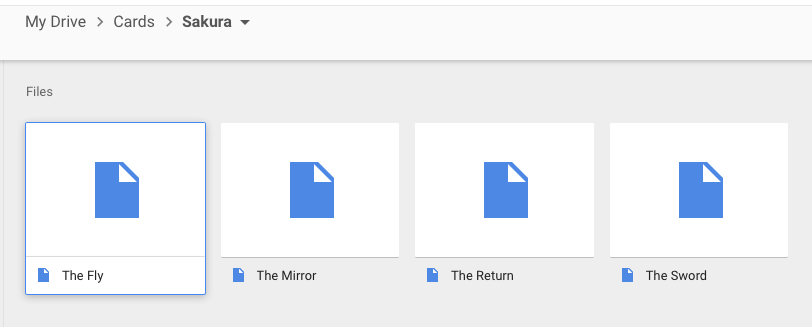
And if you go inside that directory, you will find your other directories and files.
Back on your terminal or console, you can type rclone lsd aibanezDrive:/Cards. This will list all the contents inside the Cards directory. If you do rclone ls aibanezDrive:/Cards instead, it will list all the contents instead. Be careful with this, because if you have a lot of data, ls can take a very long time to complete, as it will try to list every single file inside the specified path. You should prefer lsd over ls unless you understand how they are used.
Copying Files From Your Remotes to Your Local Filesystem
In the last section we copied local files to our remote. This time we will do it the other way around. Doing this is as easy as switching the source and destination around.
Go ahead and upload any file to your Google Drive account. I uploaded a file called “IMG_1434.JPG” and I uploaded it the root of my account. If I wanted to copy this file from my Drive account to my Local computer, inside the ~/Desktop/Cards directory using rclone, I’d use this command:
rclone copy aibanezDrive:/IMG_1434.JPG ~/Desktop/Cards
And don’t forget that you can use this to download single files or entire directories if you please.
Additional Commands
It’s beyond the scope of this article to talk about every single command and flag, but I thought I should mention a few of the most used ones.
rclone Supports a whole lot of commands as listed in their Documentation. Some useful ones are sync (it keeps a remote directory in sync with a local one), move, delete (remove the contents of a path), purge (remove a path and all its contents), ls (List all the objects in the specified path), lsd (list all the directories under the path), mkdir, and rmdir.
Some interesting flags you can use with your commands include but are not limited to --bwlimit, to limit the amount of bandwidth rclone will use, and --transfers to limit the amount of files that get transferred in batch.
Important Note!
It’s important to note that some commands and flags may not work or may behave differently based on what kind of remote you are using. The Storage Systems Overview page has a helpful table and a few notes for how commands may behave. There’s also a page for every supported remote that lists their quirks, features, and possible different behaviors for common commands.
Setting up Encryption with rclone
When we discussed what a remote means earlier, I said that a remote is a cloud account added to rclone. This is not strictly true, as there two notable exceptions to this.
There’s two remote types that don’t act as a cloud account. Instead, they sit “on top” of a normal remote to do their job. Said remotes are crypt and cache, and I just call them “special” remotes. We will only cover crypt in this article.
The crypt remote takes another remote name as part of its configuration. The crypt remote itself never touches the cloud directly. Instead, when you are uploading something, it encrypts the data, hands it over to the underlying remote, and this underlying remote will do the uploading on its behalf. Likewise, when you download something, crypt just requests the encrypted data to the underlying remote, which in turns gives the encrypted blobs to crypt, who will decrypt them. Everything crypt does is to encrypt and decrypt data, and the underlying remote does the actual downloading and uploading.
In this section, I will show you how the aibanezDrive remote we created earlier acts as the underlying remote for a new crypt remote we are about to create. Note that once you configure a crypt remote on top of a normal remote, you can still use both remotes normally, so be careful you choose the right remote when uploading, otherwise you might upload something sensitive unencrypted by default.
Creating a Crypt Remote
Before we create the new remote, delete the /Cards folder from your Google Drive (if you created it), as we will be using this same directory to show how crypt works.
We need to run rclone config again. Press n followed by Enter to create a new remote.
One thing I don’t like about rclone is that, when listing your remotes, you can’t see what underlying remote a crypt remote is using, so when prompted for the name, I recommend you choose one that can help you identify both the crypt and the underlying remote. I will be naming mine aibanezDrive_Crypt.
After the name, you will be asked for the Storage type. Choose 9 which is the crypt type.
You will now be prompted for the underlying remote. Remember, this is the remote that will do the actual uploading and downloading, so write the name of the remote where you want to store your encrypted data. In this case it’s aibanezDrive.
Remote to encrypt/decrypt.
Normally should contain a ':' and a path, eg "myremote:path/to/dir",
"myremote:bucket" or maybe "myremote:" (not recommended).
Enter a string value. Press Enter for the default ("").
remote> aibanezDrive:/Cards
A small discussion is in order here. First, the remote> we are using contains both the remote and a path (aibanezDrive:/Cards). A crypt remote can store it’s data in just a folder somewhere in the underlying remote, or it can use the entirety of it. You should configure a special folder to store the encrypted data in, because rclone will have problems dealing with the contents of a remote that has both encrypted and unencrypted data. In the example above, the underlying remote is aibanezDrive:, and the root folder for crypt is /Cards inside of it. This means that the crypt remote will not be able to write or read outside the /Cards directory. When you use Google Drive through the drive client, you will see the /Cards directory, but everything inside of it will be gibberish.
Next you will be asked if you want to encrypt the file names. Rclone can upload the filenames with their original names while encrypting their content. The choice is up to you, but I prefer to encrypt the file names. So write 2 followed by Enter.
How to encrypt the filenames.
Enter a string value. Press Enter for the default ("standard").
Choose a number from below, or type in your own value
 1 / Don't encrypt the file names.  Adds a ".bin" extension only.
   \ "off"
 2 / Encrypt the filenames see the docs for the details.
   \ "standard"
 3 / Very simple filename obfuscation.
   \ "obfuscate"
Important Note!
Some remote types can’t deal with very long file names or paths. Encrypting the files will make the file names longer as rclone stores metadata within the encrypted filename.
As a personal anecdote, when I used the Amazon Drive remote, there was a limitation to file length and I couldn’t nest my files very deeply because of it. I haven’t had any similar issues with Google Drive yet, but your mileage may very.
In general, if your file names are below 156 characters, you should be fine on all providers. Please refer to the crypt documentation to see if you can find any limitations with the file paths lengths with the remote types you intend on using.
You will now be asked if you want to encrypt directory names. Just like file names, you can leave them unencrypted. I prefer to encrypt them, but keep in mind that directory names are also longer when encrypted.
Press 1 followed by Enter.
Option to either encrypt directory names or leave them intact.
Enter a boolean value (true or false). Press Enter for the default ("true").
Choose a number from below, or type in your own value
 1 / Encrypt directory names.
   \ "true"
 2 / Don't encrypt directory names, leave them intact.
   \ "false"
directory_name_encryption> 1
Next you will be asked if you want to provide your own encryption password or have one generated by rclone. This is where you need to be careful. The password will be stored in a secure manner inside your config file. It’s very hard to retrieve the password from the config file later. Once the crypt remote has a password, you never have to worry about writing it down again as rclone will handle all that for you. For this reason, if you choose yes, you have to make sure you will never lose your password. If you choose generate, you have to be responsible and backup your rclone config file. You should always backup your config file regardless of what you choose, but if you chose y and you remember your password, you can recreate the remote and access your data in case you lose the original config. If you choose g and you lose your config file, you will never have access to the encrypted data ever again. So be careful here, and remember, backup, backup, backup!
Choose y to write your own password for now.
Password or pass phrase for encryption.
y) Yes type in my own password
g) Generate random password
n) No leave this optional password blank
y/g/n> y
You will be prompted twice for your password.
To complicate things a bit, you are given the option to generate a second password. The options are the same as above, as are the implications of each. I always choose y because I generate and keep this data stored in my password manager.
Password or pass phrase for salt. Optional but recommended.
Should be different to the previous password.
y) Yes type in my own password
g) Generate random password
n) No leave this optional password blank
y/g/n> y
Next you will be prompted if you want to use advanced config. Press n followed by Enter.
Finally rclone will print your newly created crypt remote info.
[aibanezDrive_Crypt]
type = crypt
remote = aibanezDrive:/Cards
filename_encryption = standard
directory_name_encryption = true
password = *** ENCRYPTED ***
password2 = *** ENCRYPTED ***
We are ready to use our new shiny remote.
Using a Crypt Remote
The nice thing about rclone is that once you have used a remote type, you have used them all. The syntax for the common commands such as copy does not change at all, whether you are using a Dropbox remote or a crypt remote. Run the following to upload the ~/Desktop/Cards directory once again, but this time with your crypt remote:
rclone copy ~/Desktop/Cards aibanezDrive_Crypt:/
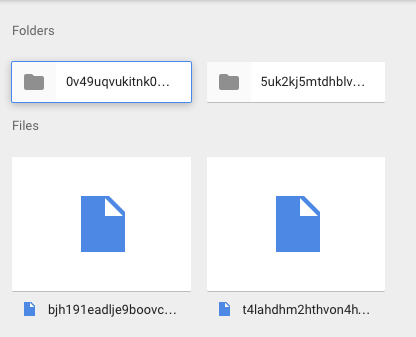
Now, open Google Drive in the web client and open the /Cards directory. You will see the right amount of folders and files, but their filenames are complete gibberish and even their contents are encrypted.
Now the only way to access these files is with rclone. rclone knows how to do the right thing. List the remote’s contents:
rclone ls aibanezDrive_Crypt:/
Andys-iMac:Cards andyibanez$ rclone ls aibanezDrive_Crypt:/
   358768 IMG_1434.JPG
        0 None.txt
        0 Shaoran/The Freeze
        0 Shaoran/The Return
        0 Shaoran/The Storm
        0 Shaoran/The Time
        0 Sakura/The Sword
        0 Sakura/The Mirror
        0 Sakura/The Return
        0 Sakura/The Fly
And rclone will show you the decrypted filenames for you.
If you use copy to copy from the crypt remote to your computer, rclone will decrypt the files and their names. rclone’s encryption method is really transparent, and you never have to concern yourself with the details of how it’s done.
rclone copy aibanezDrive_Crypt:/Sakura ~/Desktop/restored
Conclusion
rclone is a great tool to interact with cloud storage services from the command line. It’s encryption support is transparent and very easy to use. As long as you keep a backup of your rclone.conf file, you will never lose access to your encrypted files.
Where to Go From Here
Once you are familiar with rclone, I recommend you explore the Official Site of the project so you can learn more advanced tasks you can do. Take some time to explore the documentation to learn how to use other commands, as well as how to use certain flags with certain commands. A particular command I use a lot is sync with the --log-file and --backup-dir flags. This allows me to check that all files were synced properly to the remote, and to move the ones that were different or deleted someplace else instead of outright removing them (for incremental backups). But there’s much more you can do, and the only way to learn all the power of rclone is to browse the documentation and play around with it. In the future, I may share my backup strategies with rclone to give you ideas how you can use this amazing tool.