
Intercepting iOS Network Request Calls with Proxyman
Working with network APIs can be tricky, especially when debugging. You oftentimes have to ask yourself if your app is sending and receiving the expected information. You also often worry about whether the web service returns whatever it promises it will return. Working with APIs is both easy and tricky due to all the implications behind the scenes. What happens if the service goes down and sends unexpected responses? Or if your app loses internet connection? Using a proxy to intercept network calls will help us answer these questions.
Full Disclosure
I was reached out by the team at Proxyman and they gave me a full year license. In turn I’d write at least one article about the program.
I think that proxy tools are important, and while we have some established tools, I genuinely like Proxyman.
If you need to intercept network calls and you can’t or don’t want to pay, there are some alternatives available. Including mitmproxy, for which I have an article on here. mitmproxy is a free and open source alternative to Proxyman. I personally find Proxyman easier to use, but mitmproxy is not a bad alternative by any means.
On andyibanez.com, I make the promise to disclose whenever I have been asked to write about a certain product, and I will only write about said product if I like it. I also make the promise that, shall this become a more common occurrence in the future, my website will see two new posts weekly: One post for the product, and my usual weekly article.
Installing Proxyman
Proxyman is available through Homebrew, so if you already have Homebrew installed, you simply need to type the following in a Terminal window:
brew install proxyman
Otherwise you can get it from here.
Setting up
When you launch Proxyman, you will see a window that shows all the network calls going on in your system. We will first set it up to work with the iOS Simulator.
For this article, I will be proxying my own app, Next Anime Episode. Feel free to use your own app, or you can use this one when install it on your phone.
In this case of Next Anime Episode, we will intercept calls that come from the Anilist domain.

The basic use for a proxy tool like this is we want to observer the requests we do, and the requests we make. To the bottom-left we have views where we can choose if we want to see our headers sent, our requests, or the server responses.
Because the app is using HTTPS, we cannot observer any traffic yet. To the bottom-right we will have the options to enable proxying, either all the domains of the app, or just that specific domain.
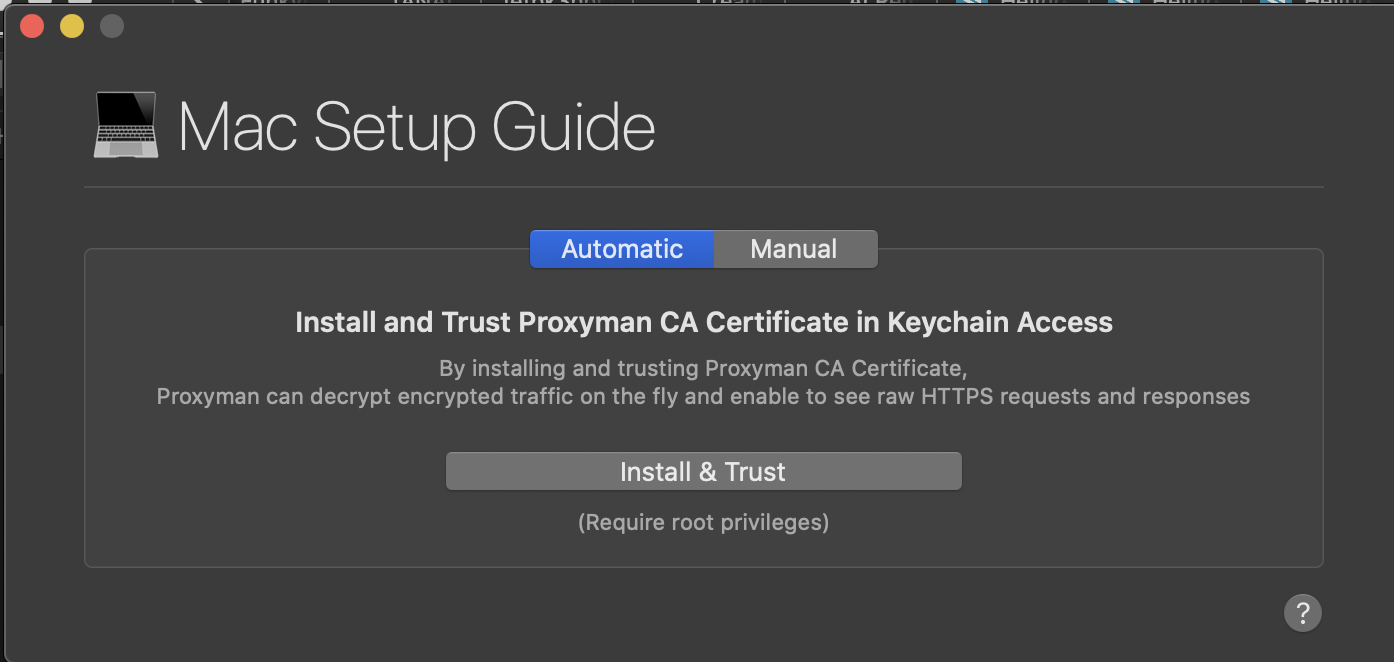
Once you click either button you will be prompted to install and trust Proxyman’s certificate. This is necessary in order to decrypt HTTPS traffic. Do note that Proxyman cannot intercept calls when dealing with certificate pinning. There is no tool that can currently do this.
Once you install the certificate, proxyman will prompt you to run the request again. Simply repeat an action on the app that would trigger a request.
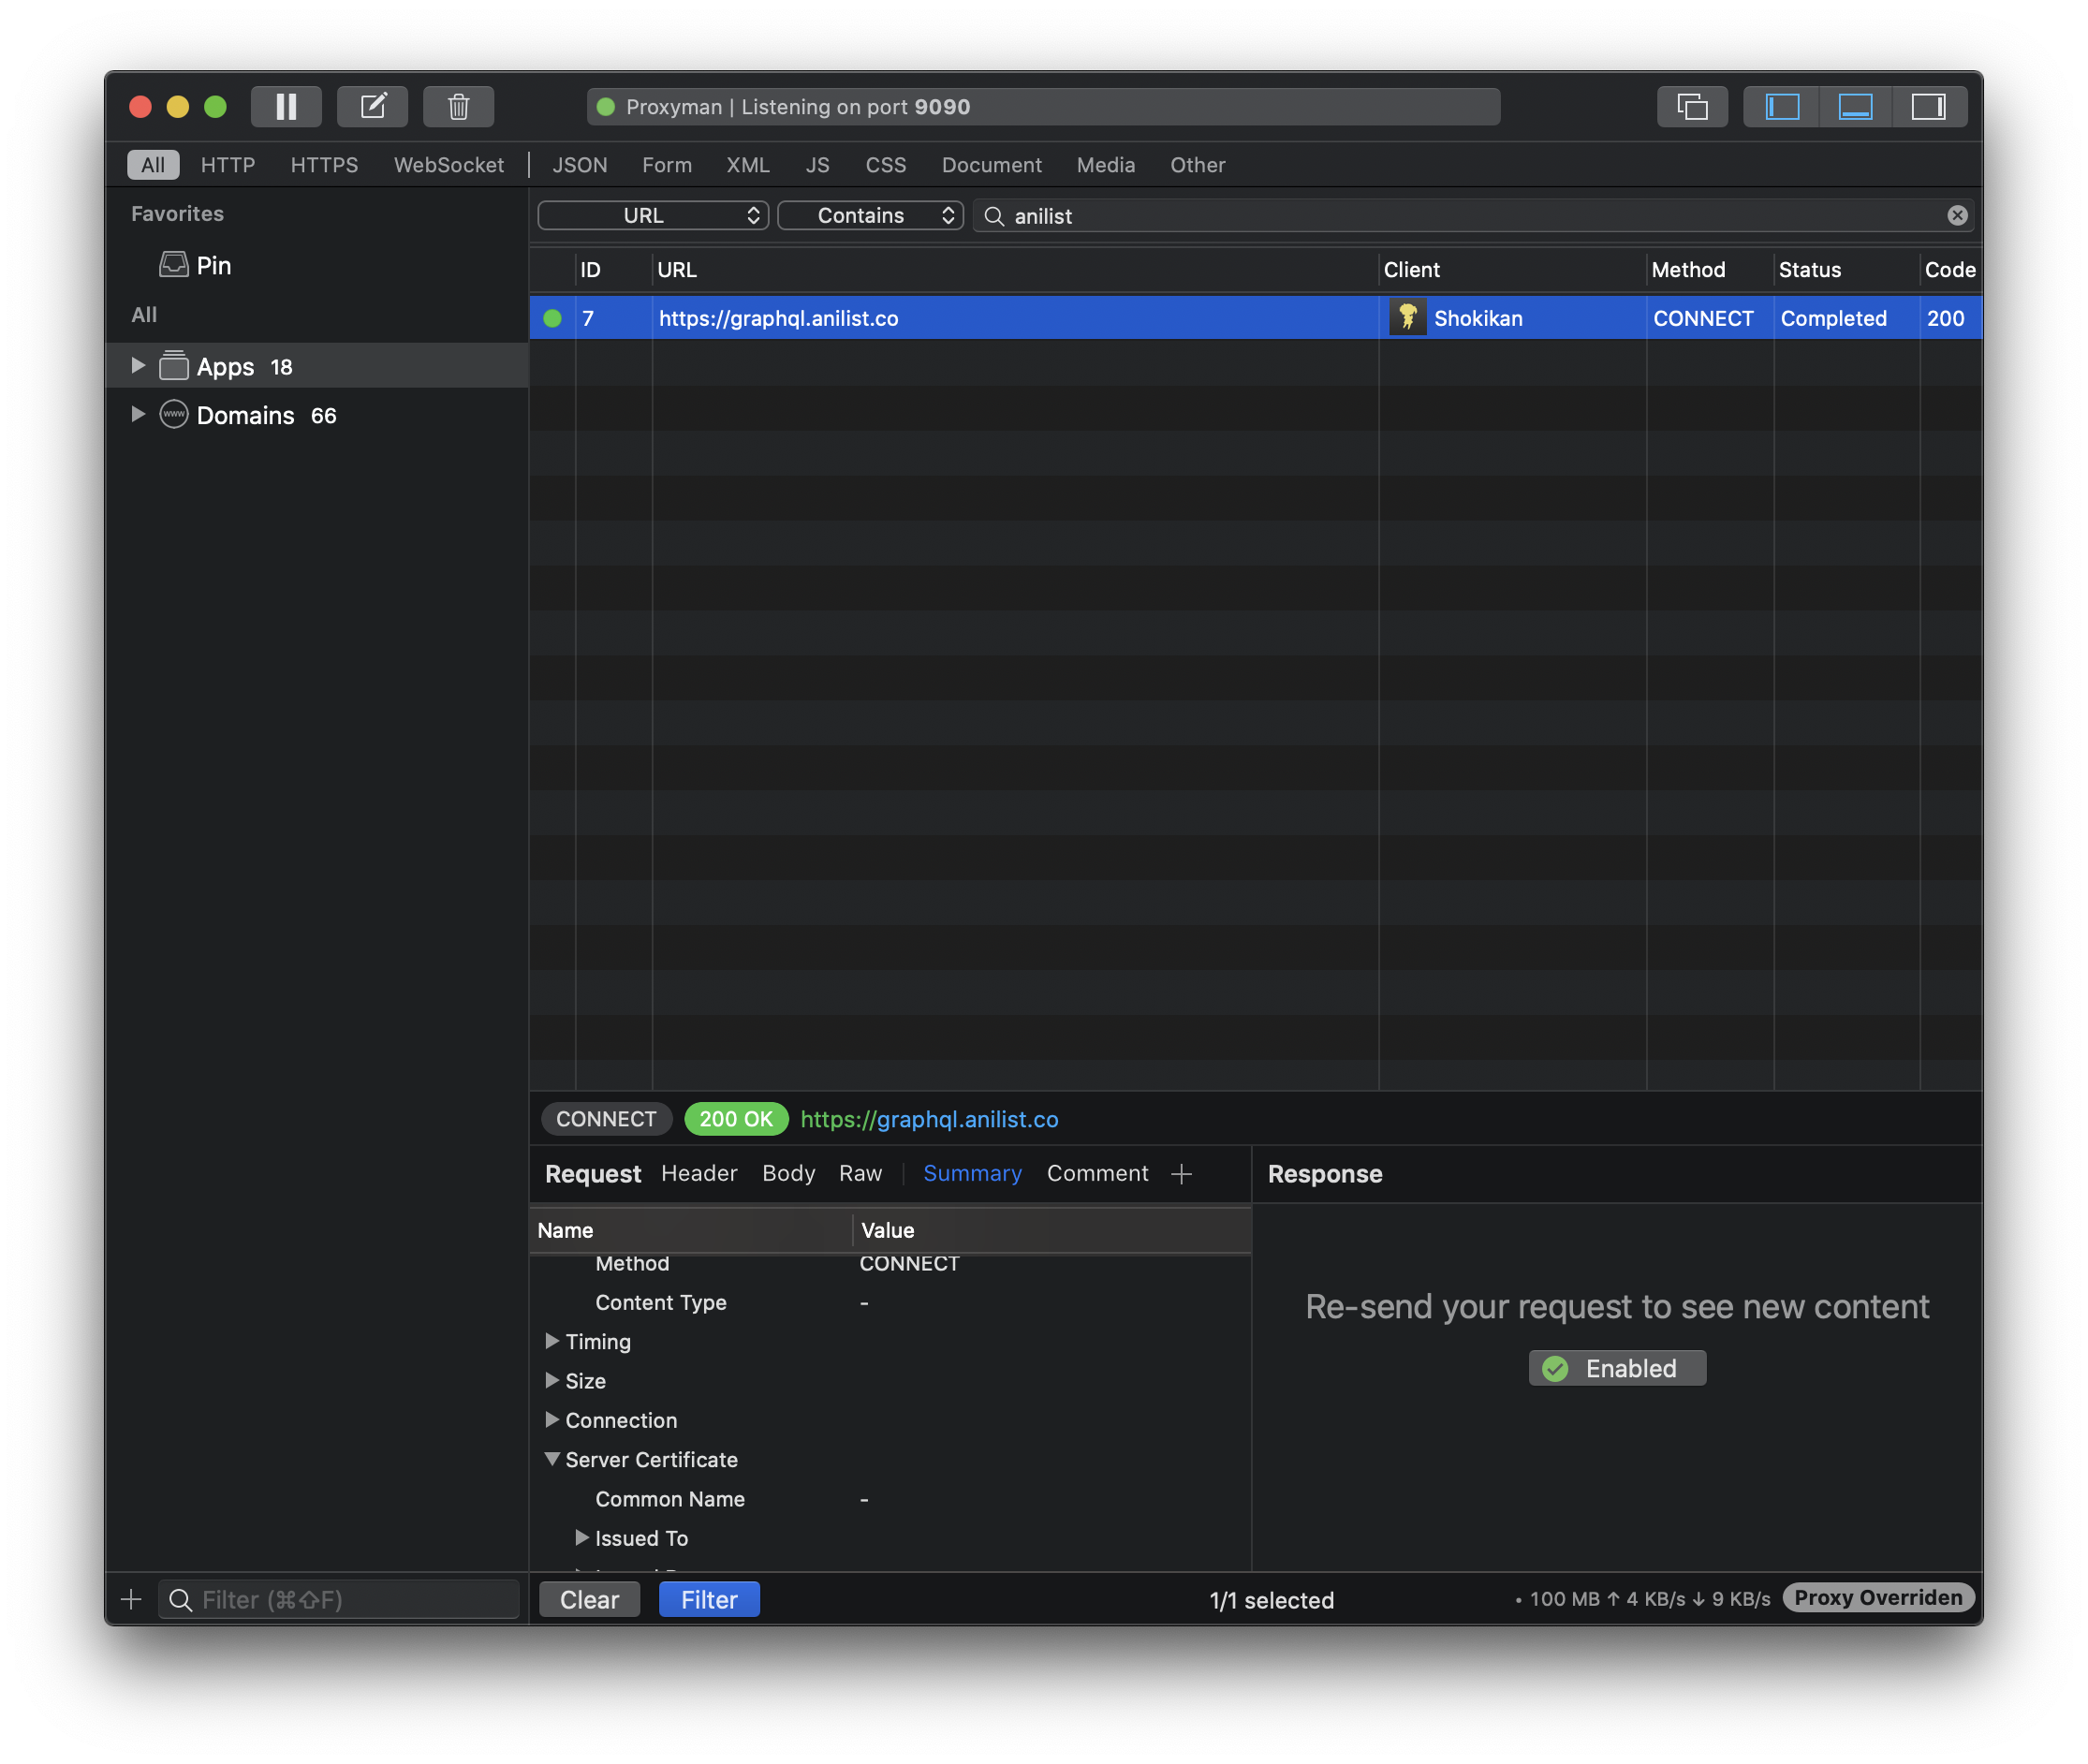
Once you re-run the request, you will find that you are not quite ready yet. Now the app will refuse to run as it (rightfully) thinks someone else is trying to act as them. To fix this, we now need to install the matching key on the simulators. Open the request you just re-did and look to the bottom-right.
Proxyman automatically knows the request came from the simulator. Click the “Install Certificate” button to show a window where you can install the certificate on the simulators with a simple click.

We are almost done. Click the “Reset iOS Simulators” button. Next time when they launch, the certificate will be installed, and you will be able to intercept networking calls.
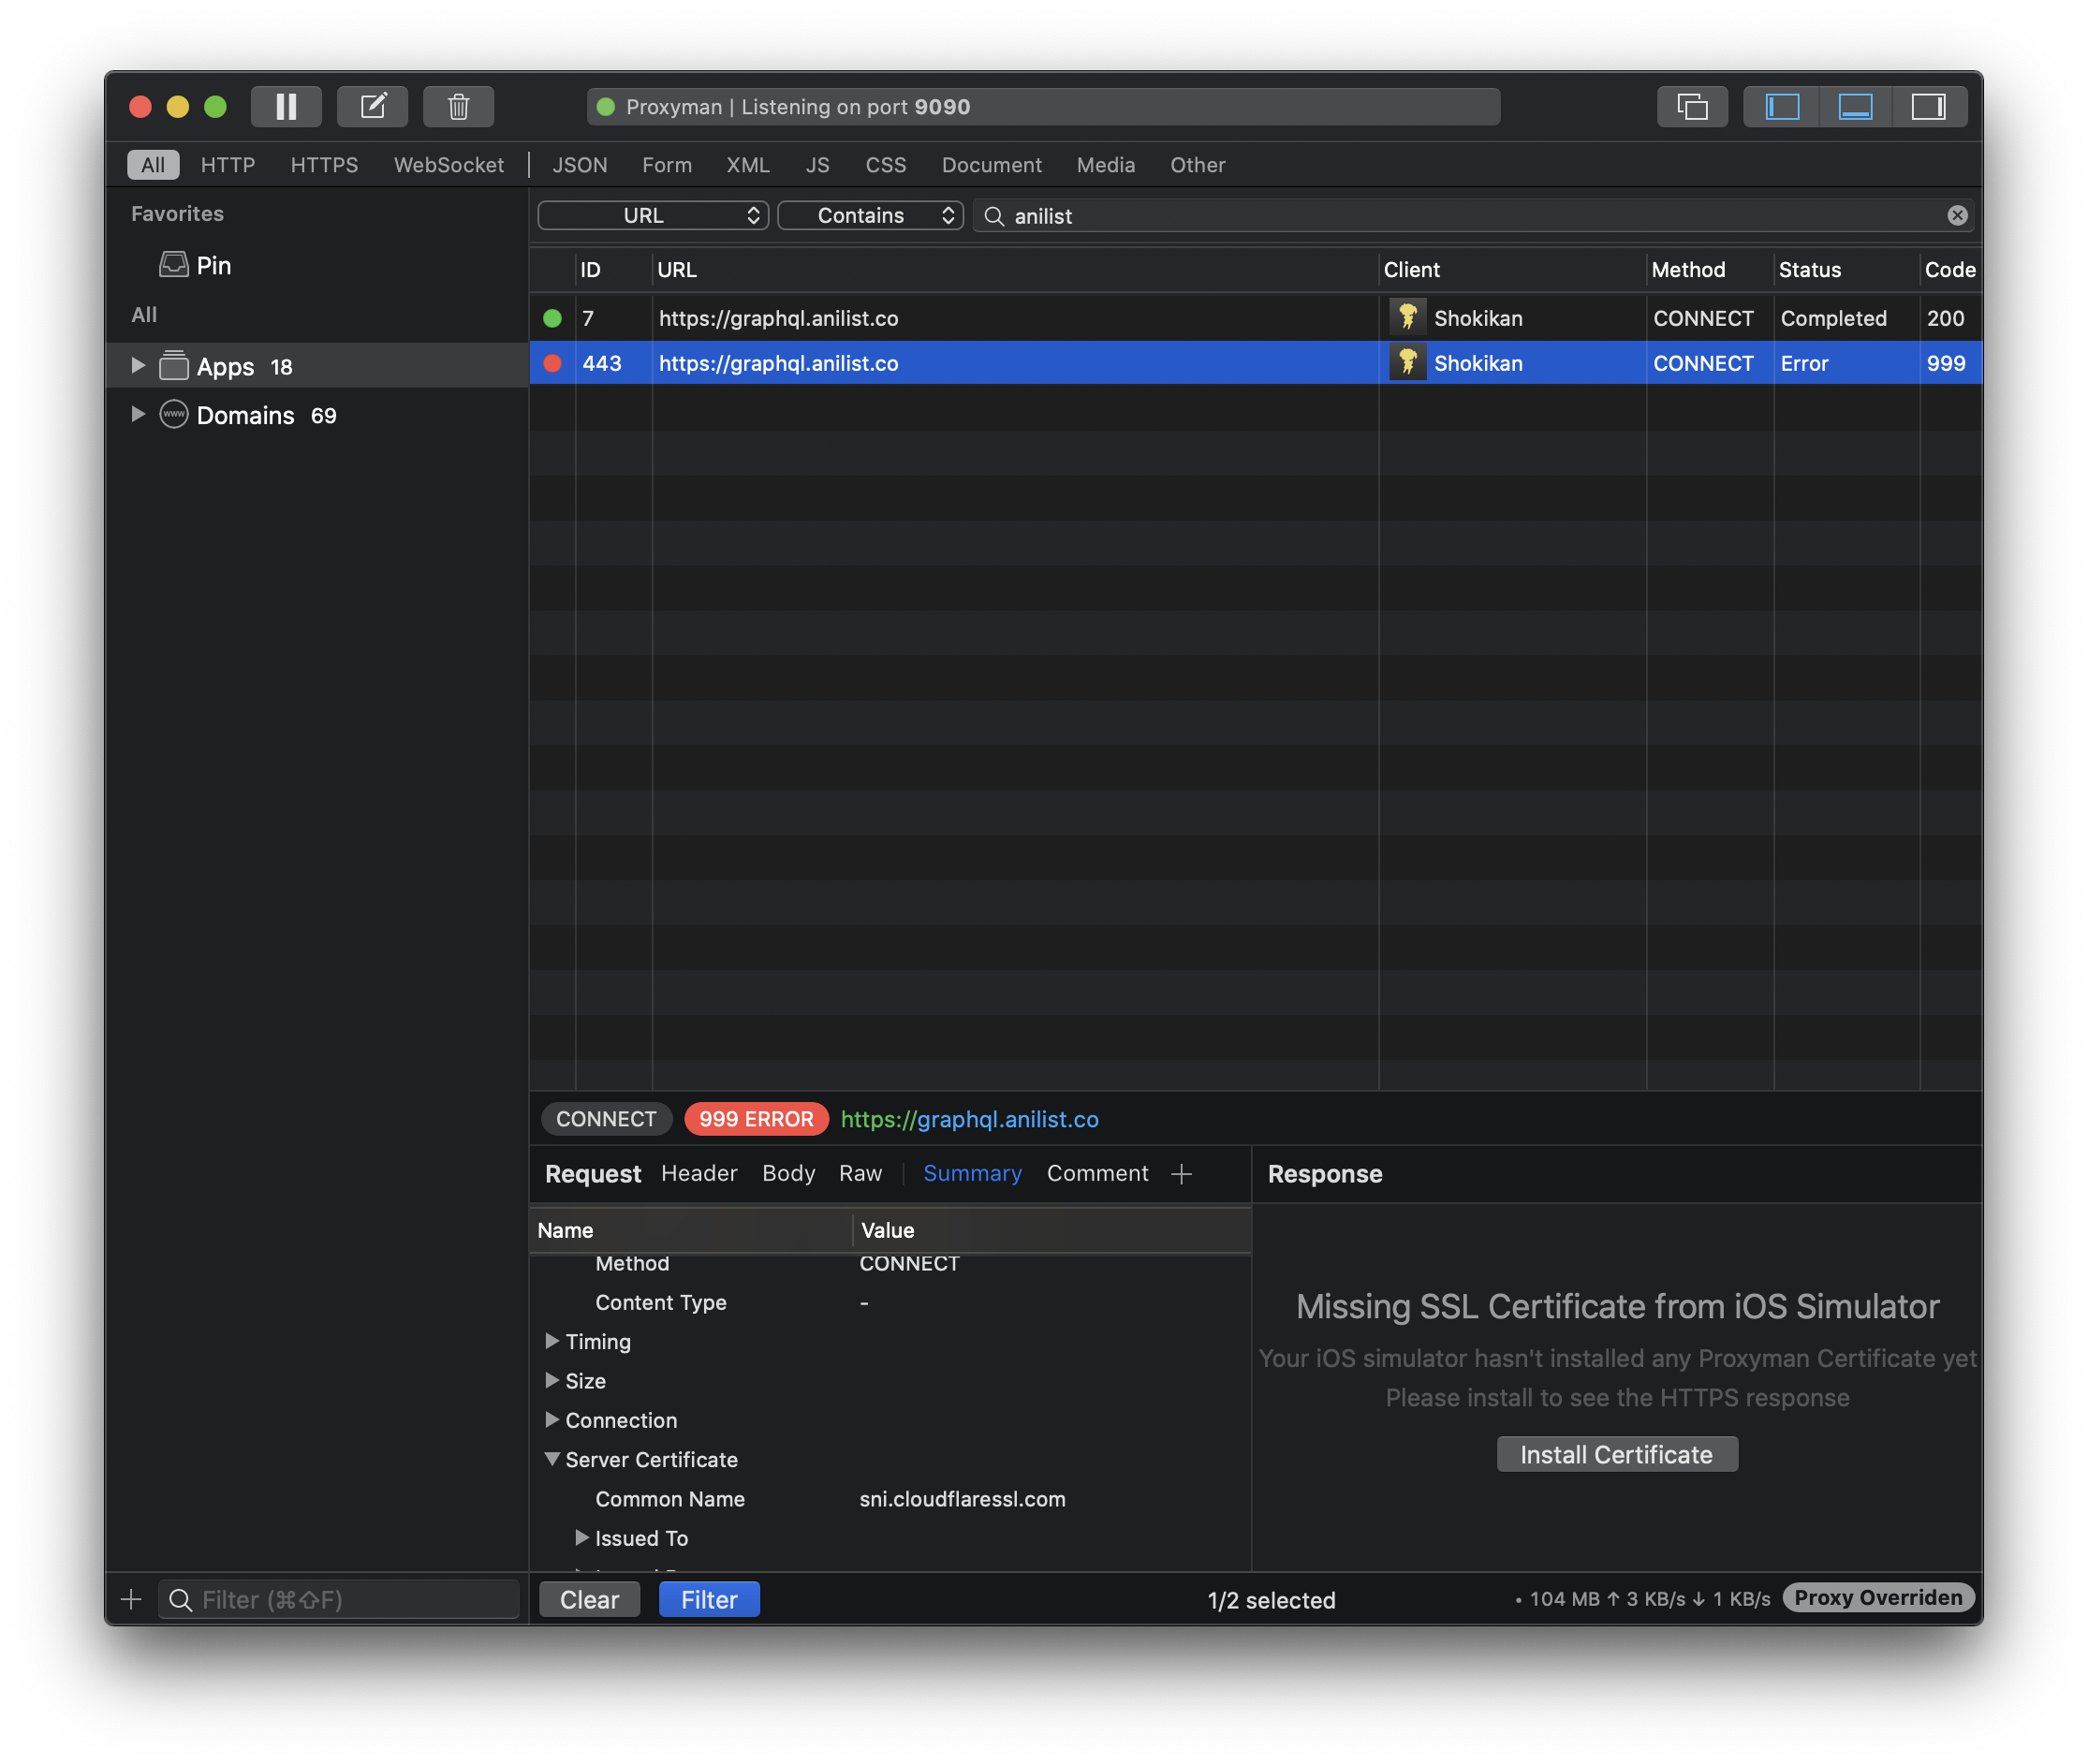
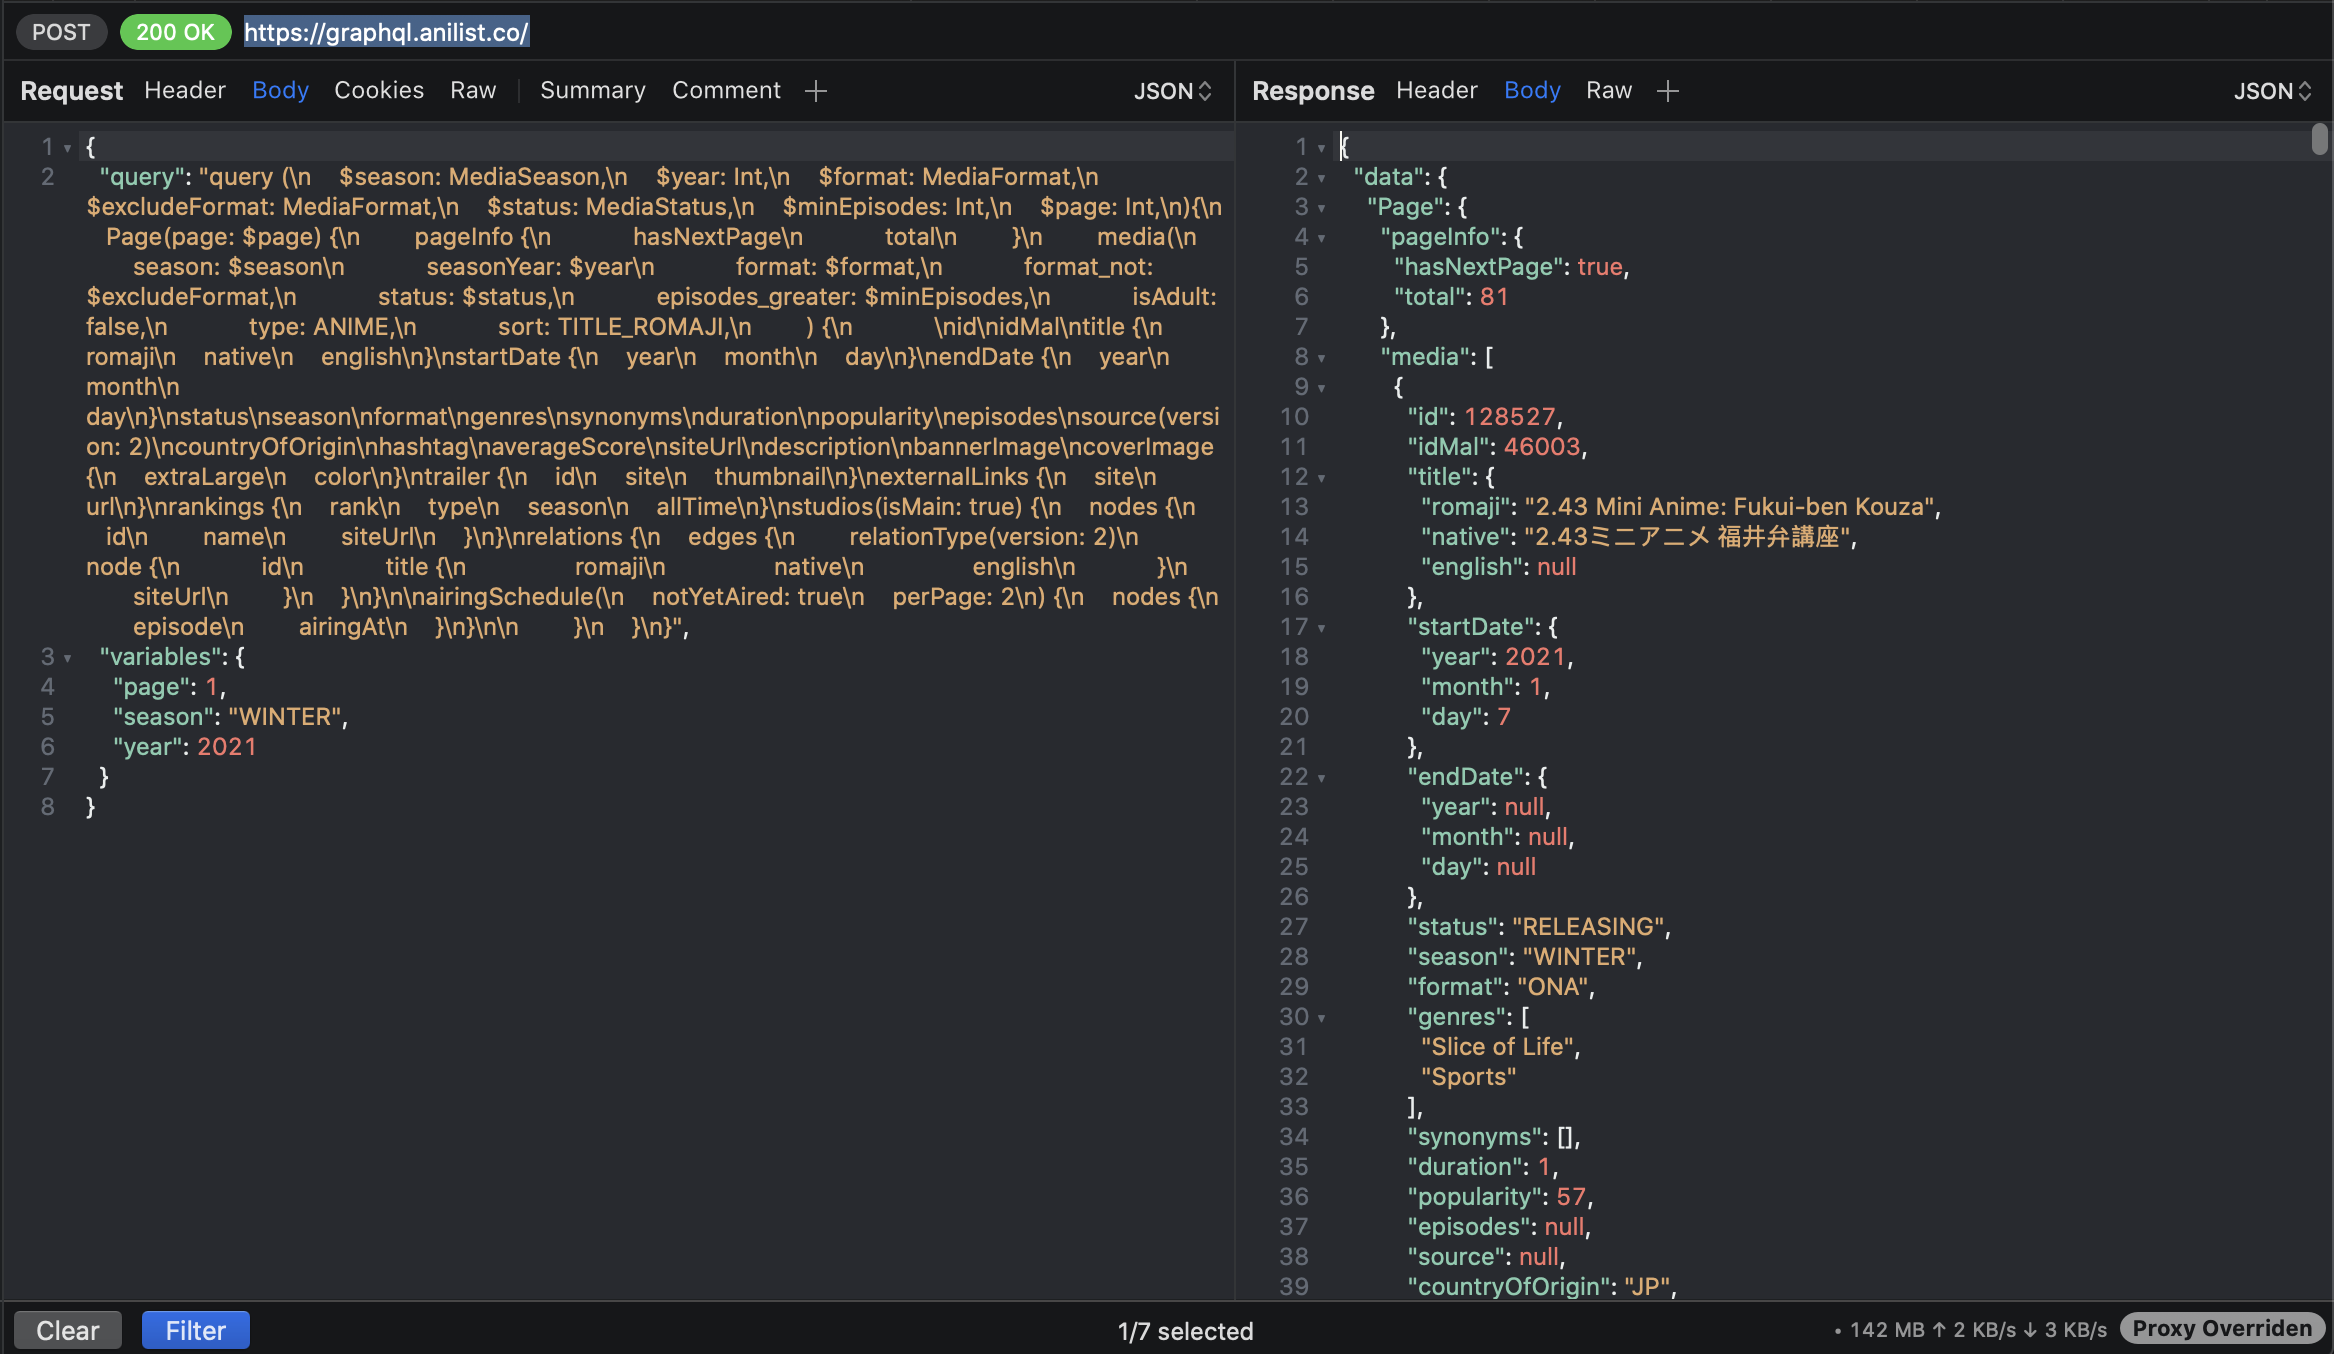
Now relaunch a request, and take a look at the panel below. Finally, some data!
Advanced Features
Proxyman offers some features that makes it very valuable when it comes to debugging networking. They are very easily accessible and easy to use.
Repeat and Edit and Repeat
The most basic advanced feature is repeating a request. When you are debugging and working with your backend team at the same time, it could be useful to repeat a request without having to relaunch your app.
To Repeat a request, go the Flow menu or press Cmd + Enter. This will repeat the request you have highlighted with no modifications whatsoever.
You can also Edit and Repeat a request (Flow menu or Option + Cmd + Enter). You will get a window where you can edit your request. If your API does not send JSON, you can also choose to show Form instead of text.
This is a very useful feature. For my particular job, and when dealing with private APIs in general, this allows me to write stronger code for my requests and find requests that prevent me from bombing the server.
Worth nothing you can edit everything about the request, including the header, so you can use this feature when experimenting with an API for the first time.
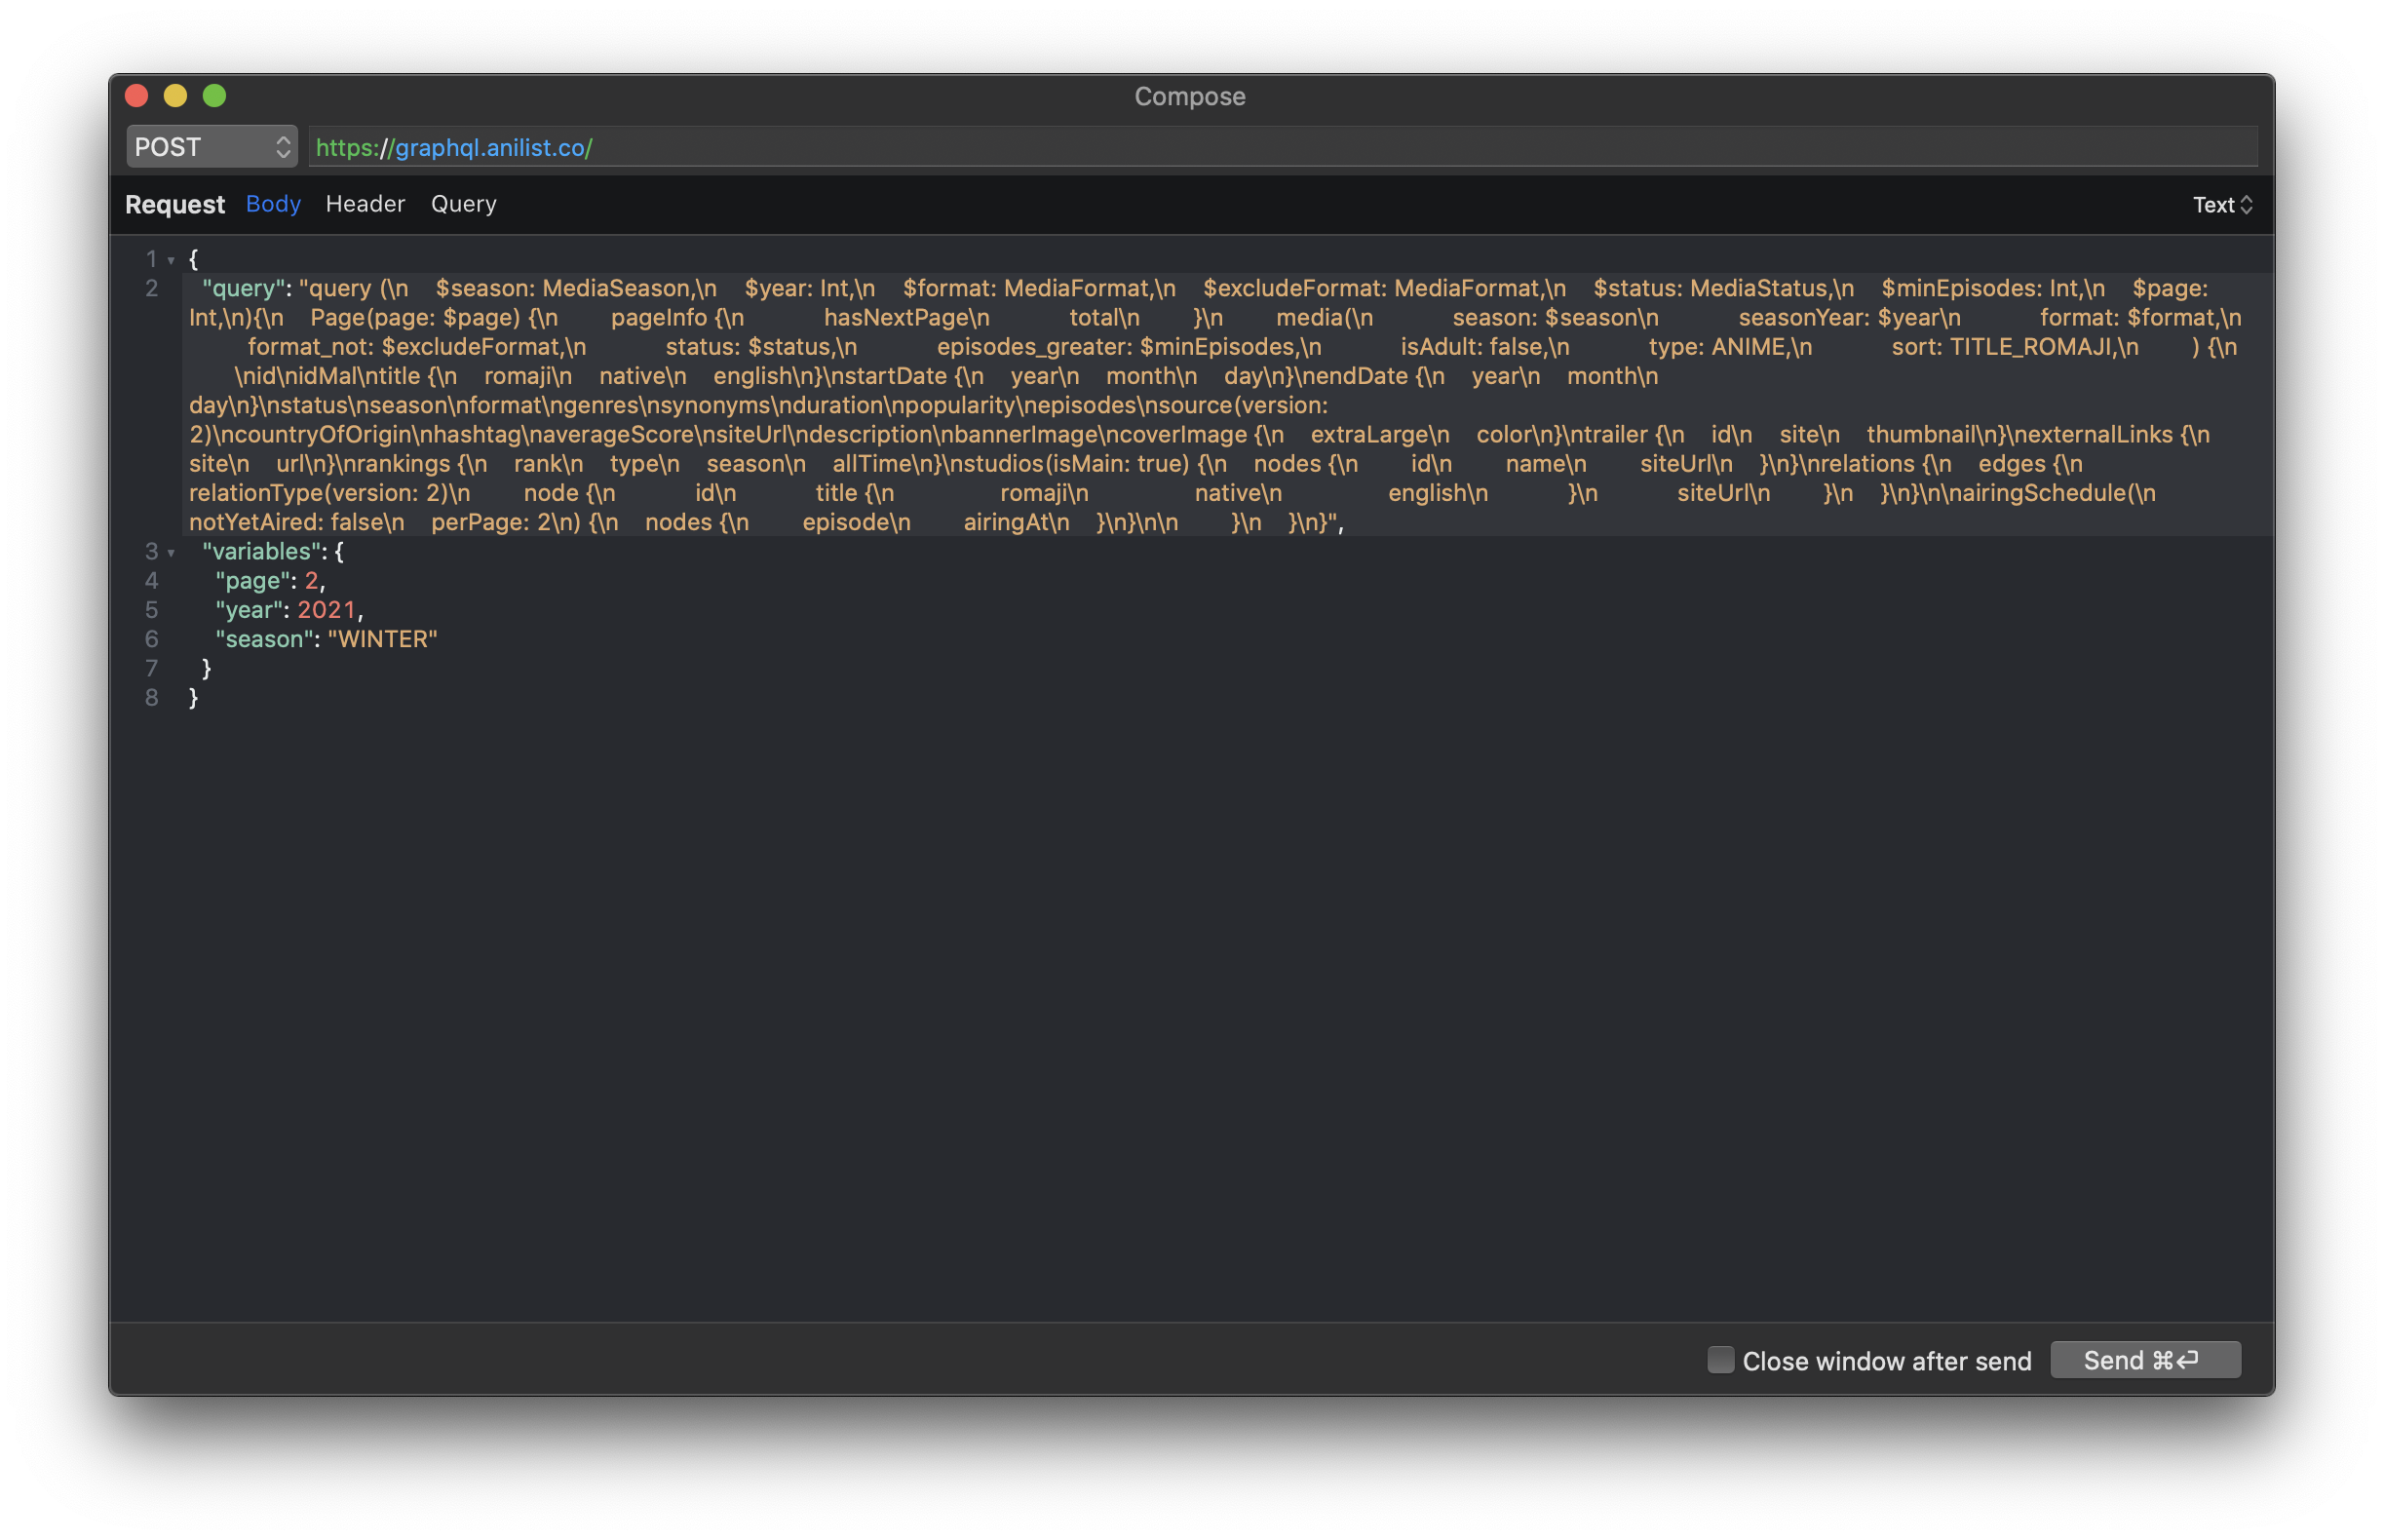
Similar to editing, you can compose new requests from scratch, by going to Tools > Compose. This will show window very similar to the Edit and Repeat one, and you will be able to compose a request from scratch.
Breakpoints
One final handy feature I want to talk about are breakpoints. If you are debugging with traditional iOS app debugging, you know breakpoints. They work the same way.
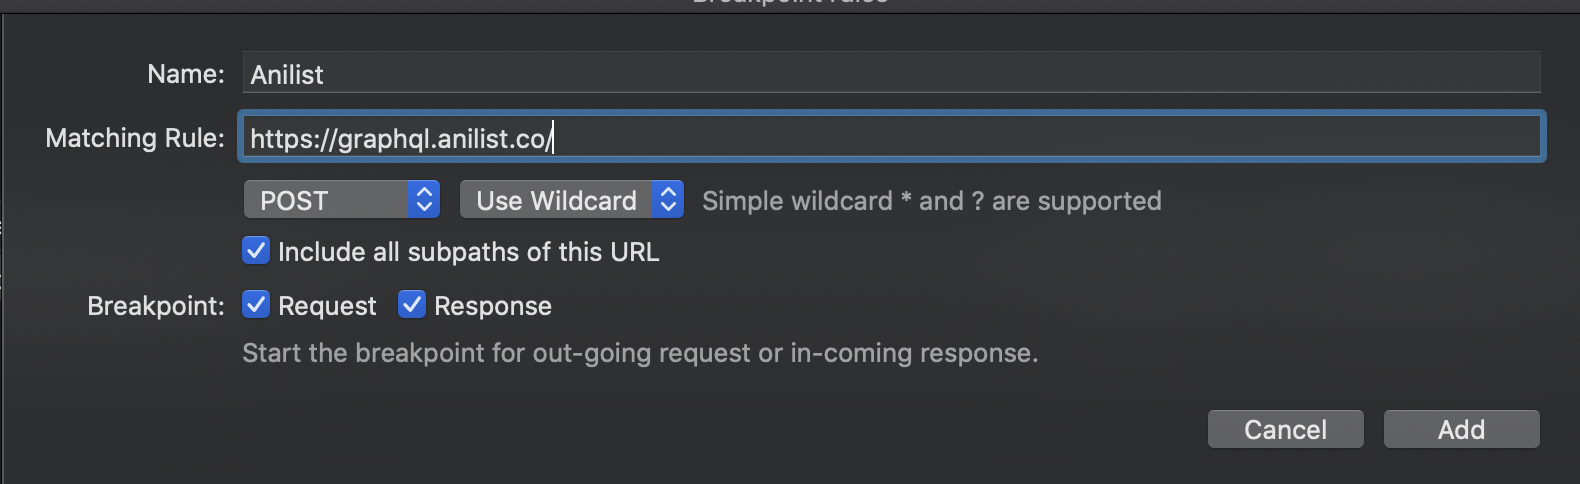
With Proxyman, you can set breakpoints on certain URLs with paths, you can choose what HTTP method should trigger it, and whether it should trigger for Requests, Responses, or both. To use the breakpoints feature, go to Tools > Breakpoints > Rules, and click +.
The specific API I use on Next Anime Episode is a GraphQL API, so there’s only one URL I can interact with.
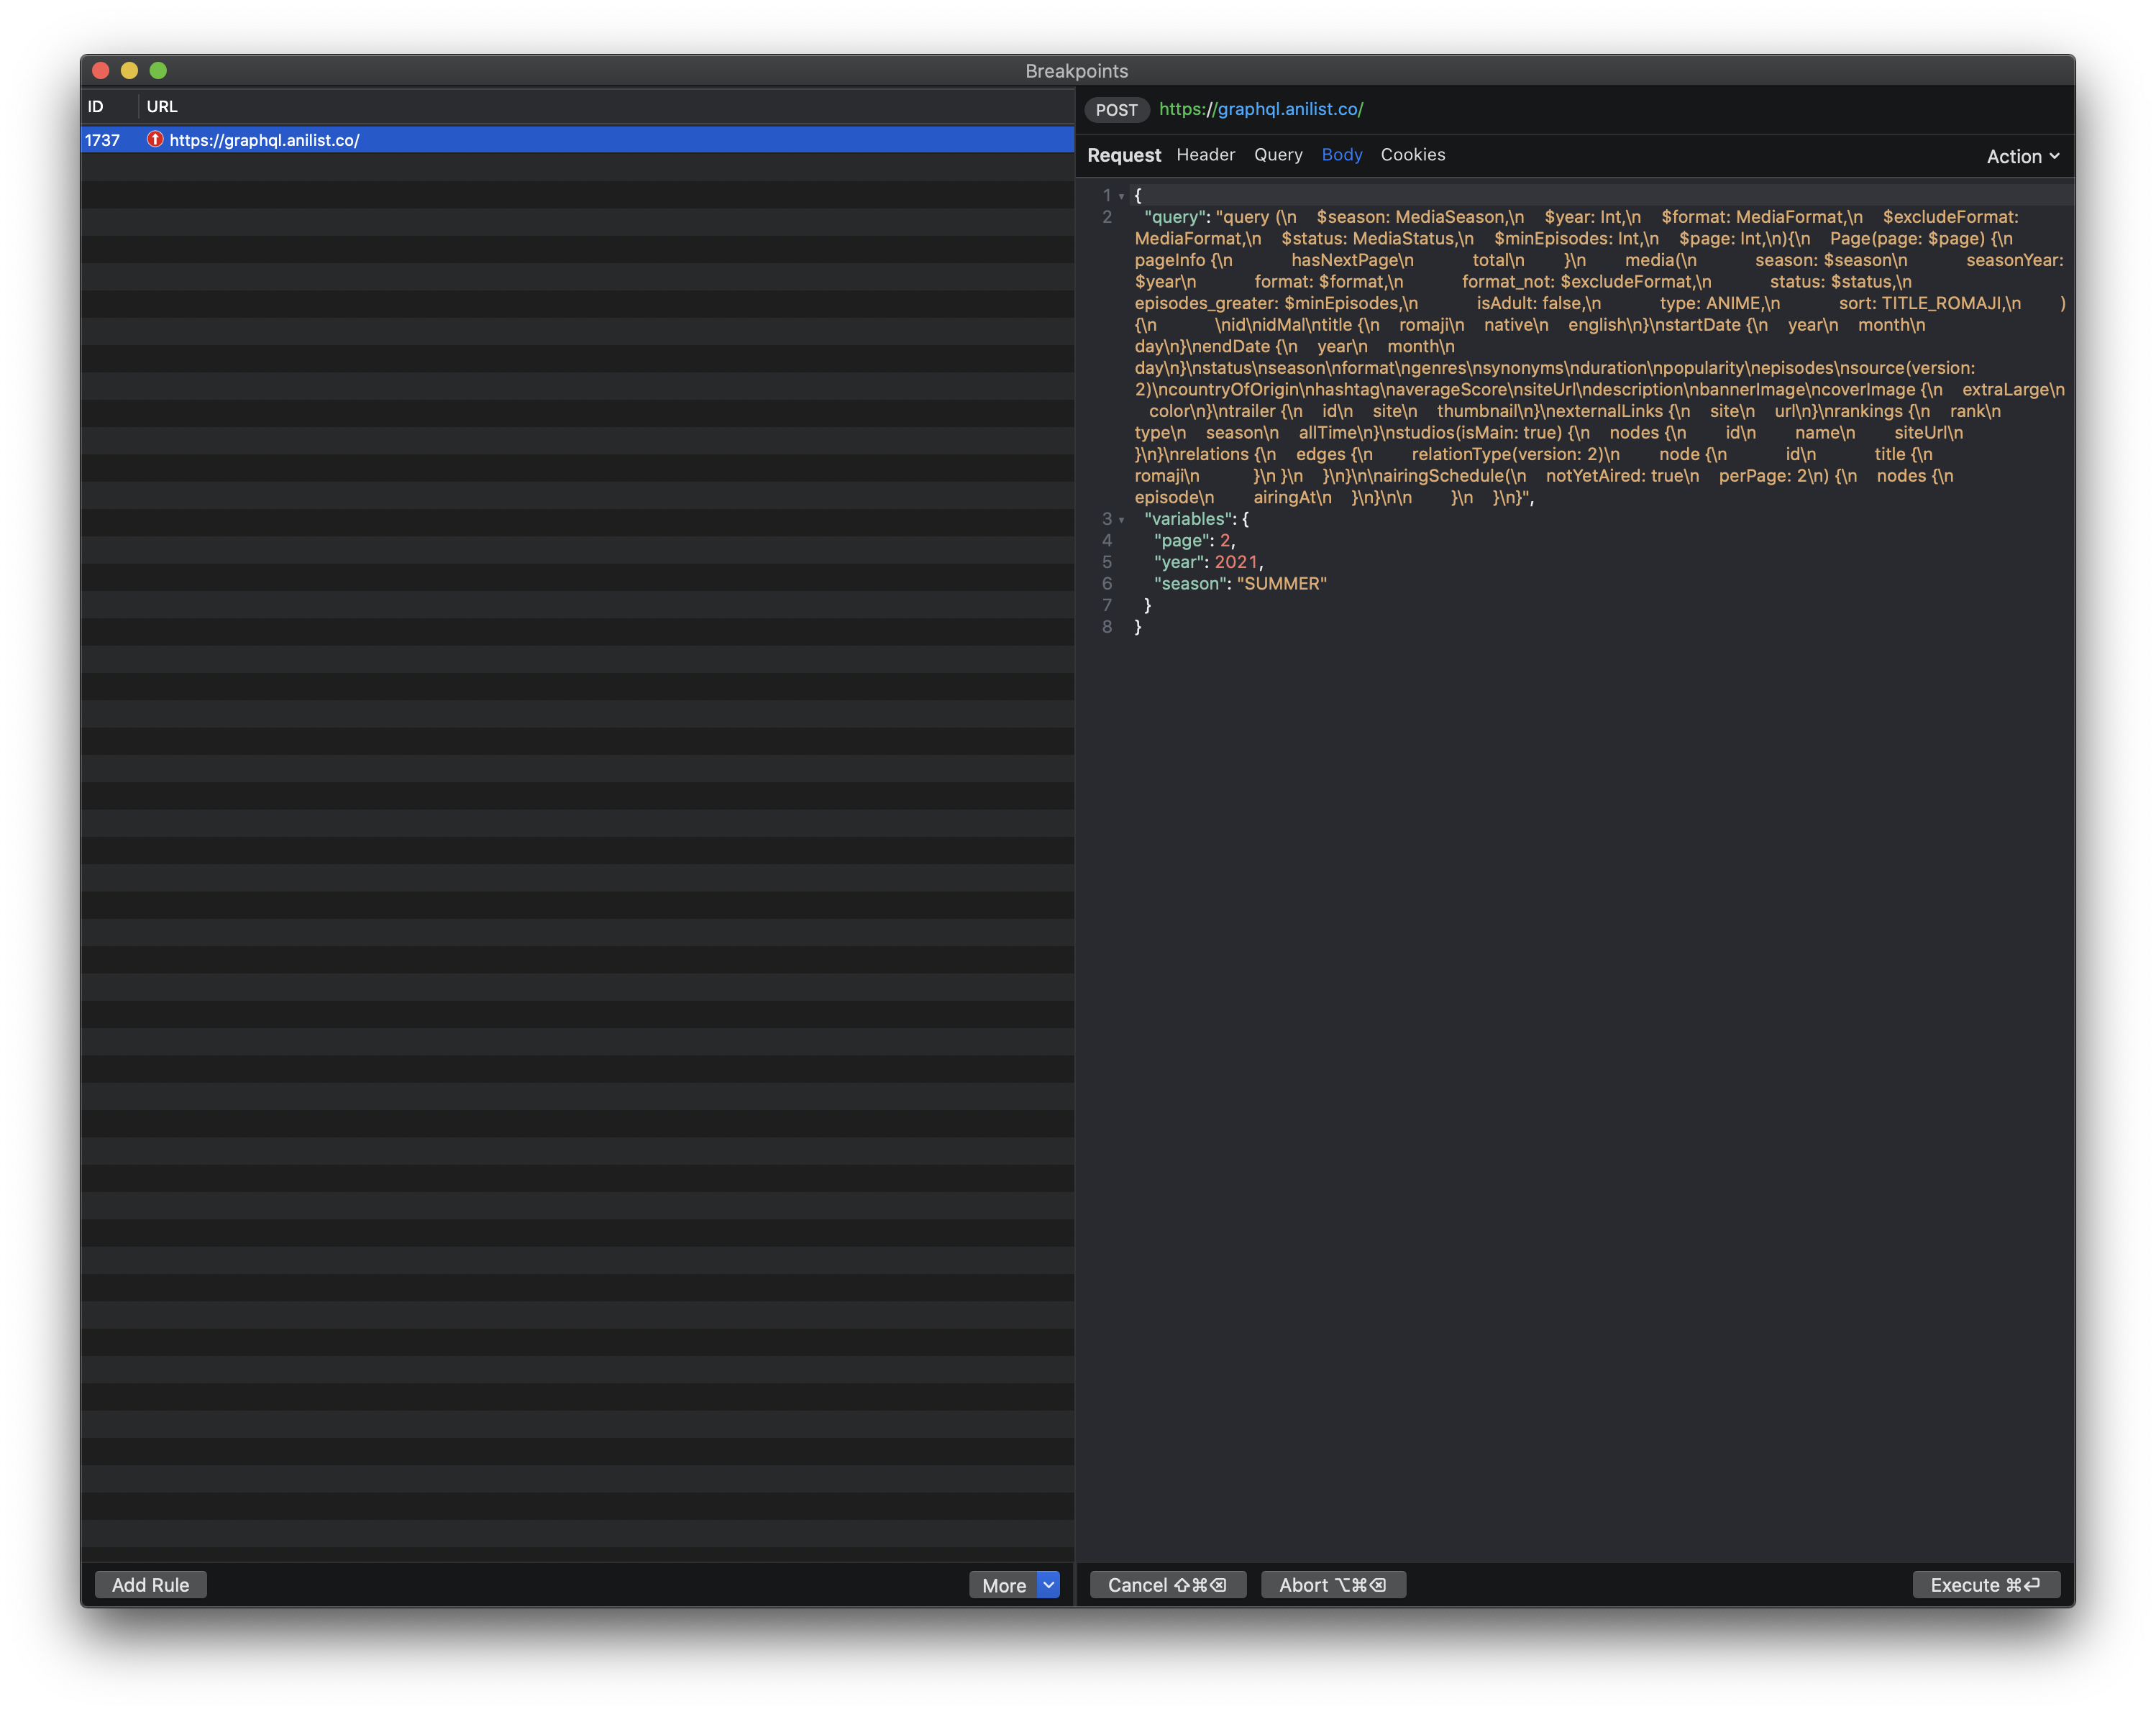
When a breakpoint is hit, you can edit it the contents. Whether you chose the breakpoint to be triggered on requests or responses, you can edit it before sending it off to its destination.
When a breakpoint is hit, you will see the Breakpoints screen, and you will be able to edit your requests immediately.
Editing responses works the same way. Editing responses is useful as you can modify a response before it hits its destination. This is useful when debugging on an actual device.
Setting up a Physical iOS Device
Proxyman allows you to use your physical device. You can configure your device to point to a proxy on your Mac running a Proxyman instance and inspect and modify all and any traffic sent from and meant to your phone.
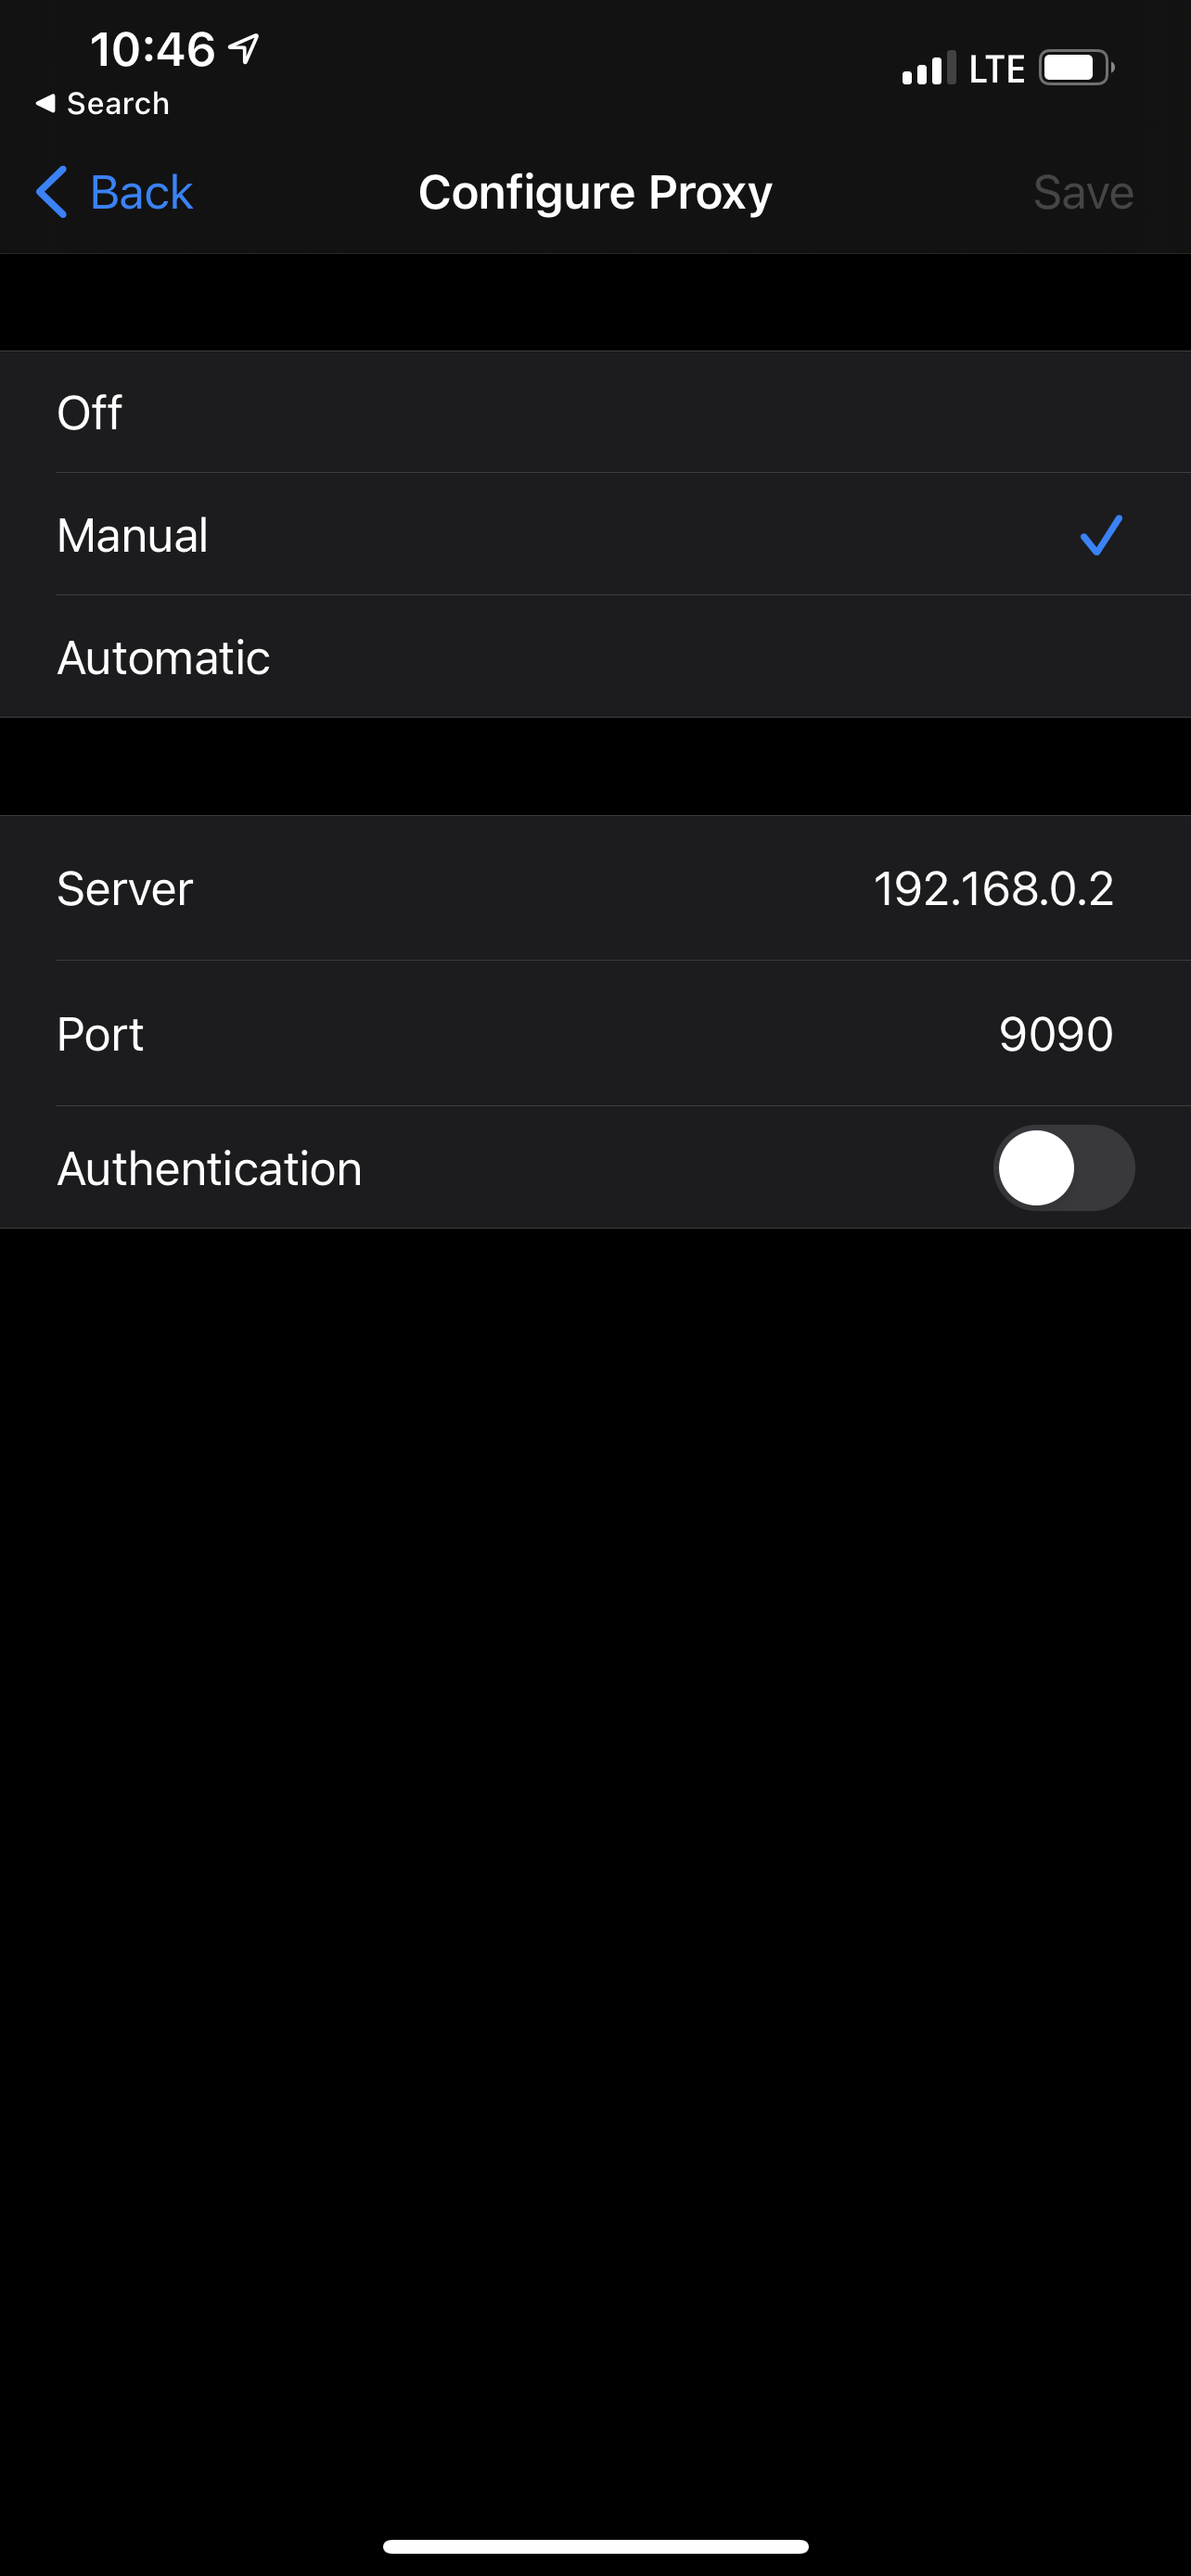
To do the setup, make sure both your Mac and device are connected to the same network. Then, configure your phone’s WiFi to use the proxy by pointing the Proxy settings to YOUR_MAC_IP:9090, where YOUR_MAC_IP is the IP address for your Mac and 9090 is the default port for Proxyman. Note that you can change the port used by Proxyman by going to Proxyman > Preferences.
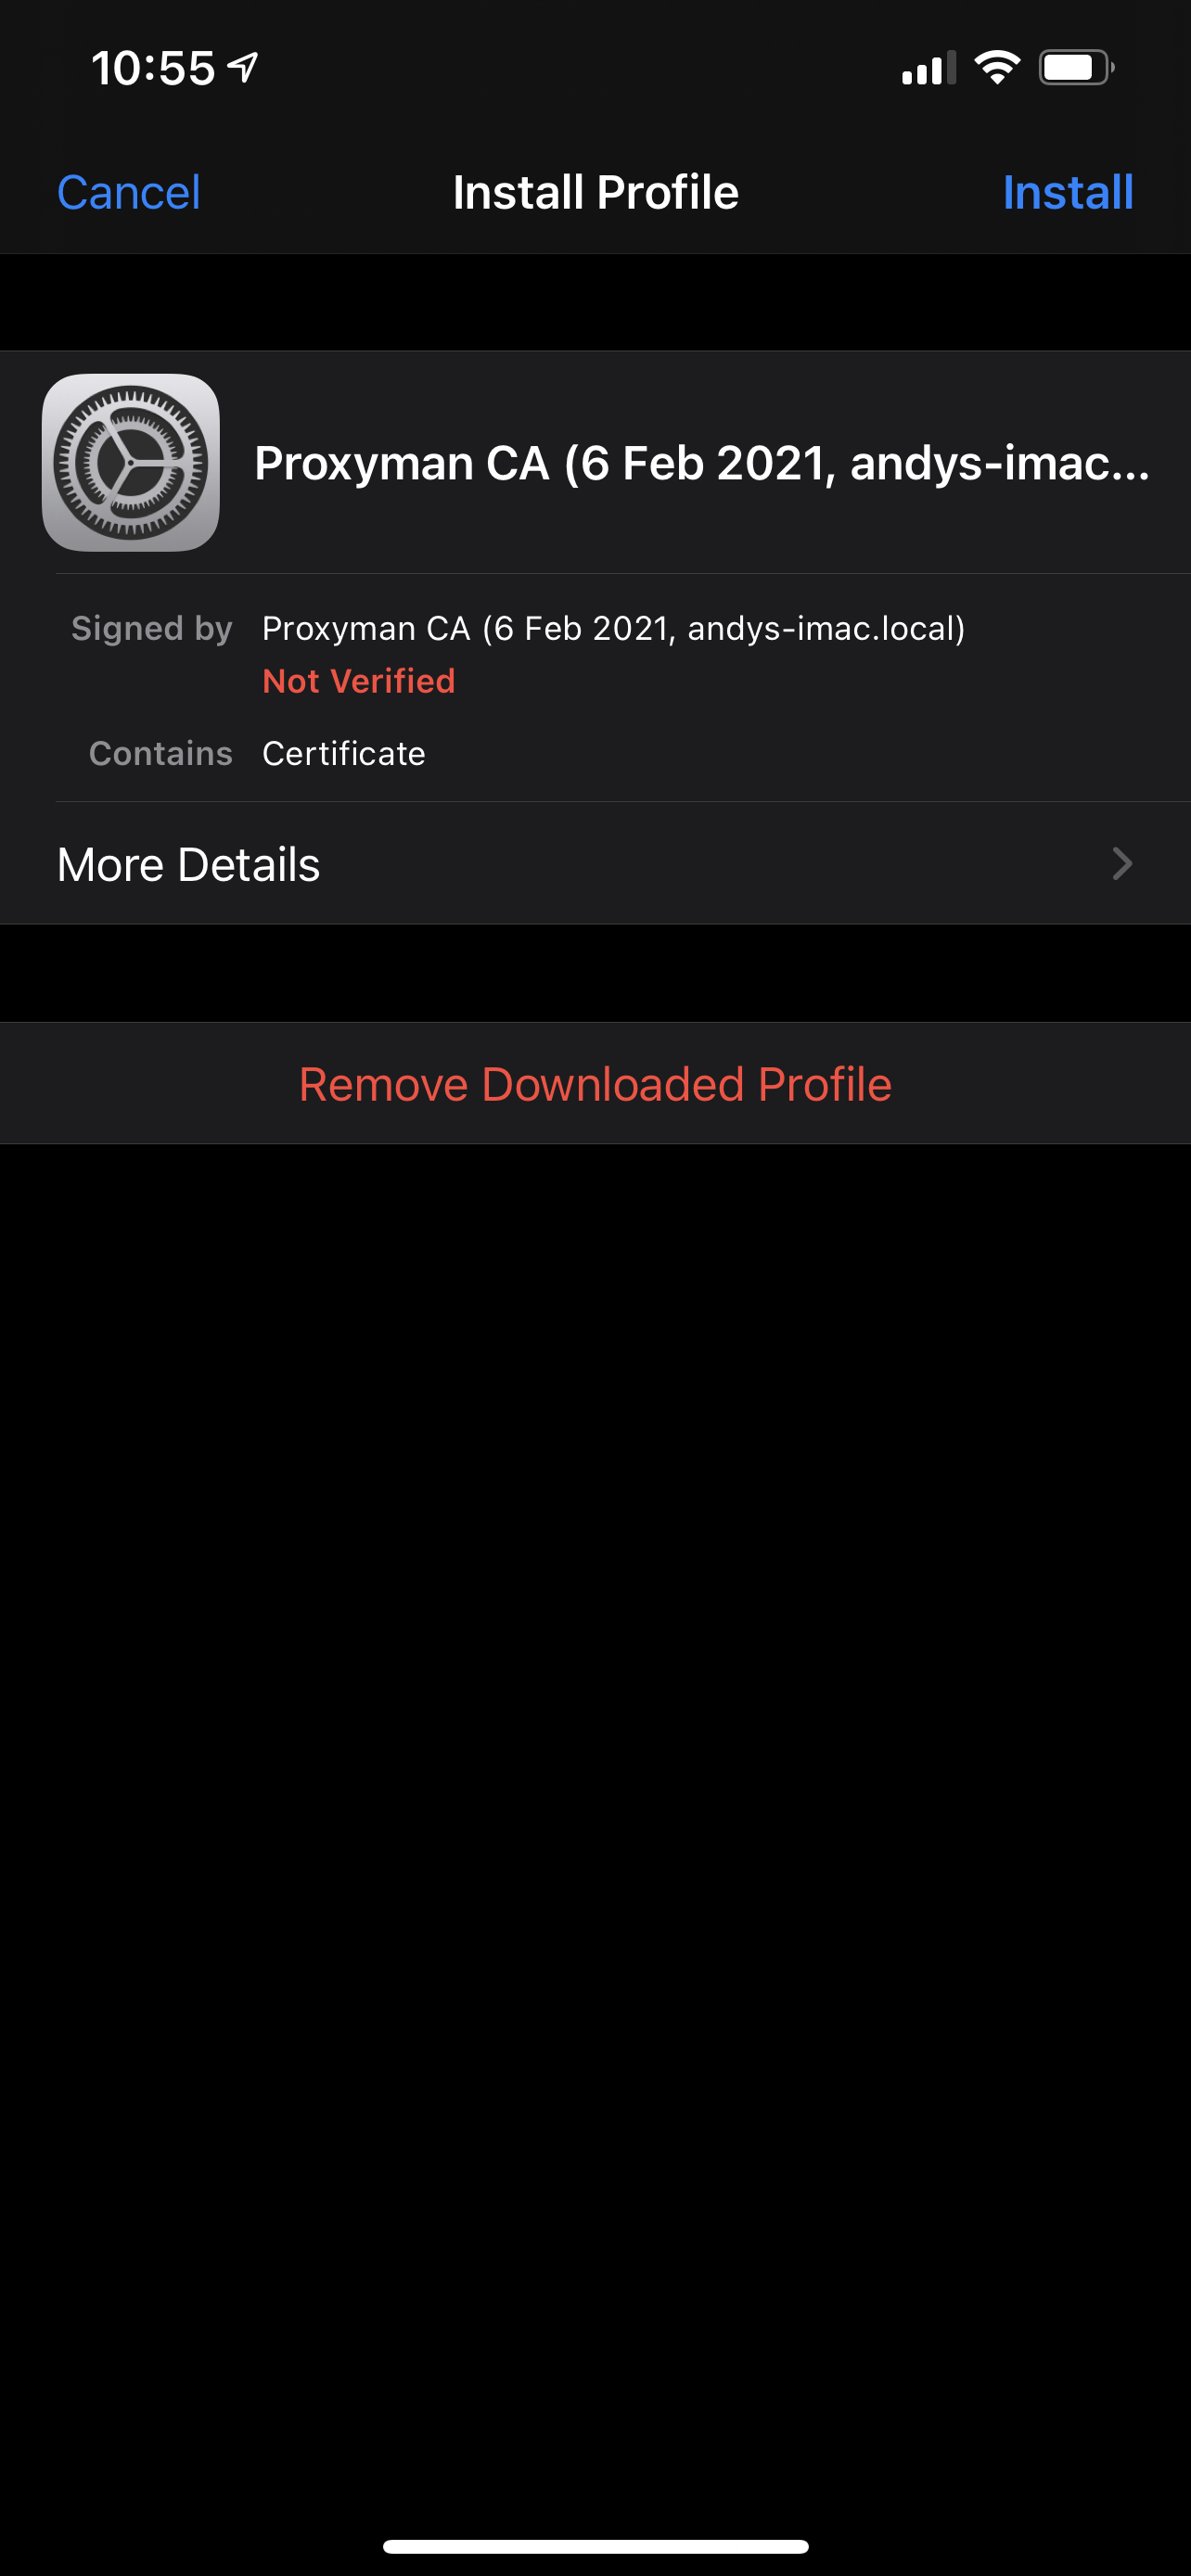
Once that’s done, visit http://proxy.man/ssl from Safari on your phone. You will be prompted to install a certificate.

Then, go to Settings > General > Profile on your phone, and select the Proxyman profile.
Finally, go to Settings > General > About > Certificate Trust Settings, and enable the switch for the Proxyman certificate.
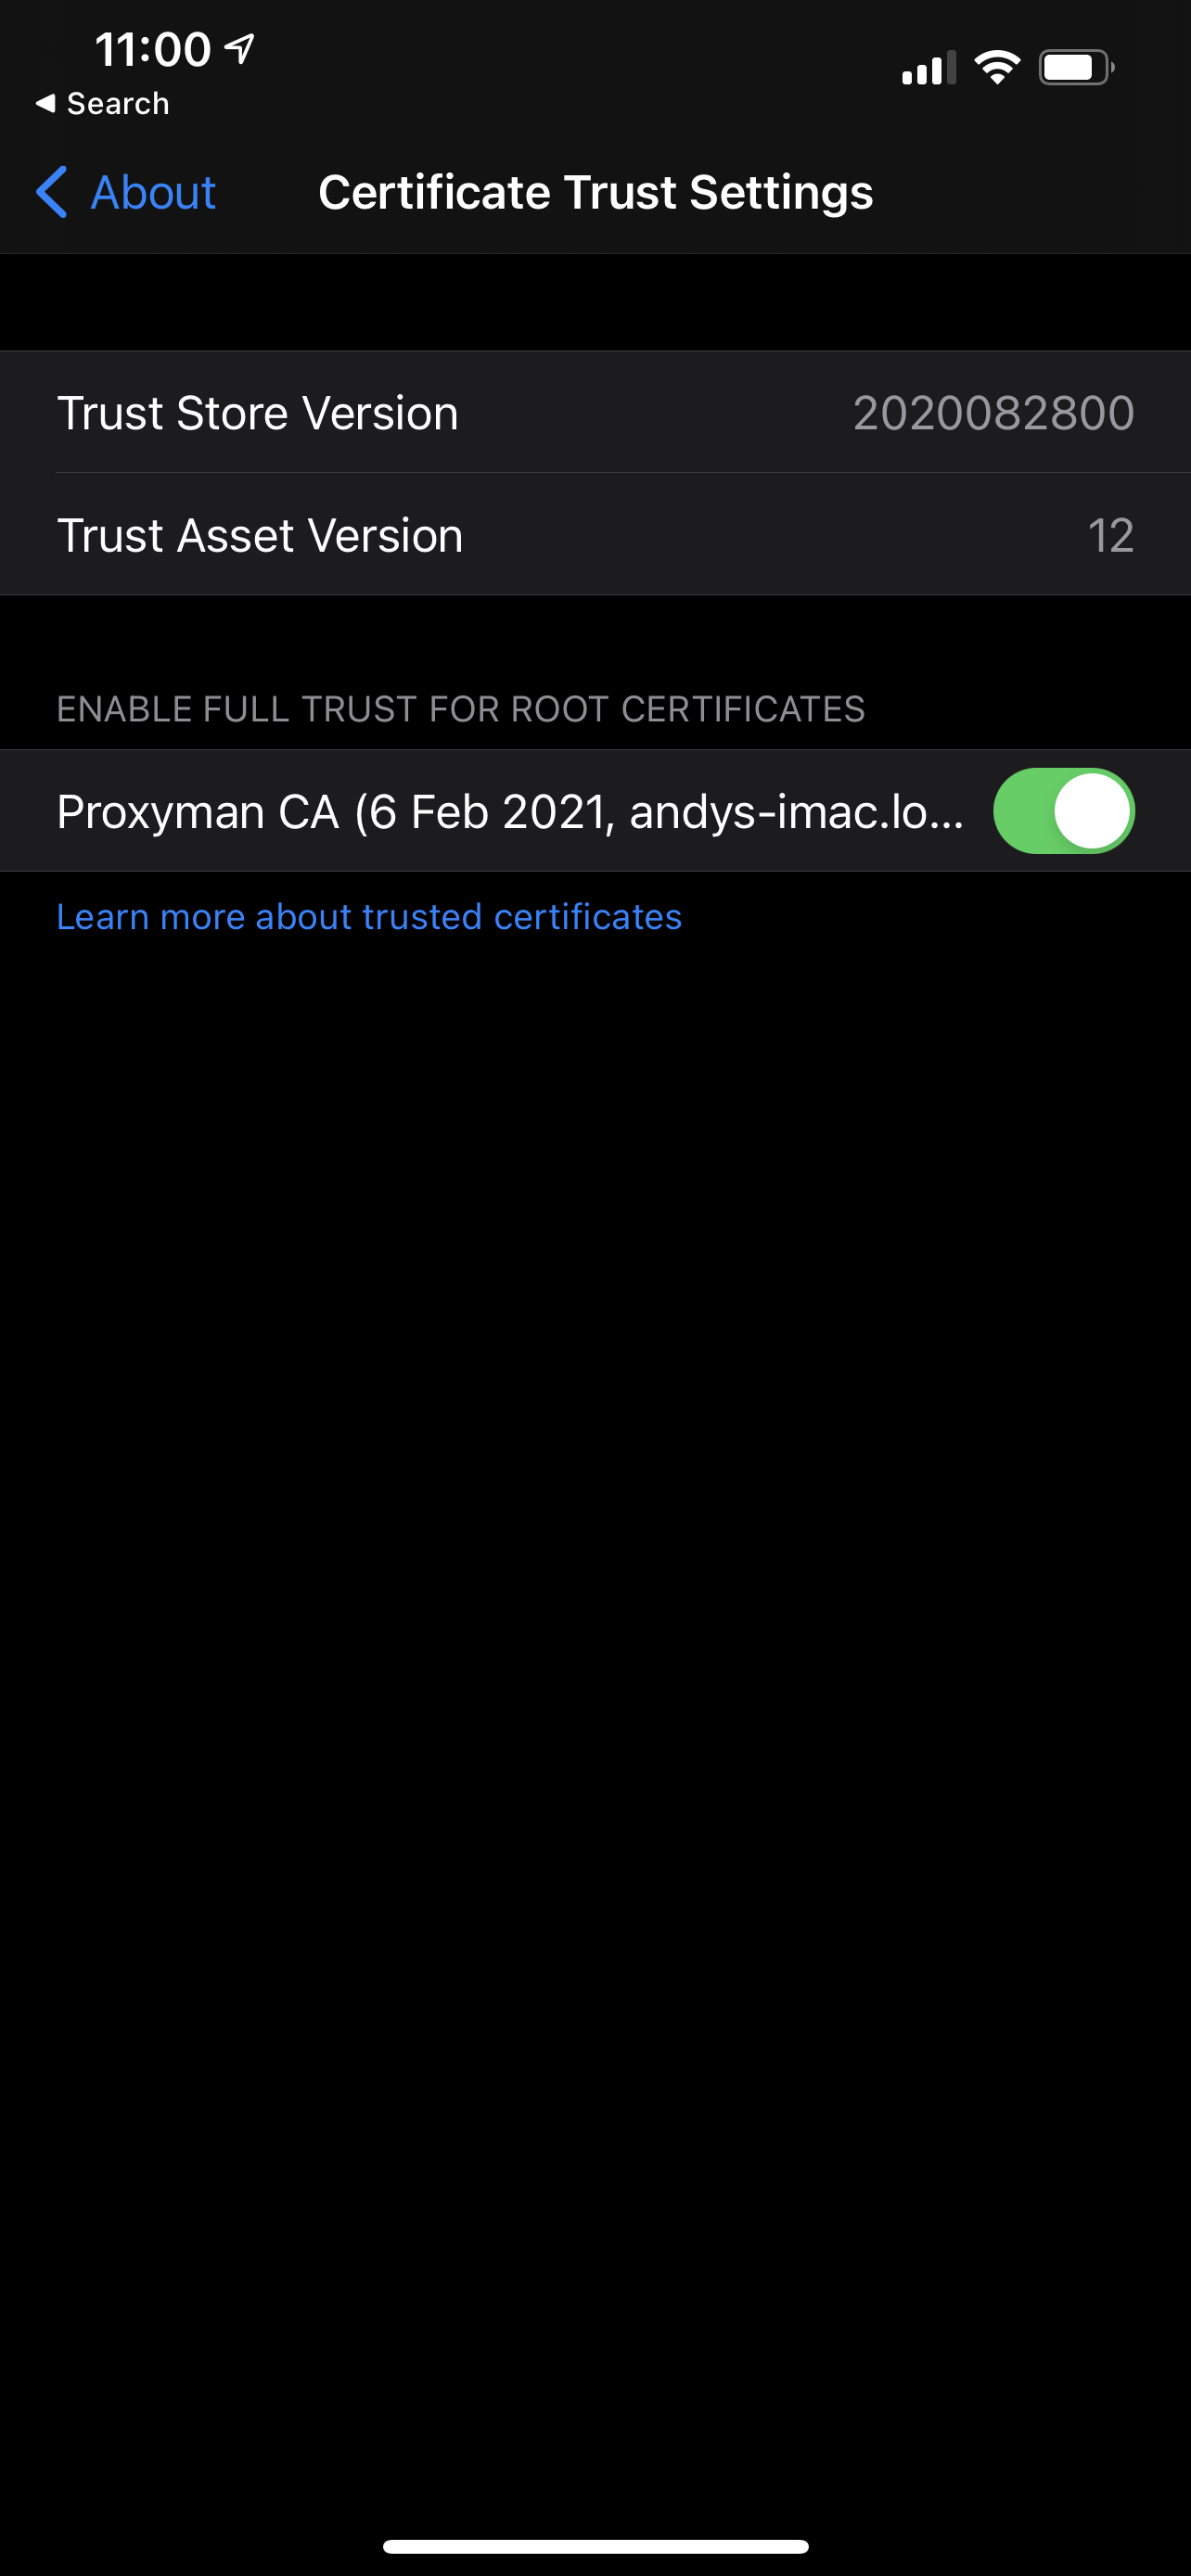
You will now be able to debug your network requests from your physical device.
Final Word
Don’t forget to disable the certificates on both your Mac and iOS when you are done with them. An attacker could in theory be running Proxyman and be able to capture your requests when connected to public WiFi. Also remember you cannot observe traffic on apps with SSL pinning.
Conclusion
Proxyman is a wonderful debugging tool. I find it easier than mitmproxy, and even friendlier than Charles. If you can afford it, I strongly recommend Proxyman, as it makes network debugging a breeze.