
In the article from last week, we explored the basic background execution APIs introduced since iOS 7. We explored how we could request additional time for a task to complete after entering the background, how we could defer downloads with URLSession, and how we could use silent push notifications to trigger background tasks.
The story with background tasks does not end there. iOS 13 introduced more APIs to do better background tasks, and that allow you to do things that weren’t possible before. Apple gave us the new shiny BackgroundTasks framework on WWDC2019. This framework gives developers more flexibility and less constraints to execute code while their apps are in the background. Not only that, but the old Background App Refresh APIs have now been deprecated in favor of a new, modern way to perform them for your app. This changes unifies with the new Background Processing tasks which lets you do more work in the background, while a device is charging, and more.
In this article, we will explore the following APIs, all part of the new BackgroundTasks framework:
- The new BackgroundTasks Framework.
- Background App Refresh Tasks.
- Processing tasks.
For point 2, we will write a quick example app to show how to adopt BackgroundTasks in your app. If you don’t feel like writing such app, it will be included as a download near the end of the article. We won’t write an example for processing tasks because the idea is exactly the same, but we will mention some extra properties that task has that can help you create better background tasks.
This article is based on the Advances in Background Execution WWDC 2019 talk and in the documentation, but I have taken the liberty to add my own code examples and I have removed content that is not not relevant for the majority of developers (VoIP pushes, etc).
Introducing BackgroundTasks
BackgroundTasks is a new framework for scheduling background work. Along with it, we get a new background mode for our apps. And to top if off, the framework is available on most of Apple’s platforms except for watchOS: iOS, iPadOS, tvOS, and on Catalyst apps on the Mac.
The app is available for Catalyst apps, but neither the WWDC session or the documentation mention it for macOS apps (AppKit).
The new background mode is called Background Processing Tasks. And starting on iOS 13, the existing Background App Refresh Task has been refined and received some new improvements.
The New Background Mode
This API is pretty neat, because it can give your app several minutes of runtime, although the constraint of doing so at system-friendly times is still there. This is what allows you to perform deferrable maintenance work, including machine learning tasks such as on-device Core ML training. It also allows you to turn off CPU Monitor for intensive work. This is very interesting, because we can use the full power of the device for as long as it is plugged in. Your app is eligible to run these tasks in the foreground or if your app has been recently used.
Improvements to Background App Refresh Task
If you used the old background app refresh APIs, be aware that there’s new API, but the same policies still apply. You get 30 seconds of runtime, and you can keep your app up-to-date throughout the day.
The WWDC session does mention you get 30 seconds of runtime, but as I discussed in the previous article on Background Execution, don’t rely on this number. You can get the real time left from the app delegate.
The eligibility depends on how your user uses your app, so the system will intelligently decide when to execute these tasks. The system will learn the pattern of your users and adapt to it in order to perform them. If your app is used frequently, your tasks will be performed frequently. On the other hand, if your users don’t use your app enough, you get less execution time.
This new API replaces the old one, so the fetch APIs of UIApplication for background app refresh are deprecated and are not supported on the Mac.
The documentation says that the old APIs are not supported “on the Mac”, but it’s established that these APIs do not work on the Mac to begin with, so I’m assuming it’s saying that the deprecated APIs are not available for Catalyst apps.
Using BackgroundTasks
Overview of the BackgroundTasks Framework
The main API for using this framework is the BGTaskScheduler . This API constantly monitors the system state such as battery level, background usage, and more, so it chooses the optimal time to run your tasks.
To use this API, you begin working when your app is on the foreground. You need to create Background task requests. The framework provides an abstract class, BGTask, you never use this task directly. Instead, the framework provides two concrete subclasses you can interact with: BGProcessingTask, for long running and maintenance tasks such backup and cleanup, and BGAppRefreshTask to keep your app up-to-date throughout the day.
You don’t create instances of these classes directly. Instead, you create BGAppRefreshTaskRequests and BGProcessingTaskRequests and submit them to BGTaskScheduler. When the scheduler wakes up your app to pass the tasks, you will get their BGAppRefreshTask and BGProcessingTask counterparts.
You can submit multiple tasks to the scheduler and you can submit both BGAppRefreshTask and BGProcessingTask at the same time. Interestingly enough, it’s also possible to submit tasks from an extension. This is useful if, for example, you have a keyboard extension that uses machine learning to learn your users’ typing patterns.
The tasks will not start automatically. When BGTaskScheduler sees that the system meets all the conditions required for a specific task, it will wake up your app in the background, and it will handle it the task from the scheduler. If we get a BGAppRefreshTask, we can fetch content, process it, and update our UI. If we get a BGProcessingTask, we can do some cleanup, backups, or other similar tasks. When the task is finished, we need to mark it as completed, so we can allow the app to suspend.
Depending on how tasks are configured, and on the system conditions, the system may wake your app and pass it more than one task at the time. The system allocates a finite amount of time to execute these tasks. And it’s important to note that the allotted time is per launch, not per task, so you should handle all the tasks concurrently at the same time.
Tasks scheduled by extensions will be handed to the main app. Extensions themselves never handle background tasks, so design your app’s data model in a way that the extension data is shared, and not contained within the exension itself.
Adopting BackgroundTasks in Your Apps
From here on out we will play with the new APIs using a sample project. I generally avoid writing full projects for my articles, but I thought it was necessary to do it this time, as it’s the only way to see BackgroundTasks in action. So go ahead and create a new Simple View App project on Xcode.
Initial Setup
Before you can use this new framework, you have a tiny-wee bit of setup work to do.
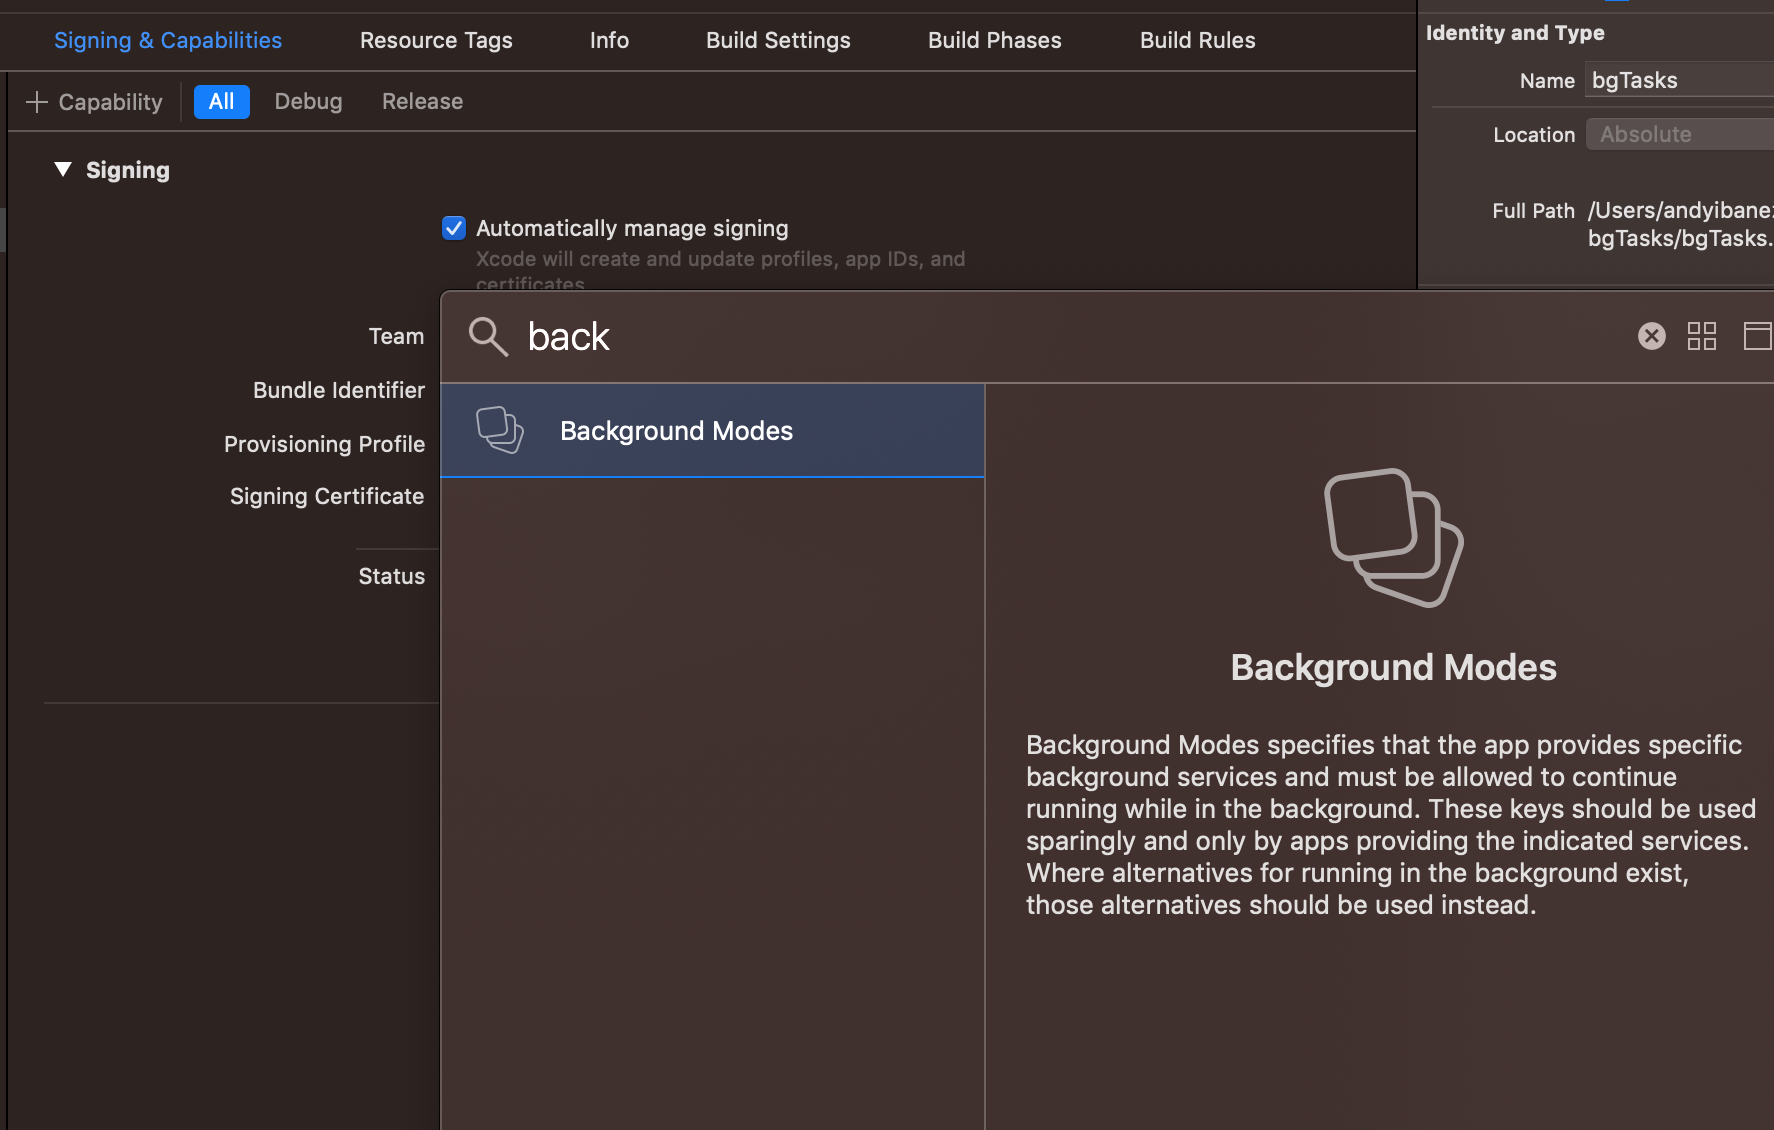
First, you need to edit the Signing & Capabilities of your target and you need to add a new Capability for background tasks. Tap the “+” sign and search for “Background Modes”
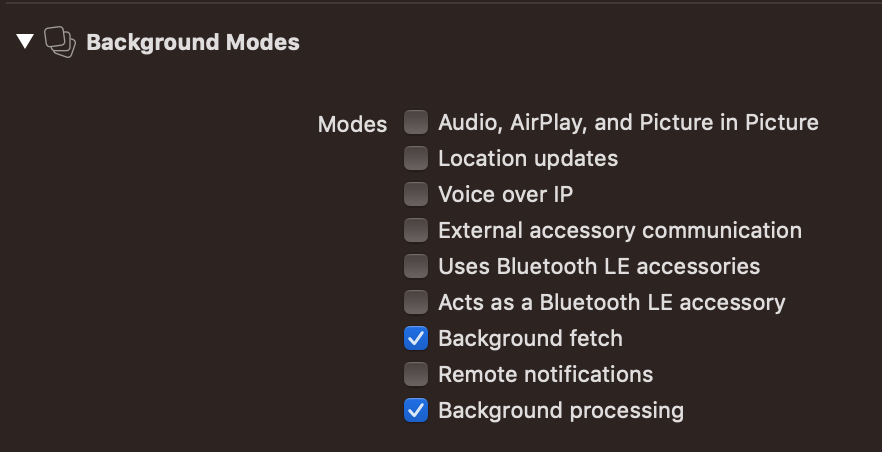
This will add a new section in your app, and you need to tick the ones you are interested in using. For BGAppRefreshTask, enable “background fetch”, and for BGProcessingTask you need “background processing”. As you may have guessed, you don’t need to use both in an app, and you can pick and choose what you need.
We are not quite done yet. Now you need to edit your app’s Info.plist and add the Permitted background task scheduler identifiers (BGTaskSchedulerPermittedIdentifiers) key and add the identifiers of the tasks you want your app to perform:

It’s recommended you use reverse DNS Notation, as third party dependencies may add their own identifiers.
We now have all the necessary setup to start playing with this new framework.
Implementing BackgroundTasks - BGAppRefreshTask
The examples here uses the PokéAPI service. PokéAPI is a free web service that provides information on Pokémon. It can be used by both casual Pokémon fans or hardcore gamers.
The app will simply display a Pokémon name and its sprite. When we background the app, we will use BGAppRefreshTask to retrieve a new Pokémon with a random ID.
I will only show you how to use BGAppRefreshTask, but rest assured that what applies to this task type, also applies to BGProcessingTask.
As much as a weeb as I am, I promise I’m not a Pokémon fan. I chose this API because it’s easy to use and doesn’t require any setup.
(I promise)
I will show you my code here, so you can build along if you wish. If you don’t feel like doing that, I will also provide a download to the finish project near the end of this article.
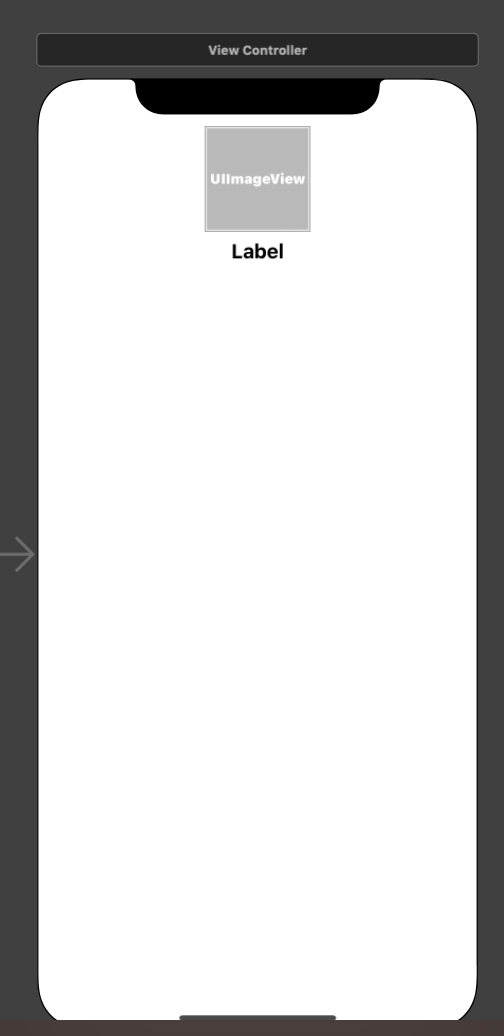
First, create a new blank project, and create a view-controller similar to this:
Now we are going to implement a quick manager to get info on a specific Pokémon with its ID. We will also add a function to download images, for the Pokémon Sprites.
Pokémon.swift
struct Pokemon: Codable {
  struct Species: Codable {
    let name: String
  }

  struct Sprites: Codable {
    let backDefault: URL?
    let backShiny: URL?
    let frontDefault: URL?
    let frontShiny: URL?

    enum CodingKeys: String, CodingKey {
      case backDefault = "back_default"
      case backShiny = "back_shiny"
      case frontDefault = "front_default"
      case frontShiny = "front_shiny"
    }
  }

  let species: Species
  let sprites: Sprites
}
PokeManager.swift
class PokeManager {
  static let urlSession = URLSession(configuration: .default)

  static func pokemon(id: Int,
                      completionHandler: @escaping (_ pokemon: Pokemon) -> Void) {
    let pokeUrl = buildPokemonURL(id: id)
    let task = urlSession.dataTask(with: pokeUrl) { (data, _, _) in
      let pokemon = try! JSONDecoder().decode(Pokemon.self, from: data!)
      DispatchQueue.main.async {
        completionHandler(pokemon)
      }
    }

    task.resume()

  }

  static func downloadImage(url: URL, completionHandler: @escaping (_ image: UIImage) -> Void) {
    let task = urlSession.dataTask(with: url) { data, _, _ in
      let image = UIImage(data: data!)!
      DispatchQueue.main.async {
        completionHandler(image)
      }
    }

    task.resume()
  }

  private static func buildPokemonURL(id: Int) -> URL {
    var urlComponents = URLComponents()
    urlComponents.scheme = "https"
    urlComponents.host = "pokeapi.co"
    urlComponents.path = "/api/v2/pokemon/\(id)"
    return urlComponents.url!
  }
}
Now on the view controller for the view you created above, implement fetchPokemon(id: Int) , and call it on viewDidLoad.
override func viewDidLoad() {
	super.viewDidLoad()
	fetchPokemon(id: 1)
}

//...

func fetchPokemon(id: Int) {
	PokeManager.pokemon(id: id) { (pokemon) in
	  self.name.text = pokemon.species.name
	  PokeManager.downloadImage(url: pokemon.sprites.backDefault!) { (image) in
	    self.image.image = image
	  }
	}
}
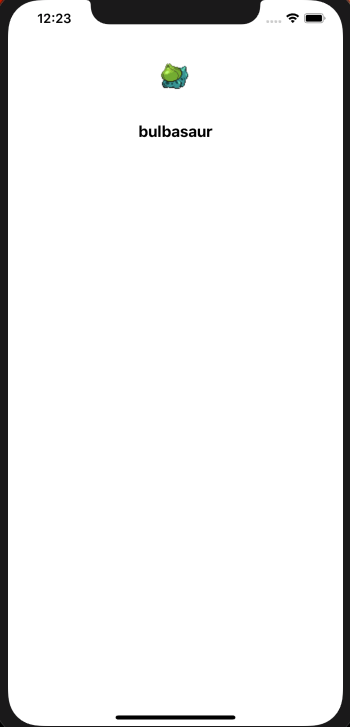
Build and run the project, and you will see a nice Bulbasaur:
We can now implement the scheduler. When the app is backgrounded, we will grab a random Pokémon ID (between 1 and 151 - because I’m old and I don’t remember many Pokémon after the first generation), download it, and display it.
That’s it for the view controller for now. We need to edit other parts of the app now.
In your AppDelegate, import BackgroundTasks.
import BackgroundTasks
What we need to do now is to register our app to receive BGTasks when the system hands them to the app. You need to call this method once for each identifier specified in BGTaskSchedulerPermittedIdentifiers in your Info.plist. You can do this in appliation(didFinishLaunchingWithOptions:).
    BGTaskScheduler.shared.register(forTaskWithIdentifier: "com.andyibanez.fetchPokemon",
                                    using: nil) { (task) in
      // ...
    }
The first parameter takes the task identifier. The second takes a DispatchQueue?, which you can use to synchronize your task with other threads. If you pass in nil, the system will create a concurrent queue for you.
I will create a new method in the AppDelegate, and the handler from register will call it to start doing a background work:
func handleAppRefreshTask(task: BGAppRefreshTask) {

}
BGTaskScheduler.shared.register(
  forTaskWithIdentifier: "com.andyibanez.fetchPokemon",
  using: nil) { (task) in
    self.handleAppRefreshTask(task: task as! BGAppRefreshTask)
}
The system will give us limited time to execute the task. The first thing we’ll do is to cancel all the operations happening in PokeManager when we reach our expiration time:
func handleAppRefreshTask(task: BGAppRefreshTask) {
	task.expirationHandler = {
	  PokeManager.urlSession.invalidateAndCancel()
	}
}
Later, we will also mark the task as completed. This way we are playing nice by the system’s rules, and we will be able to get most background time we request.
But first, we need to actually schedule a background task. We will schedule the task when the app enters the background.
In your app delegate:
func scheduleBackgroundPokemonFetch() {
	let pokemonFetchTask = BGAppRefreshTaskRequest(identifier: "com.andyibanez.fetchPokemon")
	pokemonFetchTask.earliestBeginDate = Date(timeIntervalSinceNow: 60)
	do {
	  try BGTaskScheduler.shared.submit(pokemonFetchTask)
	} catch {
	  print("Unable to submit task: \(error.localizedDescription)")
	}
}
If you schedule tasks when the app is being launched, you should call BGTaskScheduler.shared.submit on a background thread as it is a blocking API. This is not a concern when sending it to the background.
And then, in your SceneDelegate.swift:
func sceneDidEnterBackground(_ scene: UIScene) {
	(UIApplication.shared.delegate as! AppDelegate).scheduleBackgroundPokemonFetch()
}
In the WWDC talk, the presenter uses applicationDidEnterBackground in the app delegate instead of the Scene Delegate to schedule the background task. applicationDidEnterBackground is the old API for the old lifecycle of apps prior to iOS 13. In iOS 13, I wasn’t able to get my app to call that delegate method at all, so I figured I needed to use the scene delegate instead.
You might also be wondering why we have the task handling code in the App Delegate and not scene delegate. The reason is the methods in SceneDelegate can get called multiple times throughout the lifecycle of the app. This can only happen in iPadOS as it has multi-window support. We want to register the handler for our tasks only one time during the lifetime of our app. You can probably write all your BackgroundTasks code in the SceneDelegate if you have an iPhone-only app, but I can’t say I recommend doing that.
We can specify the earliestBeginDate property of the task. This will let us download the data as soon as possible. In the example above, we are scheduling the task 5 seconds after it is backgrounded. This does not guarantee that the task will start at the specified time, but rather that it won’t start any sooner than that. If you use the default nil, there will be no start delay.
You should not set this property too far into the future. The app may not be called at all if the user never goes back to your app. You should set this limit to one week or less. This recommendation is given in the WWDC talk for this topic.
We are almost done. Now we need to go back to handleAppRefreshTask and implementing the Pokémon downloading code:
func handleAppRefreshTask(task: BGAppRefreshTask) {
  task.expirationHandler = {
    task.setTaskCompleted(success: false)
    PokeManager.urlSession.invalidateAndCancel()
  }

  let randomPoke = (1...151).randomElement() ?? 1
  PokeManager.pokemon(id: randomPoke) { (pokemon) in
    NotificationCenter.default.post(name: .newPokemonFetched,
                                    object: self,
                                    userInfo: ["pokemon": pokemon])
    task.setTaskCompleted(success: true)
  }

  scheduleBackgroundPokemonFetch()
}
When you schedule a task, it will only be executed once. If you want to keep executing it throughout the day, you simply need to call scheduleBackgroundPokemonFetch again inside handleAppRefreshTask.
We are using NotificationCenter to notify the view controller that a new Pokémon has been retrieved and that the UI should be updated accordingly, so create a new Notification.Name for that too:
extension Notification.Name {
  static let newPokemonFetched = Notification.Name("com.andyibanez.newPokemonFetched")
}
Finally, in the view controller, register for this notification and update the UI when received:
func registerForNotifications() {
  NotificationCenter.default.addObserver(
    forName: .newPokemonFetched,
    object: nil,
    queue: nil) { (notification) in
      print("notification received")
      if let uInfo = notification.userInfo,
         let pokemon = uInfo["pokemon"] as? Pokemon {
        self.updateWithPokemon(pokemon)
      }
  }
}

func updateWithPokemon(_ pokemon: Pokemon) {
  name.text = pokemon.species.name
  PokeManager.downloadImage(url: pokemon.sprites.backDefault!) { (image) in
    self.image.image = image
  }
}
override func viewDidLoad() {
	super.viewDidLoad()
	registerForNotifications()
	fetchPokemon(id: 1)
}
And done! Now your app can refresh in the background and each time it does it will show a new Pokémon. Exciting!
Testing
Well, this is a bit of a problem, but if you try to run this now, you will come across two problems:
- This does not work on the simulator at all. You need to run the app on a real device.
- You have no control over when the task will run. As we said before,
earliestBeginDatewill not guarantee the app receives an event at that time. You may leave your phone connected to your computer for hours without receiving an event. So what to do?
Testing on the simulator is out of the question, but you can force events to happen via the debugger when running the app on a real device.
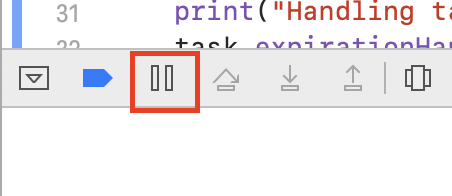
Build and run your app and then background it to schedule the task. Bring the app to the foreground again. Then in Xcode, hit the pause button in the debugger.
You can then copy and paste the following commands, replacing "TASK_IDENTIFIER" with your task identifier.
To simulate a receiving an event:
e -l objc -- (void)[[BGTaskScheduler sharedScheduler] _simulateLaunchForTaskWithIdentifier:@"TASK_IDENTIFIER"]
After you press enter, you will see a new Pokémon on the screen. Keep doing it to see more Pokémon. Let the nostalgia in.
And to force an early termination of a task:
e -l objc -- (void)[[BGTaskScheduler sharedScheduler] _simulateExpirationForTaskWithIdentifier:@"TASK_IDENTIFIER"]
These are documented here. Needless to say you shouldn’t try to call those private methods within your app itself.
Sample Project.
You can download the sample project for this app here.
BGProcessingTask
The usage of this task is exactly the same as the other one. But BGProcessingTaskRequests have two additional properties that make it good to use for maintenance and background tasks.
requiresNetworkConnectivity: If the task requires internet to work, you can set this property totrue.requiresExternalPower: If the task requires the device to be connected to power to work, you can set this property totrue.
Conclusion
BackgroundTasks is a new framework introduced in iOS 13 to offer developers more ways to execute background work. Background task offers two type of classes:
BGAppRefreshTask: To refresh your app in the background periodically and always have up to date content.BGProcessingTask: To perform possibly longer operations related to mainenance, backup, and cleanup of the app. We can set tasks of this type to execute when our devices are connected to power and/or have internet connection available.
The scheduler will decide the best time to wake up your app and hand them the tasks to execute. Be a good citizen and always let the system know when a task has finished running, either successfully or unsuccessfully.
Short Break Notice
Despite the fact that the article is ready, I will not be publishing anything on New Years (January 1, 2020). I’m taking a short break. For that reason, Jan 1st’s article is getting pushed to January 8. Thank you for your understanding!